


Wallboard

Wallboard feature of ROGER365.io allows portal admins or users with proper RBAC permission to create customized Wallboard. Published Wallboard(s) can be used on external monitors or TVs making monitoring of crucial data easier than ever.
Wallboard feature requires license (in order to publish it), Business and Enterprise subscriptions have 1 license included. Each published Wallboard can have 3 active sessions. Additional Wallboard licenses should be arranged with Sales department.
Wallboard page in ROGER365 admin portal allows to import exported earlier Wallboard configurations which enables opportunity of creating various templates.
To create a Wallboard press “+Add”:
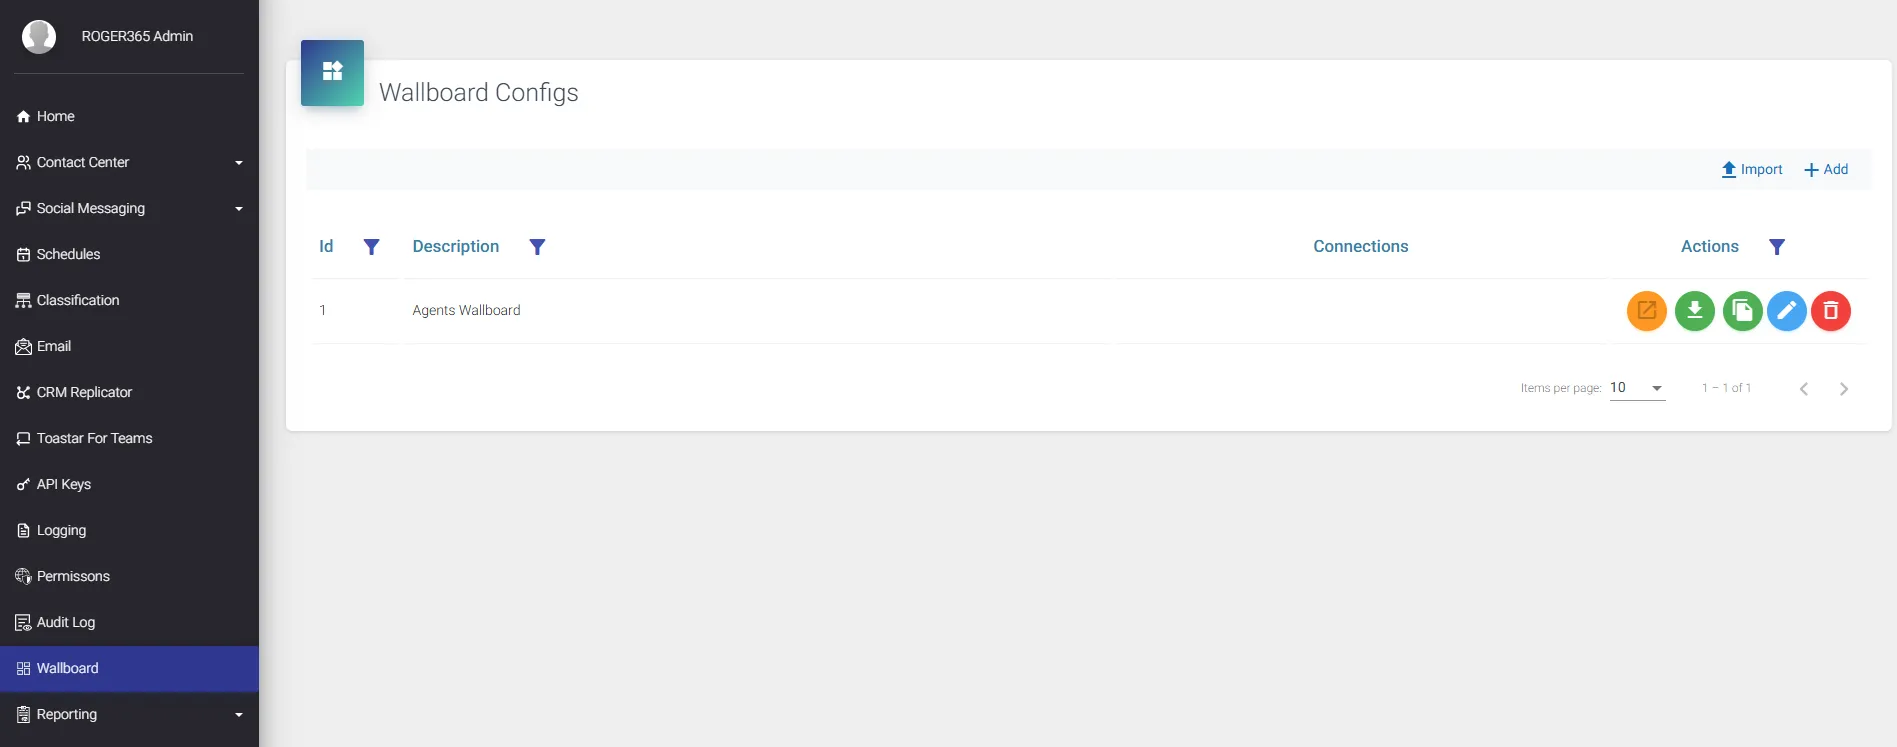
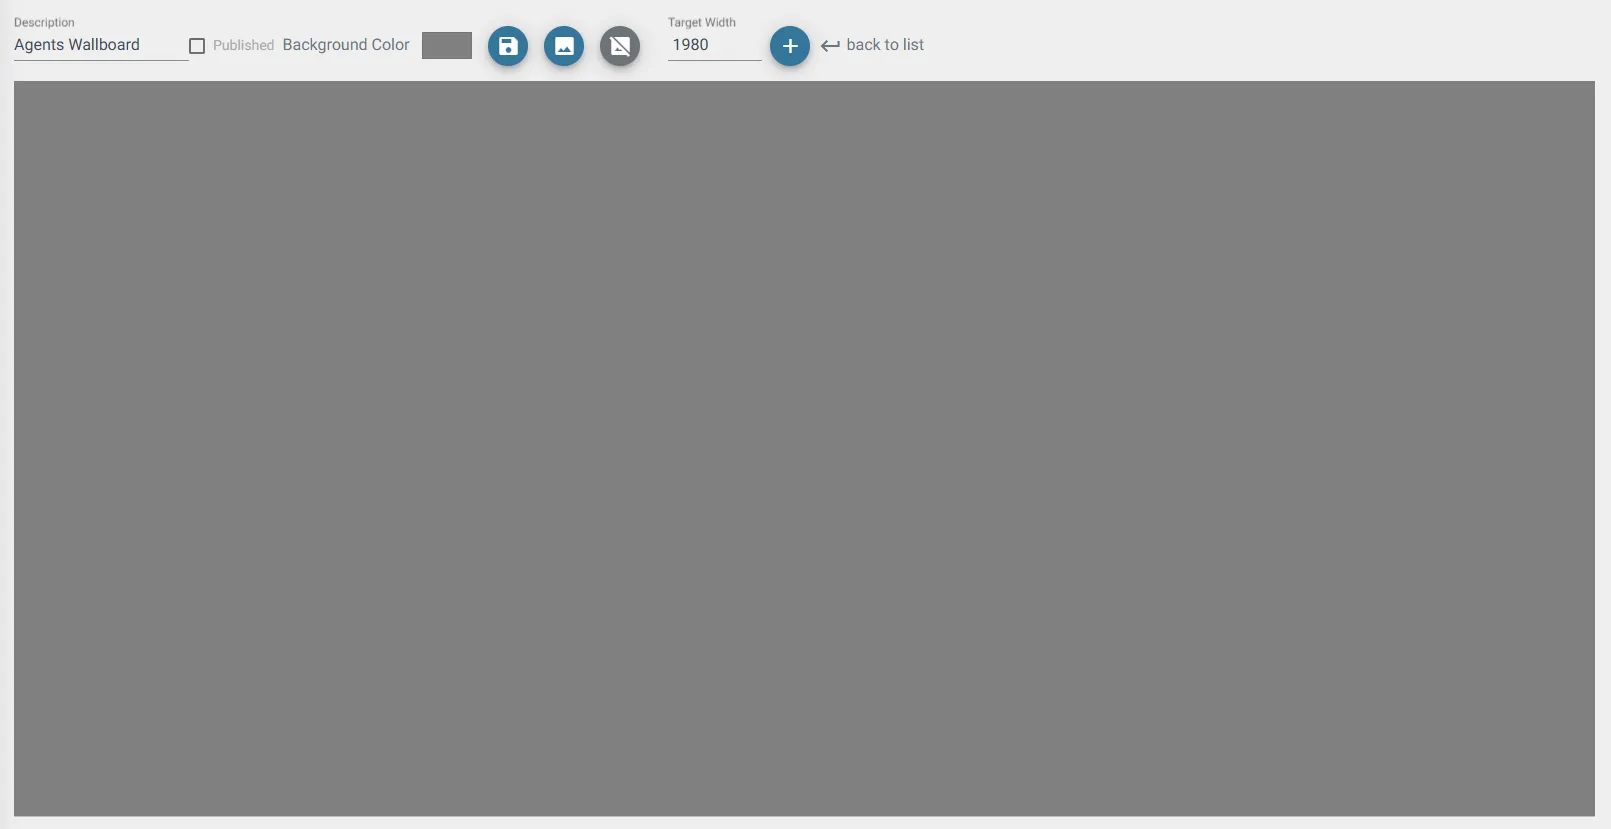
In this configuration window you can start creating your Wallboard which can be customized based on your demands.
Description of the top bar functions is as follows (starting from left to right):
- Name of the Wallboard.
- Checkbox “Published“: if selected, the Wallboard is published, allowing live data monitoring. This action consumes a license.
- “Set Background Color” allows to set background color of your Wallboard.
- “Set Background Image” button allows to upload background picture for your Wallboard.
- A good rule of thumb is to upload a background image with the specified dimensions of the target display.
- “Clear Background Image” button is used for removing uploaded earlier background image.
- “Target Width” property is used for designing Wallboard in specified display width.
- “Add new cell” button is used for adding new cell. Cell is responsible for setting up one of the available Wallboard widgets.
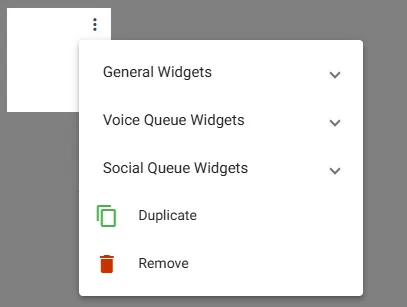
After adding new cell you can choose various widgets from 3 main groups – “General Widgets”, “Voice Queue Widgets” and “Social Queue Widgets”. In the same menu you can Remove specific cell, or Duplicate entire widget’s configuration if recreation takes too much time. These operations are available via ⋮ in the upper right corner of the cell.
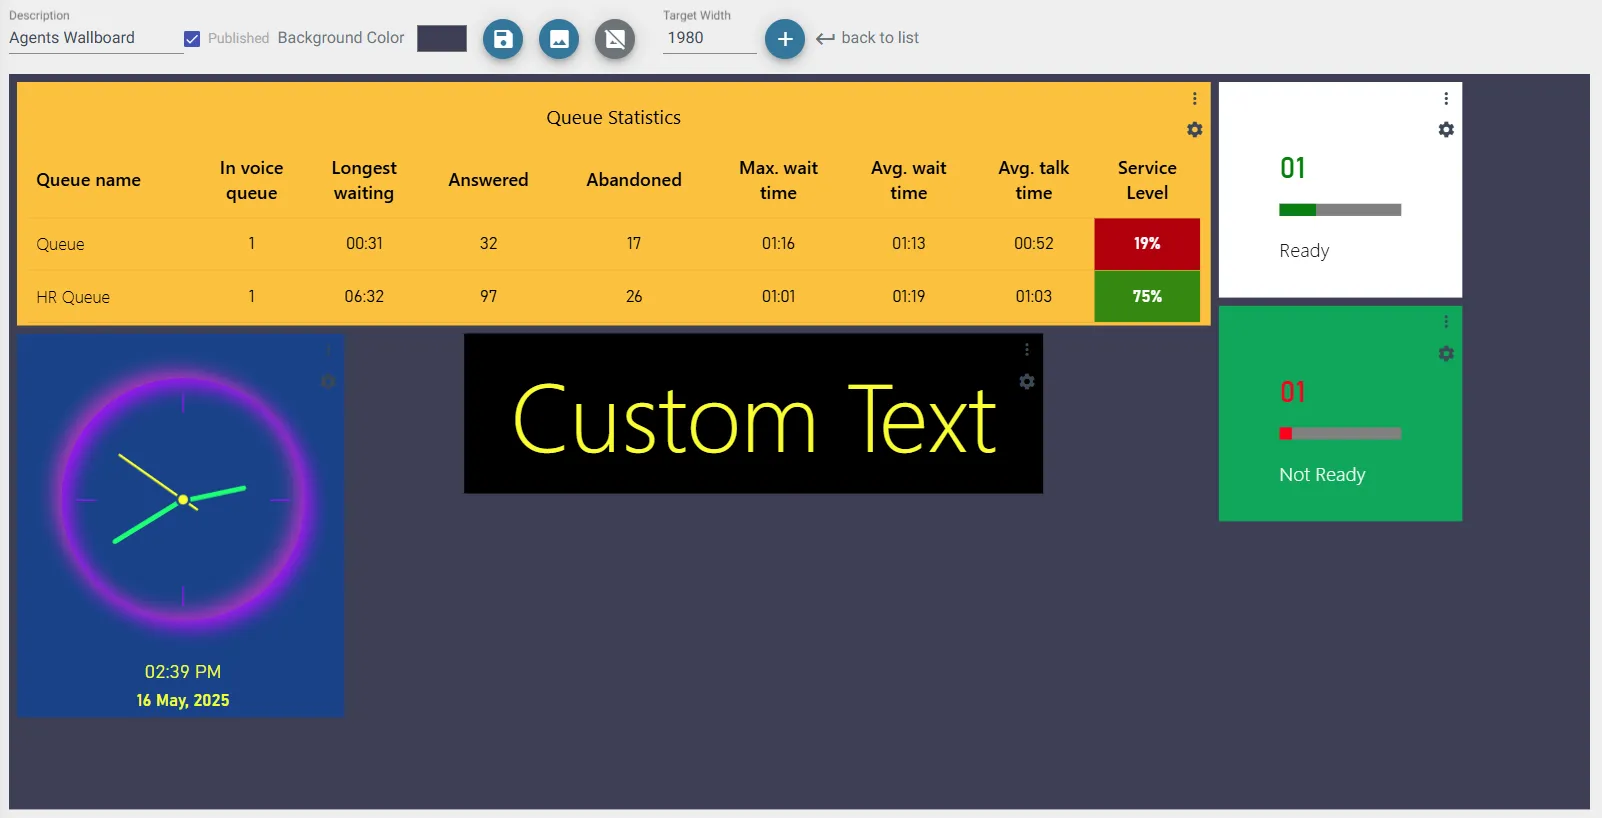
Cells in the configuration window will be showing sample data to make customization of cells easier.
To customize one of the Widgets, press ⛭ icon:
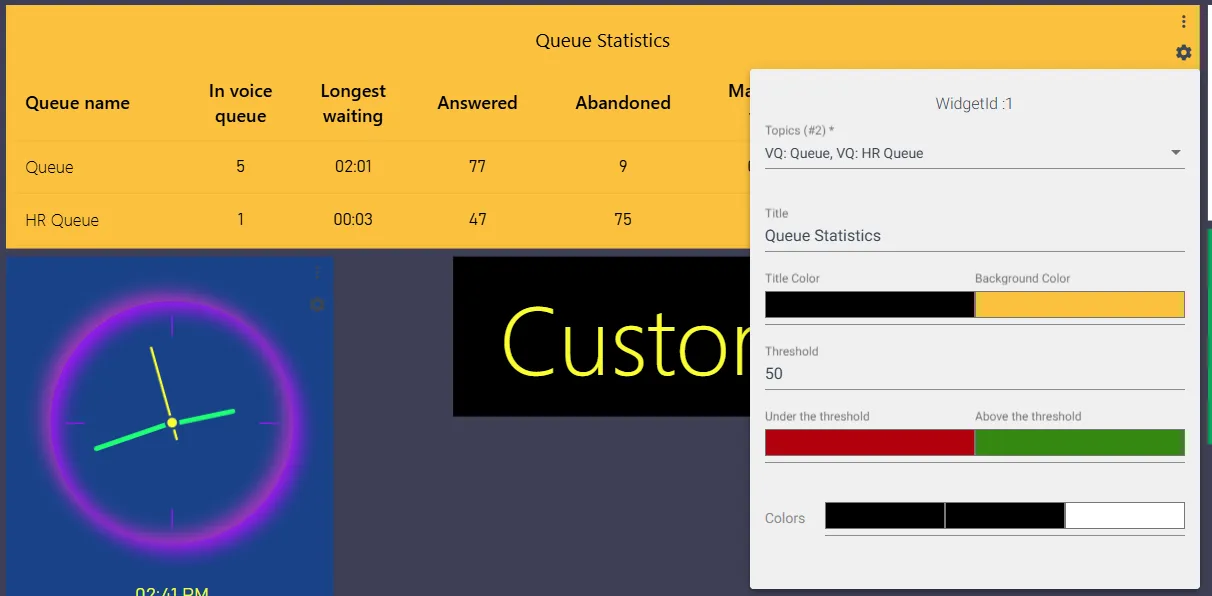
In this window you can change various aspect of this specific Widget. In the example based on “General statistics” Voice Queue widget, you can customize Topics (Voice Queues), the Widget Title, colors, and the Queue Service Level Threshold (as a percentage).
To move widgets, perform press & hold operation and move your mouse in desired direction, you will see a grid which helps with aligning widgets against others. To resize widgets (cells), hover your mouse over any widget edge until seeing ↔ or ↕ mouse icon, then press and hold left mouse button and move your mouse in whathever direction.
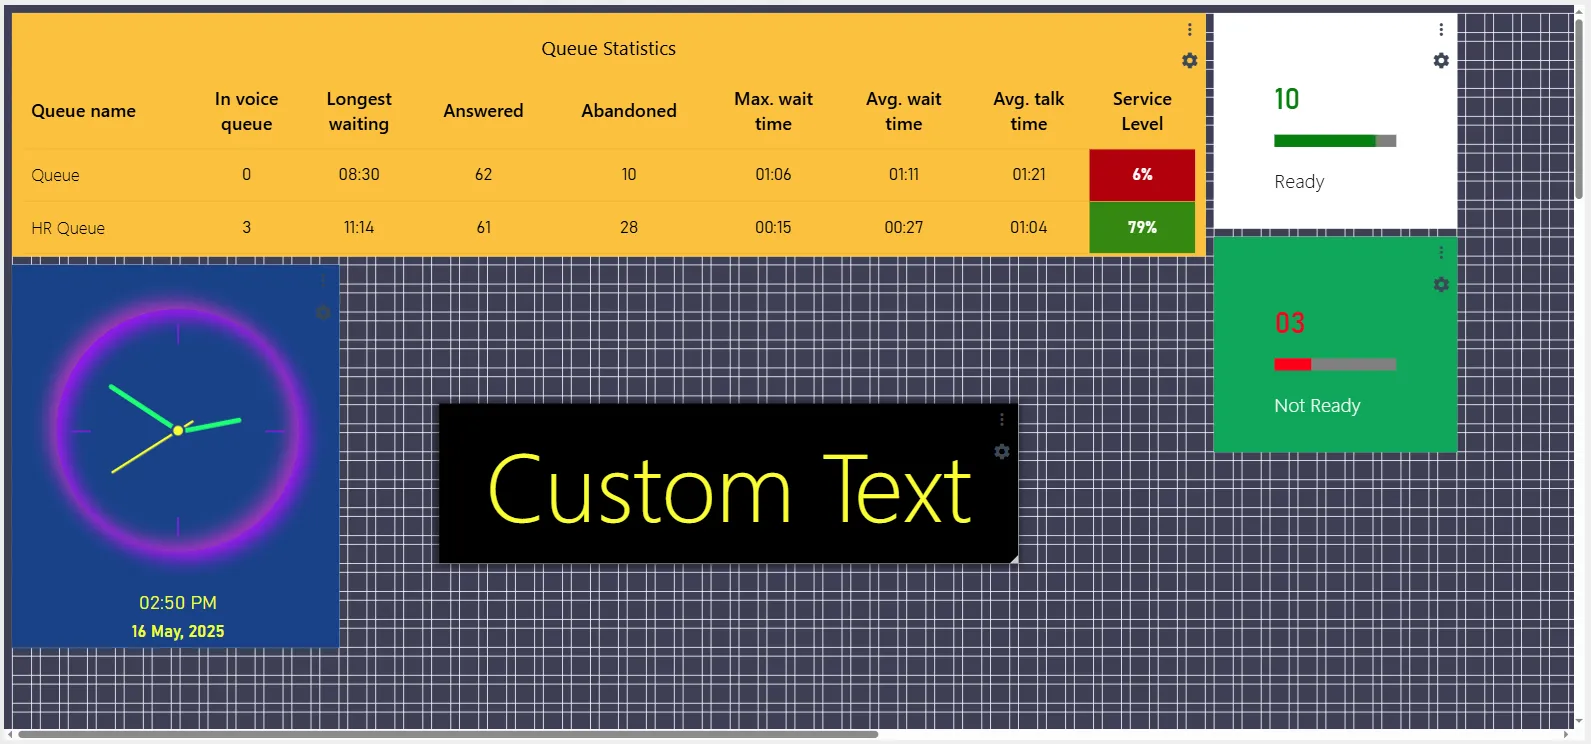
Once your Wallboard configuration is ready to be used at your external displays/TVs, mark Published checkbox and save Wallboard.
To open published Wallboard navigate to a main Wallboard admin page and press yellow icon “Go to published Wallboard”. You will be redirected to a URL of your Wallboard which can be used on devices with Internet access. Live version of the Wallboard will now await for actual data coming from ROGER365.io platform.
Accessing published Wallboard is done via admin portal so it requires authentication in the same way as for portal admins/RBAC users with permissions allowing to set up selected aspects of ROGER365 platform. This approach allows to create Wallboard-only user(s) within your Microsoft Entra ID environment. Wallboard user(s) should have at minimum “TeamsUser” role assigned at Enterprise Application “ROGER365.io” level, it is not possible to access the published Wallboard as a user without any role.
Role reference can be found at this documentation page – Setup Access & Security
Notes:
- Background Image is not saved in cloned/imported Wallboard configurations.