


Agents

Before agents can be added to the platform, the Tenant App Id must be configured. Instructions on how to configure the agent app can be found here.
To route calls to agents through voice queues, they must be added to the platform. You can access the ROGER365.io UnifAI agent app at app.roger365.io.
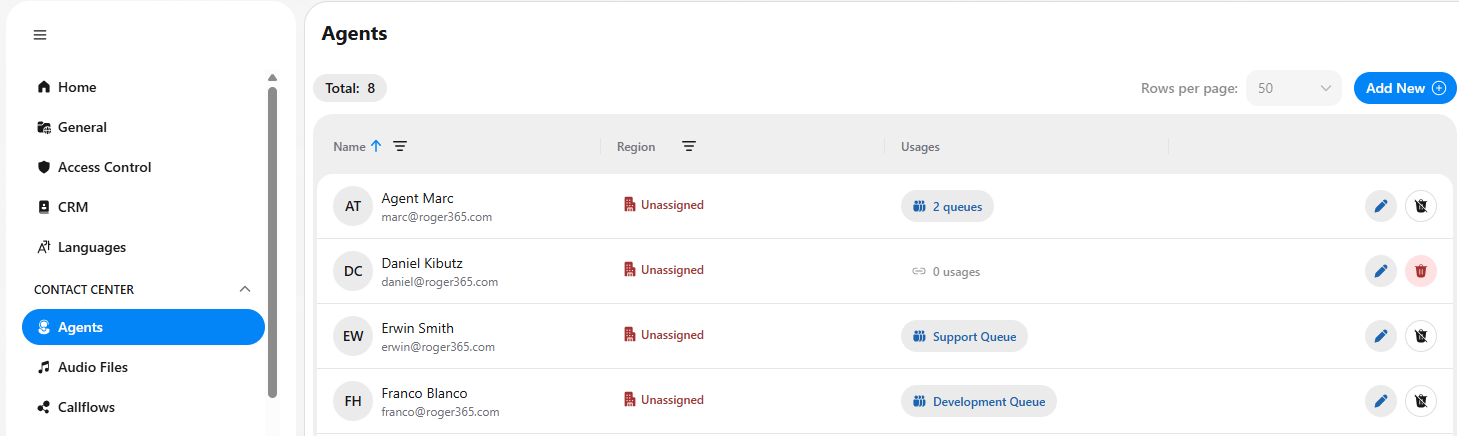
Click Add New to open the Add/Remove Agent screen, then sign into MS Graph to query Azure Entra ID for selecting agents.
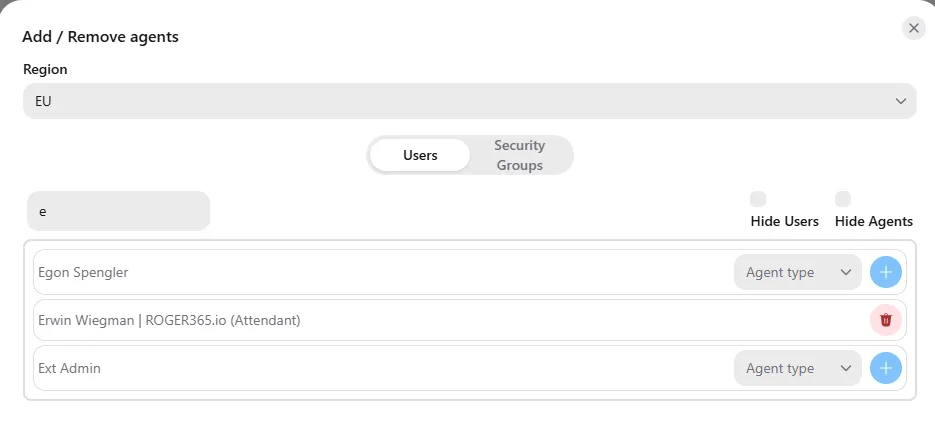
Adding/Removing an Agent
- Select the region. At the top of the screen, use the Region dropdown to choose the region where the agent is hosted. This must match the region defined at the resource account level, as agents only receive calls from the region they log in to.
- Choose how to search. Use the Users tab to search for individual users, or the Security Groups tab to search by group. You can also use the Hide Users and Hide Agents toggles to filter the list.
- Find the agent. Type a name in the Search by name field to locate the user you want to add.
- Assign an agent type. In the row for that user, click the Agent type dropdown and select a role. The available roles—such as Attendant, Voice, or Omnichannel—depend on the licenses you have purchased. Roles shown in gray are unavailable under your current licenses.
- Add the agent. Click the blue plus (+) button at the end of the row to add the agent to the platform. To remove an agent who has already been added, click the red trash icon that appears in their row.
Agent Settings
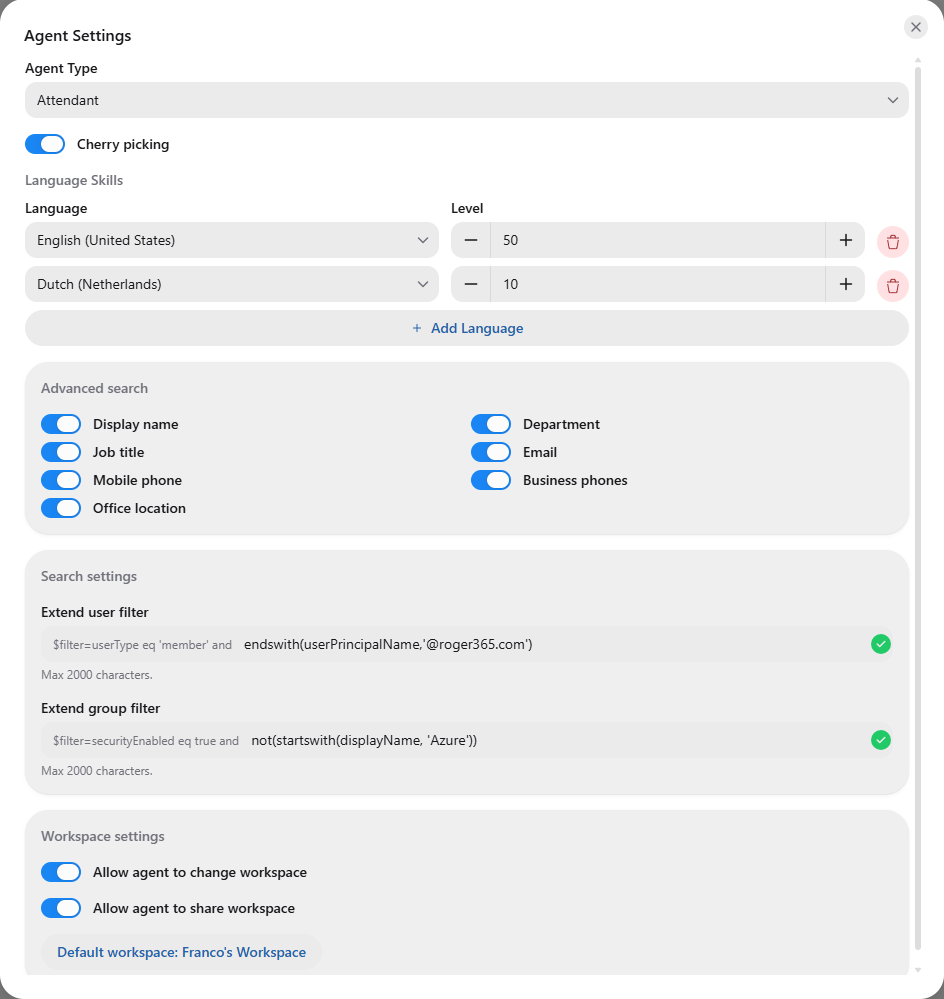
Agent Type
Determines which license type has been assigned to a specific agent (in this example, Attendant). The selected type controls which features and application views are available to the agent.
Cherry picking - Allows the agent to manually pick and answer a specific waiting call from the queue, regardless of the agent’s current status. This lets agents take priority calls out of order instead of waiting for automatic distribution.
Language Skills
Configures the language proficiency of a specific agent. Click '+ Add Language', select a language from the list, and enter a Level (use the + / − buttons or type a value). To remove a language, click the red trash icon next to it. The languages available for selection depend on the configuration of the Languages admin page.
Advanced Search
Allows you to enable or disable the additional search criteria available under the Advanced search button in the agent application. Each toggle controls whether that field is searchable:
- Display name
- Job title
- Mobile phone
- Office location
- Department
- Business phones
Search settings
Allows you to provide custom filters that narrow the users and groups returned in search results.
- Extend user filter – Custom filter applied to user searches
- Extend group filter – Custom filter applied to group searches
Each field accepts a maximum of 2000 characters. After a filter is entered, the agent configuration form validates it and indicates whether it is valid.
The Microsoft Graph API supports OData query operators such as eq (equals), ne (not equals), startswith, endswith, and, and or, enabling complex filtering. For details on supported operators and use cases, refer to the Microsoft Graph filter documentation.
Workspace settings
Controls the agent’s rights regarding workspaces:
- Allow agent to change workspace – Lets the agent customize their own workspace (rearrange, resize, move elements, create new tabs).
- Allow agent to share workspace – Lets the agent share their workspace to the platform.
- Default workspace – Sets the agent’s default workspace, which is also restored when the agent clicks Reset workspace.