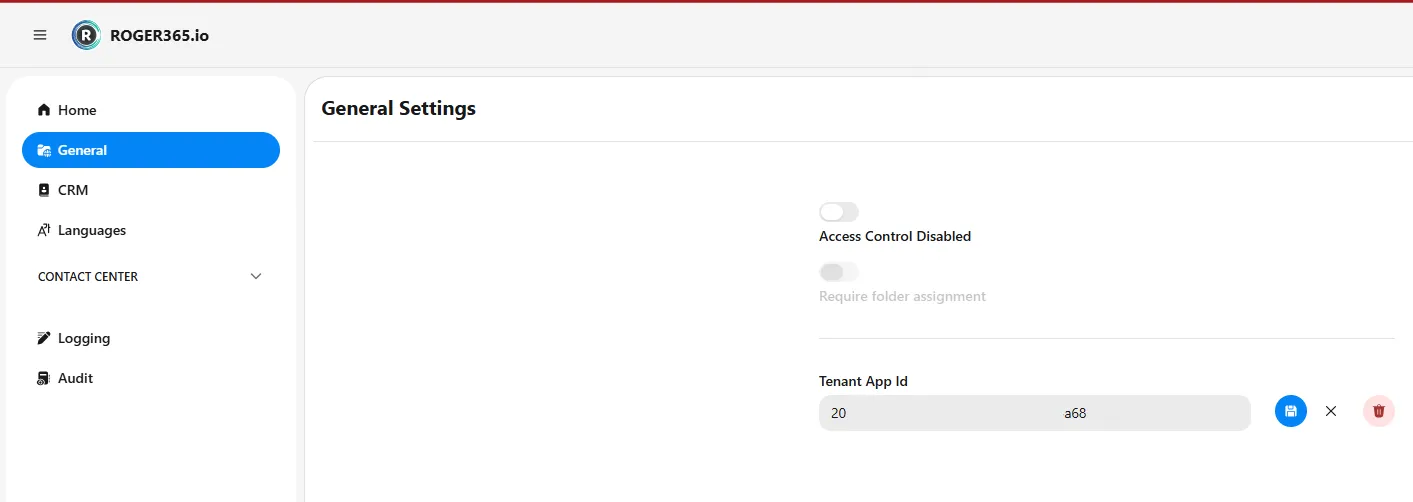
Create Tenant App

To configure the portal and use the agent app, an app registration must be created in the customer's tenant. We have provided a PowerShell script for this, or you can follow the manual creation steps.
Option 1: Automated PowerShell Script (preferred)
Execute this PowerShell script (as Global Admin): Download Script
When the script has executed successfully, you must manually grant admin consent. Follow the instructions in the script.
Option 2: Manual Creation
- Login to the Azure Portal via https://portal.azure.com
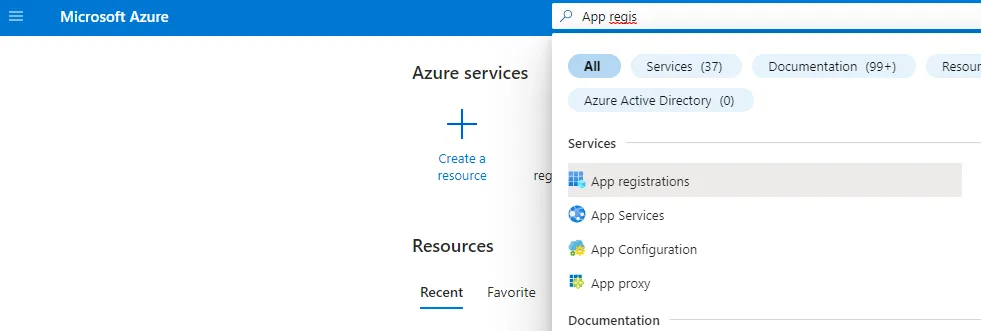
- In the search bar on top, search for ‘App Registration’. Then click the found result ‘App registrations’
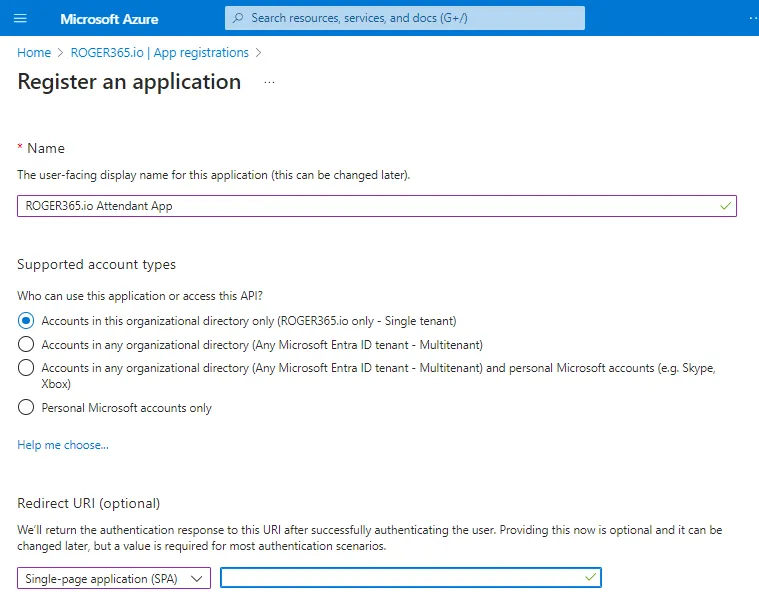
Enter a name
ROGER365.io UnifAI Attendant AppChoose
Accounts in this organizational directory only (ROGER365.io only – Single Tenant)Redirect URL - Choose Single-page application (SPA) and provide following URLs
https://app.roger365.io
https://app.roger365.io/acs/agent
https://app.roger365.io/acs/auth-end
https://portal.roger365.io
https://portal.roger365.io/acs/auth-end
-> Now click the “REGISTER” button
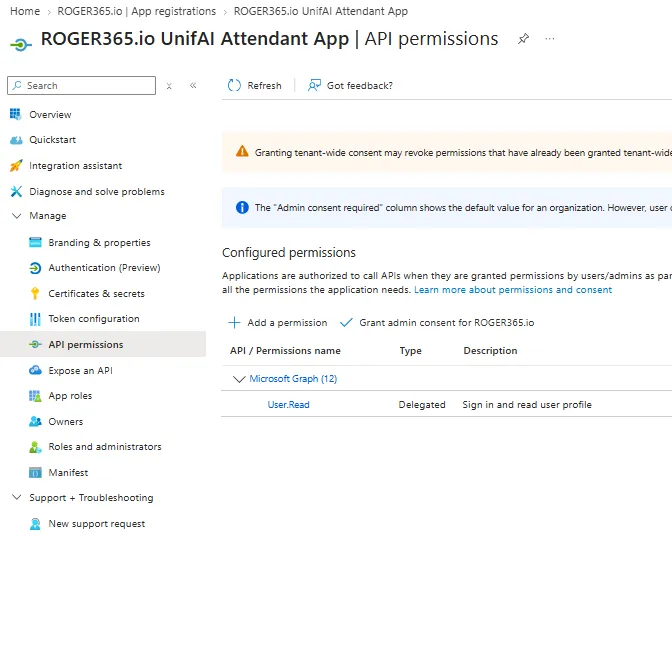
- Then click “+ Add a permission”
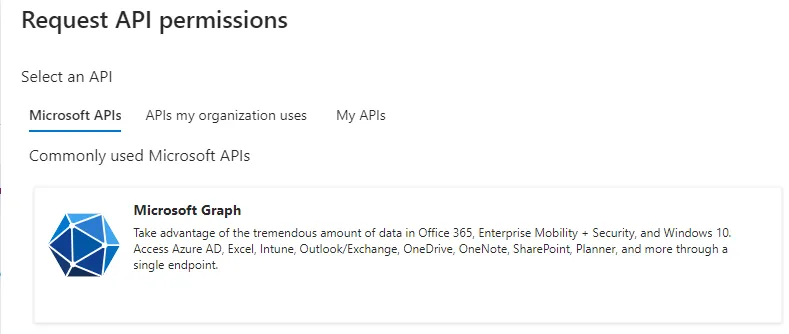
- Choose “Microsoft Graph”
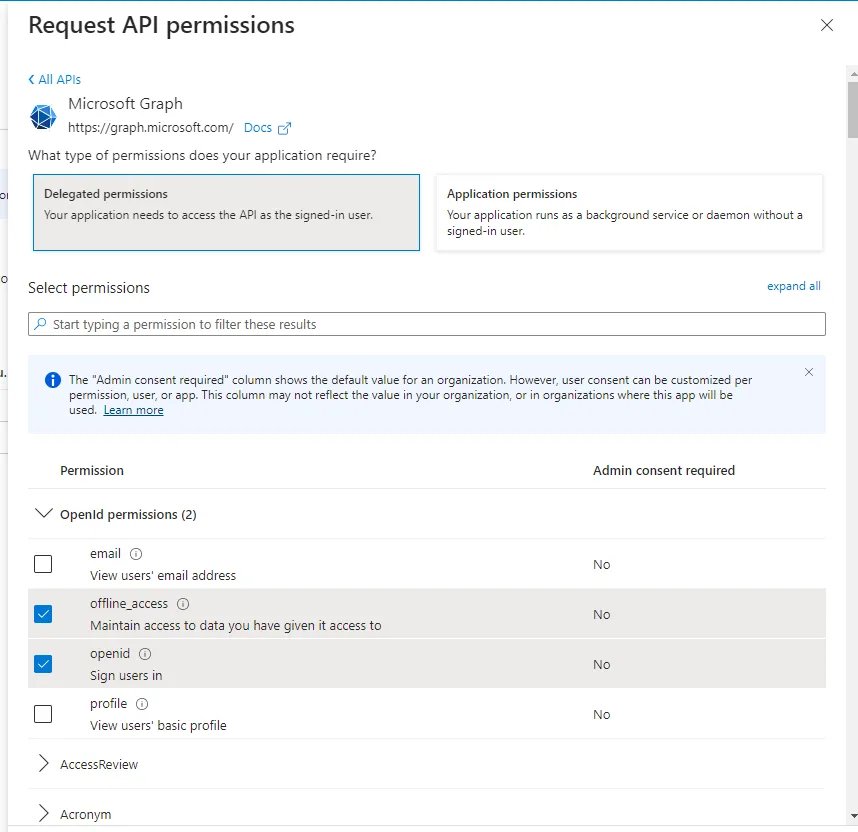
- Choose Delegated Permissions and enable the following permissions:
- OpenId Permissions
offline_access
openid
profile - Calendars
Calendars.Read - Contacts
Contacts.Read - Group
Group.Read.All - People
People.Read - Presence
Presence.Read.All - TeamsResourceAccount
TeamsResourceAccount.Read.All - Users
User.Read
User.Read.All
User.ReadBasic.All
- OpenId Permissions
Click the “Add Permission” button
Grant Admin Consent and Configure Appid
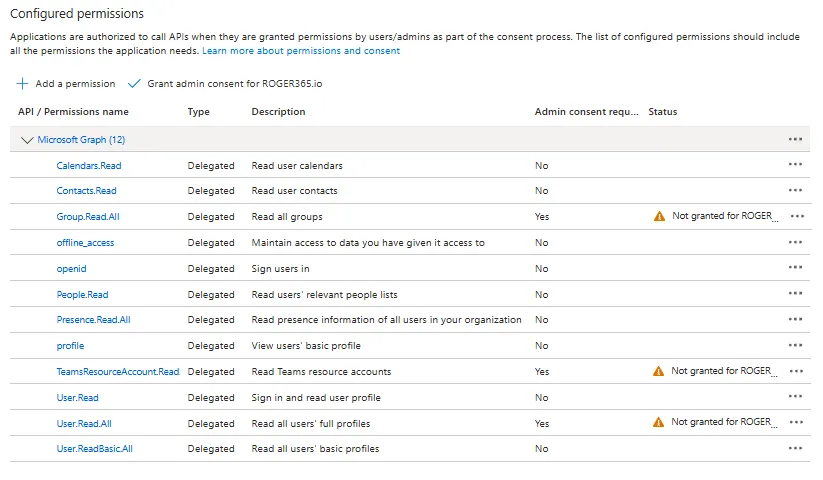
- Click “Grant admin consent for ROGER365.io” and confirm with ‘Yes”
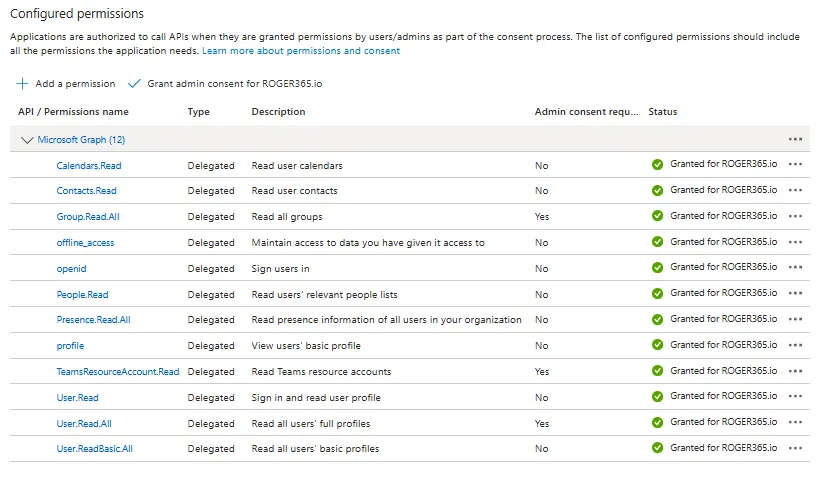
Now, all permissions should be granted
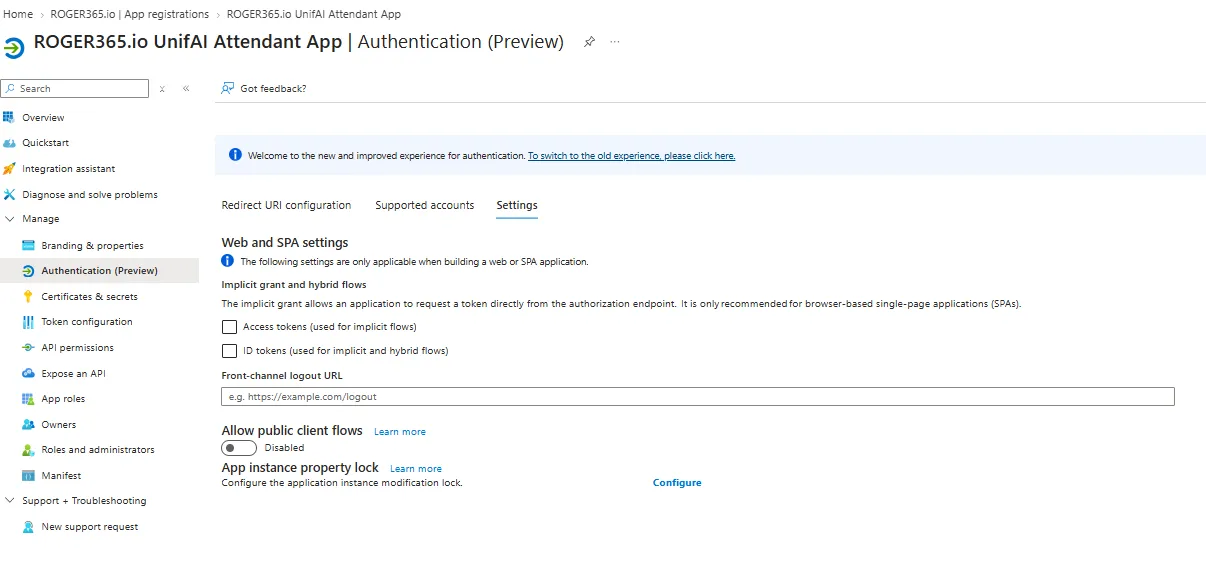
Select ‘Authentication’ on the left navigation menu and choose option settings
- Make sure that Access tokens and ID Tokens are not selected
Then press the SAVE button.
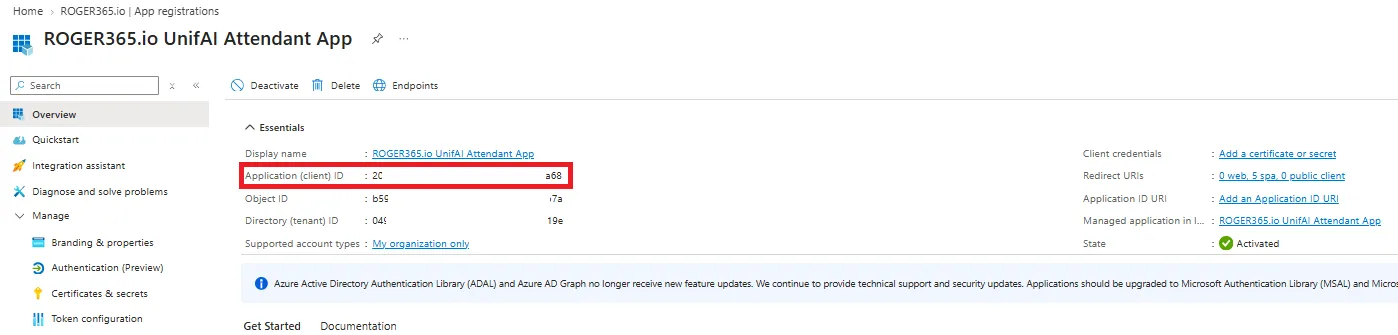
Finally, copy the Application (client) ID and paste it into the Tenant App Id field in the ROGER365.io admin portal.