Create App Registration for Attendant Console

To enable the Attendant Console feature, an App registration must be created in the customer’s Azure Portal. We have created a PowerShell script or you can follow the manual creation.
Option 1: Automated PowerShell Script (preferred)
Execute this PowerShell script (as Global Admin): Download Script
When the script has executed successfully, you have to manually ‘Grant Admin Consent’. Scroll down below to: Grant Admin Consent and Configure Appid
Option 2: Manual Creation
- Login to the Azure Portal via https://portal.azure.com
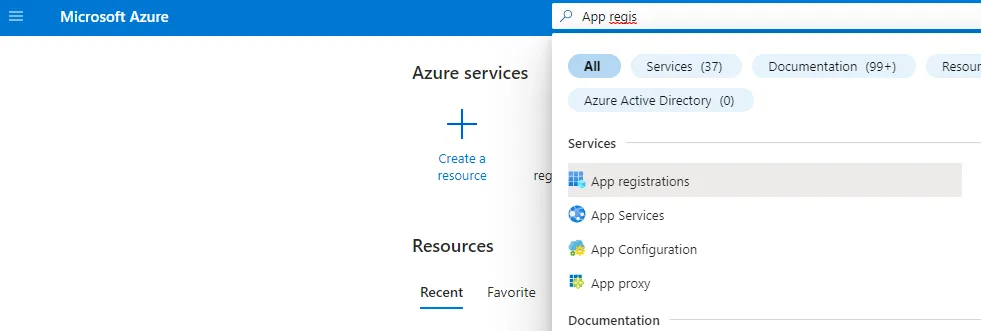
- In the search bar on top, search for ‘App Registration’. Then click the found result ‘App registrations’
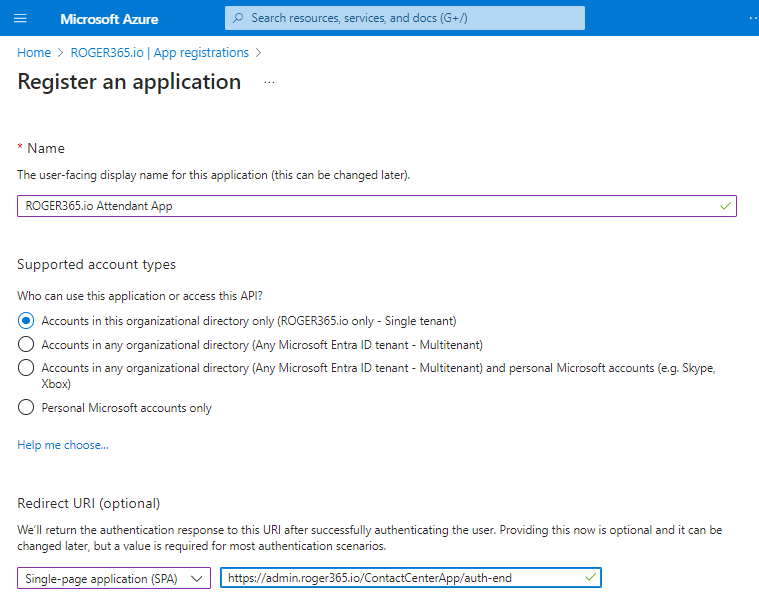
Enter a name
ROGER365.io Attendant AppChoose
Accounts in this organizational directory only (ROGER365.io only – Single Tenant)Redirect URL - Choose Single-page application (SPA) and provide following URLs
https://admin.roger365.io/ContactCenterApp/auth-end
https://admin.roger365.io/portal/Auth-end
-> Now click the “REGISTER” button
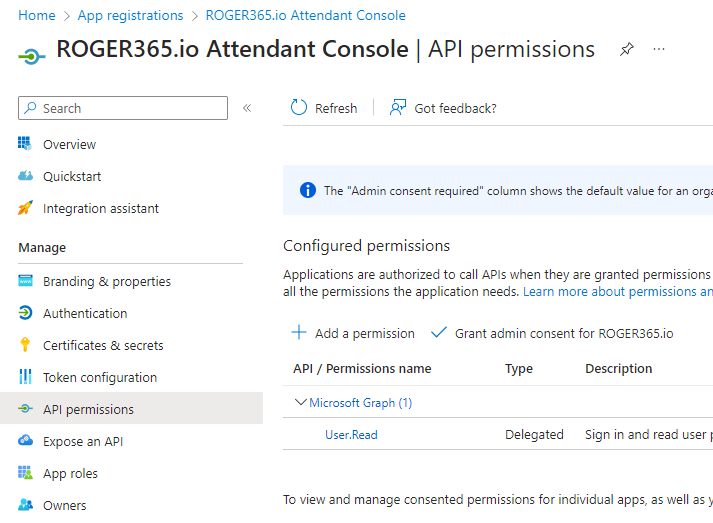
- Then click “+ Add a permission”
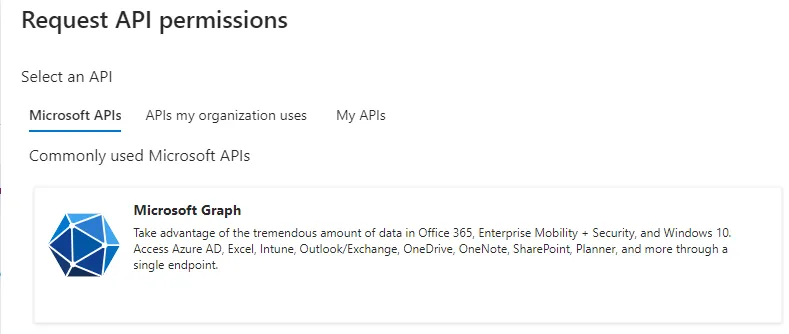
- Choose “Microsoft Graph”
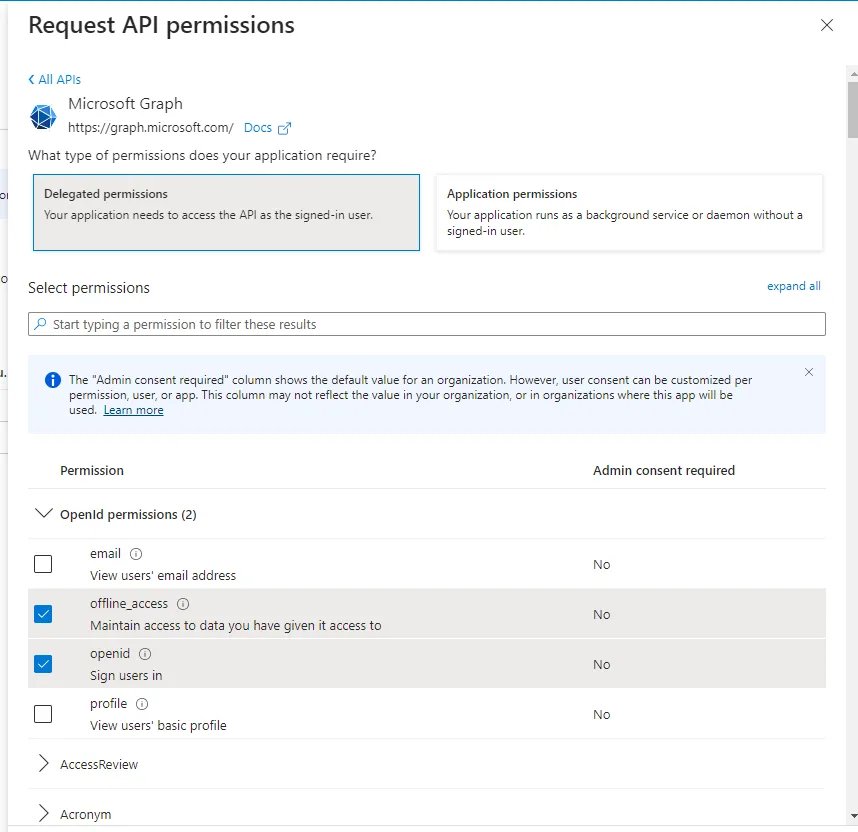
- Choose Delegated Permissions and enable the following permissions:
- OpenId Permissions
offline_access
openid - Calendars
Calendars.Read - Contacts
Contacts.Read - Group
Group.Read.All - People
People.Read - Presence
Presence.Read.All - Sites
Sites.Read.All - Users
User.Read
User.Read.All
User.ReadBasic.All
- OpenId Permissions
Click the “Add Permission” button.
Grant Admin Consent and Configure Appid
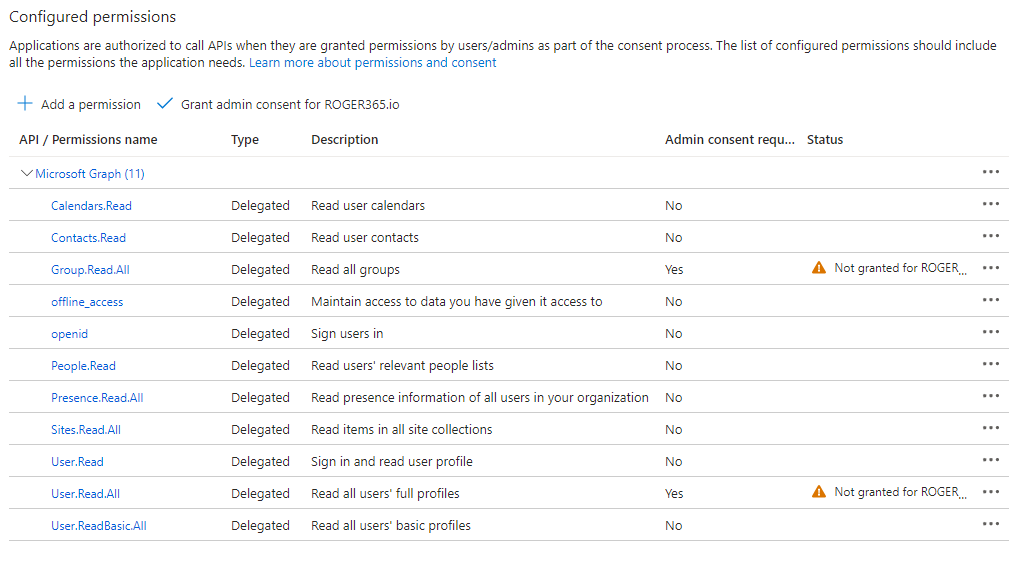
- Click “Grant admin consent for ROGER365.io” and confirm with ‘Yes”
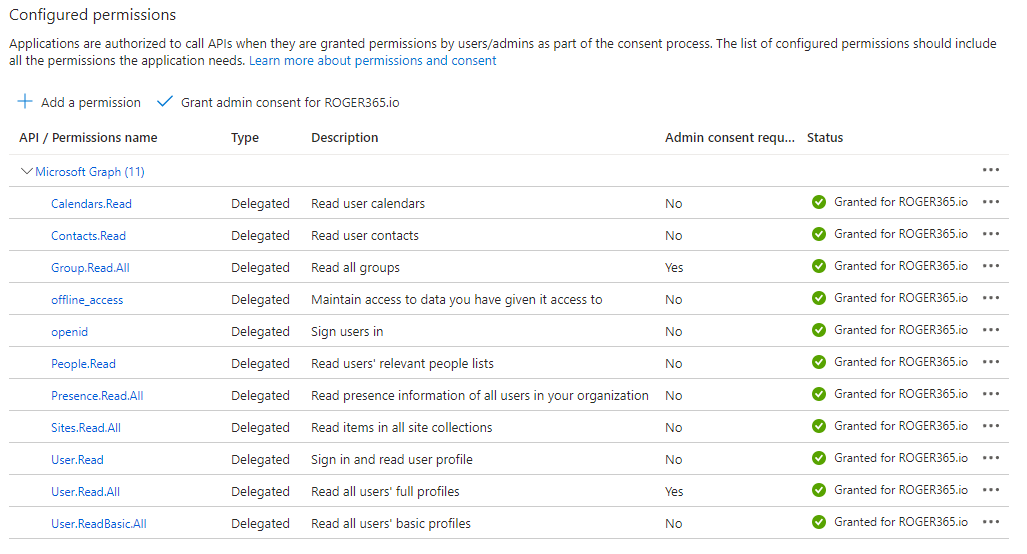
Now, all permissions should be granted
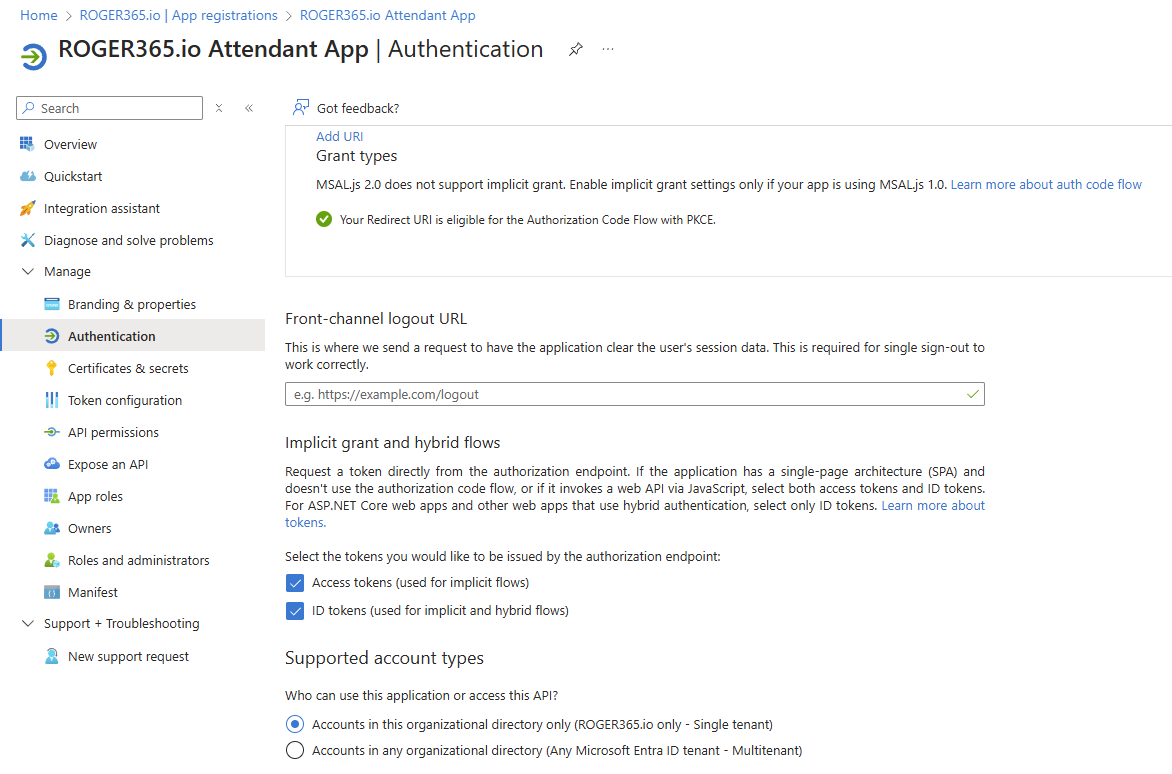
Select ‘Authentication’ on the left navigation menu and check these two options:
- Access Token (used for implicit flows)
- ID tokens (used for implicit and hybrid flows)
Then press the SAVE button.
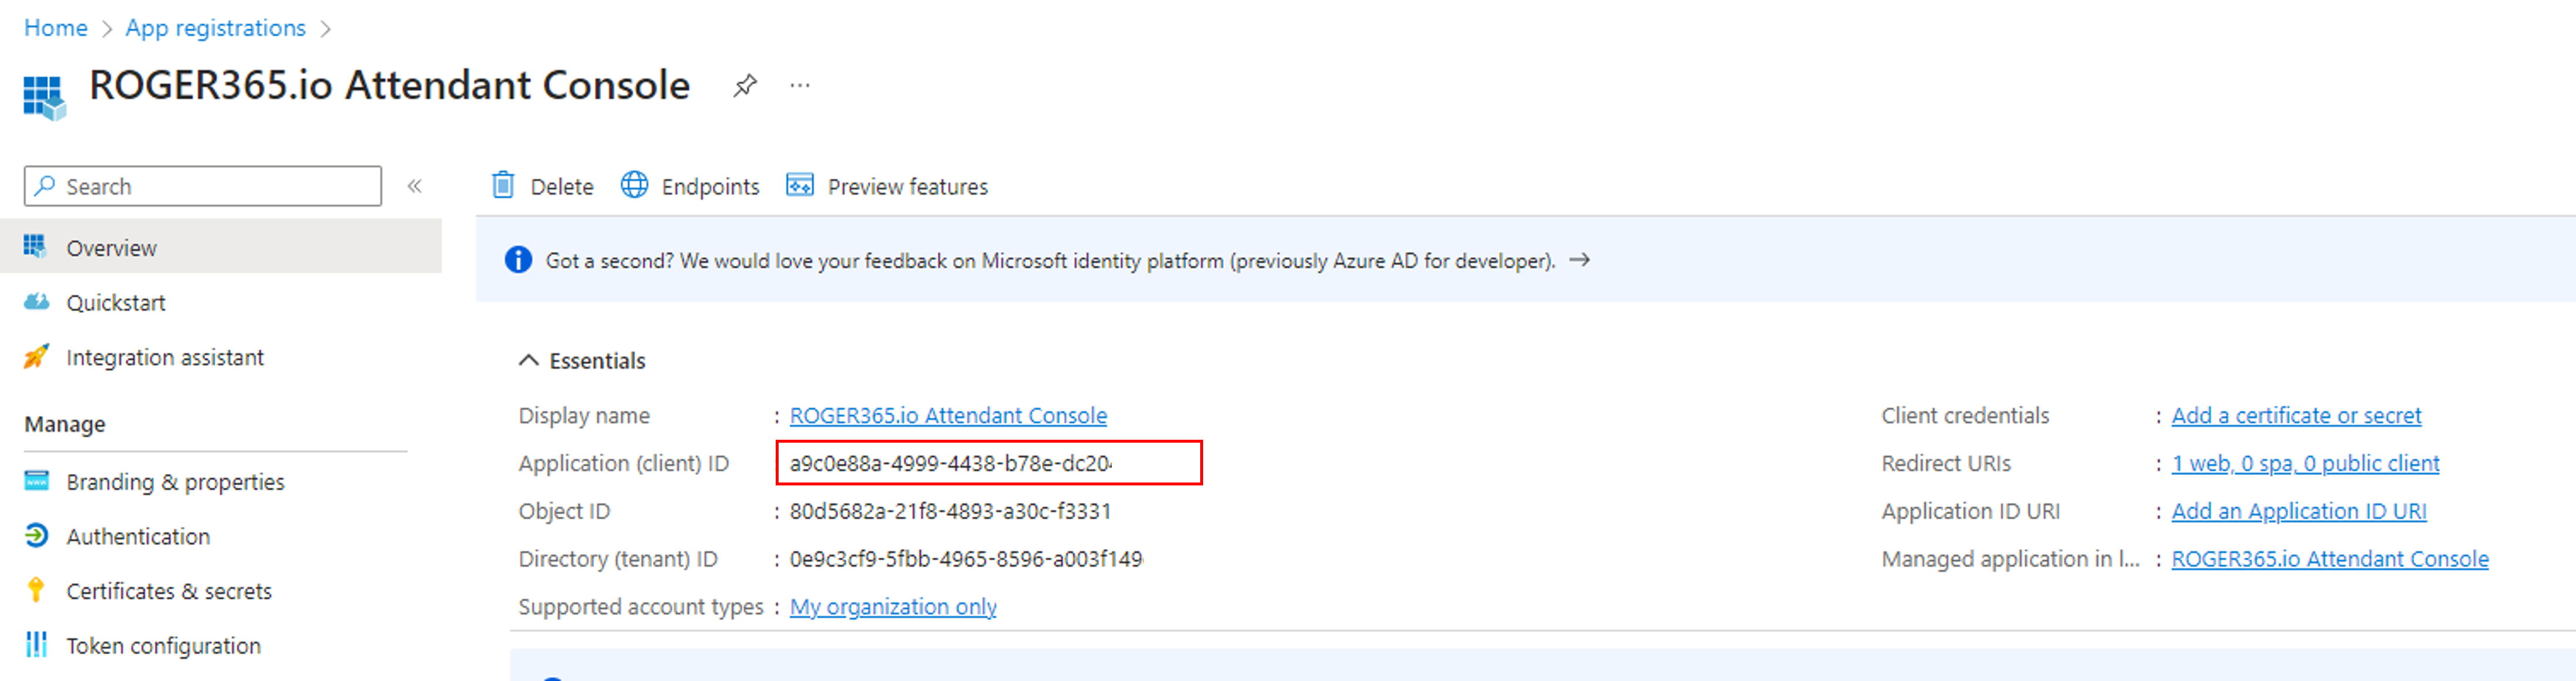
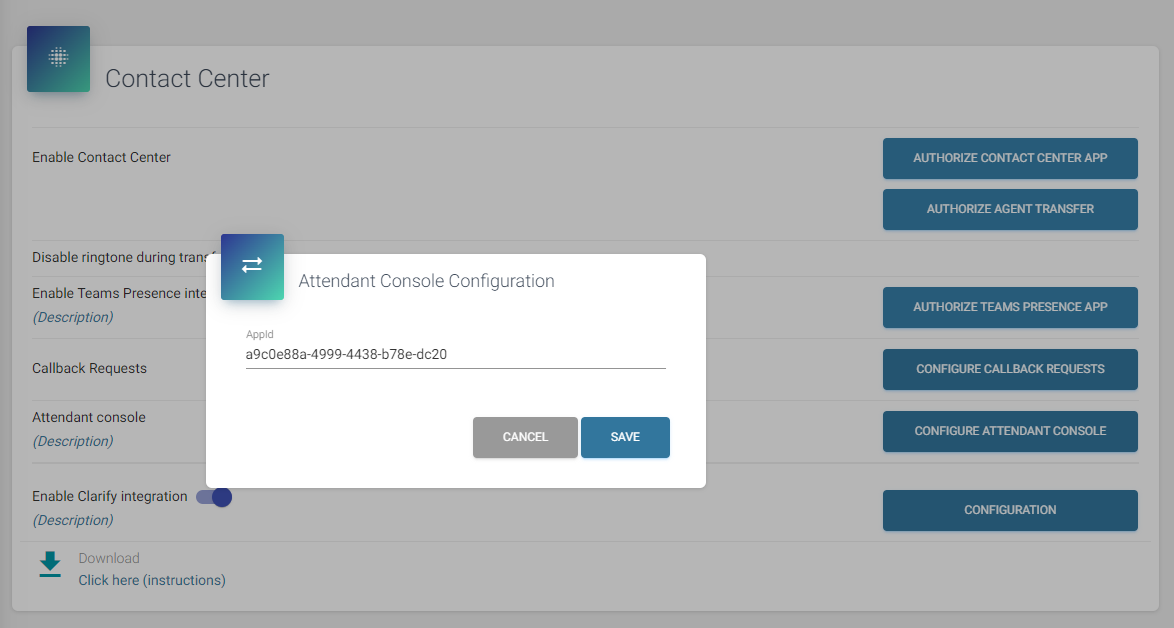
Finally, copy the Application (client) ID and paste it in the ROGER365.io admin portal: