


Webchat to Teams

Prerequisites
Before continuing make sure you have ROGER365.io connected to a Microsoft Teams channel and you have enabled Webchat TouchPoint.
Result
At the end of this document you have created your first ROGER365.io flowchart that handles webchat messages from a website to Microsoft Teams and back.
Create Webchat to Teams flowchart
1. Login into ROGER365.io admin portal, https://admin.roger365.io with your Microsoft 365 credentials
2. Choose in the left menu, [Social Messaging] > [- Messages] and choose option [+ Add Message] and click [Save]
For the name use the text below
Send Welcome MessageEnter this at the EN language
Hi! I’m Roger, how can I help you?3. Choose in the left menu, [Social Messaging] > [Messageflows] and select option [+Add Flowchart]
4. Fill in flowchart properties in the right panel;
For the name use the text below
WebchatEnter this for the description
My first flow
5. Choose the option [Variables] in the tool bar and create the variables below and press [Save]:
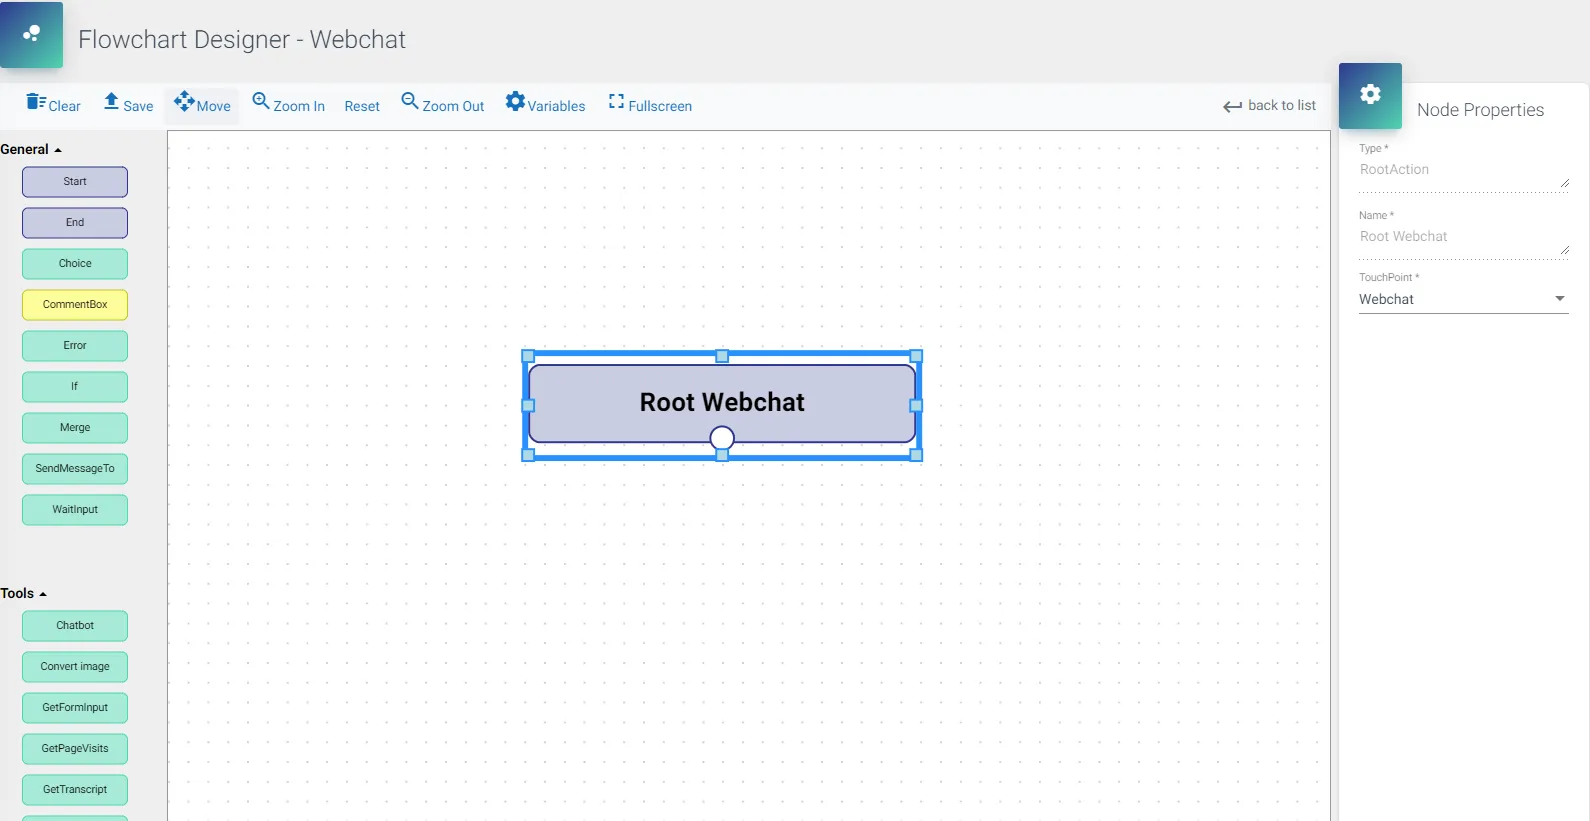
6. Click the “Root” node and fill in the following “Node Properties”:
Webchat
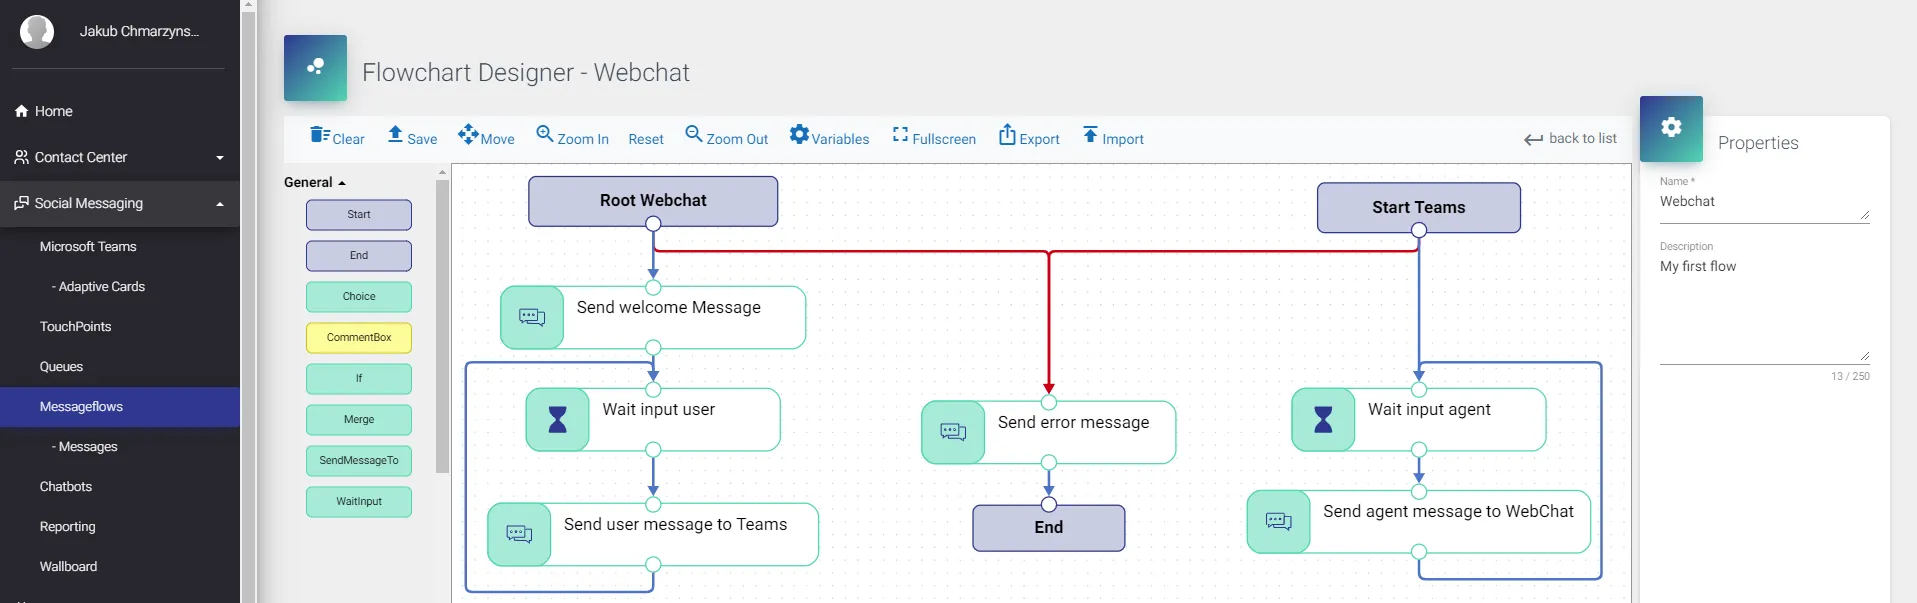
1. Choose [SendMessageTo] action in the left panel, drag & drop it into the flow area and fill in the “Node Properties”;
For the name use the text below
Send Welcome MessageEnter this for the Message
PredefinedMessage["Welcome"]Enter this for the touchpoint
Webchat2. Connect both “Root” and “Send Welcome Message” actions with a link
3. Choose action “WaitInput” in the left panel and drag & drop into the flow area.
4. Set the following “Node Propeties” and link this node with the “Welcome” node;
For the name use the text below
Send user message to TeamsEnter this as the User input destination variable
UserMessage5. Choose action “SendMessageTo” and drag & drop, fill in the following “Node Properties” and connect “WaitInputUser” with “SendToAgent”;
For the name use the text below
Send user message to TeamsEnter this as the User input destination variable
UserMessageEnter this for the touchpoint
Teams6. Choose the link between “Wait input User” and “Send user message to Teams” and make sure the “Link Properties” is set to “Input”.
7. Create a link from “Send user message to Teams” back to “Wait input User”
Create Teams to Webchat flowchart
1. Add action “Start” action into the flow area and give the following “Node Properties”;
- Touchpoints: Teams
- Add action “WaitInput”, fill in the “Node Properties” and link “Start” Teams with this action;
For the name use the text below
Wait input AgentEnter this as the User input destination variable
AgentMessage2. Add action “SendMessageTo” and fill in the following “Node Properties”;
For the name use the text below
Send agent message to WebchatEnter this as the User input destination variable
AgentMessageEnter this for the touchpoint
Webchat3. Link “Wait input Agent” with the “Send agent message to Webchat” and make sure the “Link Properties” type to “Input”
4. Create a link from “Send agent message to Webchat” back to “Wait input Agent”
5. Add action “SendMessageTo” and fill in the following “Node Properties”;
For the name use the text below
Send error messageEnter this as the User input destination variable
LastErrorMessageEnter this for the touchpoint
Teams6. Create a Error link between the “Root Webchat” node and “Send error message”
7. Create a Error link between the “Start Teams” node and “Send error message”
8. Add action “End” and create a link between “Send error message” and “End”
9. Click [Save] to store the created flow
Assign new flow to Touchpoint
- Go to [TouchPoints], and choose the webchat touchpoint you want to connect the created flow.
- Choose option “Assign a flowchart…” and choose the just created flow.
- Click [Update] to confirm changes.