


Schedules

The Schedules page is where you manage the schedules used on your platform. A schedule defines the operating hours for a call flow—such as business hours, after-hours, and holidays—determining how calls are handled at different times. You can find this page under the Contact Center section in the left-hand menu.

Understanding the page
The counter at the top shows the total number of schedules currently configured (in this example, 1). Each schedule is listed in a table with the following columns:
- Details – The name of the schedule (for example, "Default Schedule"), shown with its initials in the icon on the left.
- Actions – The controls for managing each schedule.
Working with schedules
To create a new schedule, click the Add New button in the top-right corner.
To edit an existing schedule, click the blue pencil icon in the Actions column for that row. To delete a schedule, click the red trash icon in the same row.
Maintaining a Schedule
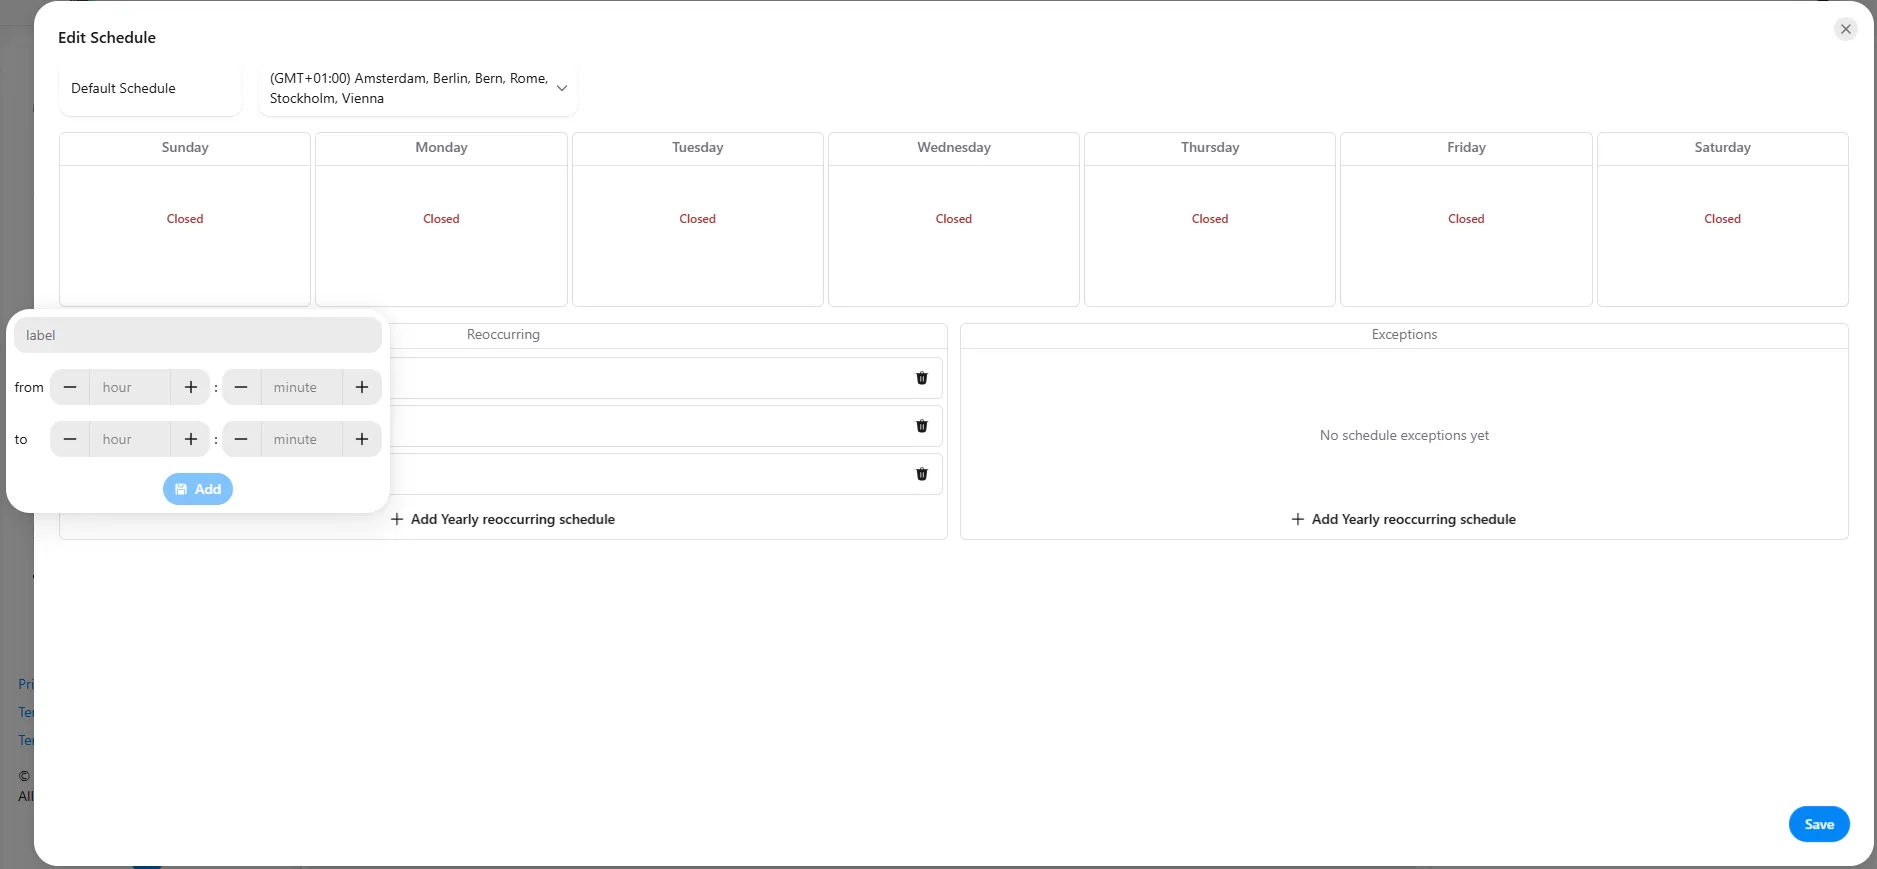
The Edit Schedule dialog lets you define the operating hours for the schedule, including weekly opening times, recurring yearly periods, and exceptions. Click the blue pencil icon next to a schedule on the Schedules page to open this dialog.
Schedule name and time zone
At the top of the dialog, you can edit the schedule's name (for example, "Default Schedule") and select the time zone that the schedule's hours are based on (for example, GMT+01:00 Amsterdam, Berlin, Bern, Rome, Stockholm, Vienna).
Setting weekly opening hours
The seven days of the week are displayed across the top. By default, each day is marked as "Closed." To set opening hours for a day, click on that day to open the time editor, where you can:
- Enter an optional label for the time block.
- Set the "from" time using the hour and minute controls (use the plus and minus buttons to adjust the values).
- Set the "to" time in the same way.
- Click Add to apply the time block to that day.
You can add multiple time blocks to a single day—for example, to account for a lunch break by creating a morning block and an afternoon block.
Once you have added opening hours to a day, the time blocks are displayed within that day's column (for example, "08:00 - 17:00" for Sunday). Each day can have one or more time blocks, and you can manage them using the following controls:
- Copy – Click the copy icon on a time block to duplicate its hours, allowing you to quickly apply the same times to other days.
- Delete – Click the trash icon on a time block to remove it from that day.
- Add Open Time – Click the Add Open Time button to add another time block to the day. This lets you define multiple opening periods for a single day—for example, a morning and an afternoon block separated by a lunch break.
When all time blocks are removed from a day, it is marked as "Closed."
Recurring schedules
In the Reoccurring section, you can define yearly recurring periods—such as regular seasonal hours. Click Add Yearly reoccurring schedule to create one, and use the trash icon next to an entry to remove it.
Exceptions
In the Exceptions section, you can define specific dates that override the normal schedule, such as public holidays. When no exceptions have been set, the message "No schedule exceptions yet" is displayed. Click Add Yearly reoccurring schedule to add an exception.
Saving your changes
When you have finished configuring the schedule, click Save in the bottom-right corner to apply your changes.