


Queues

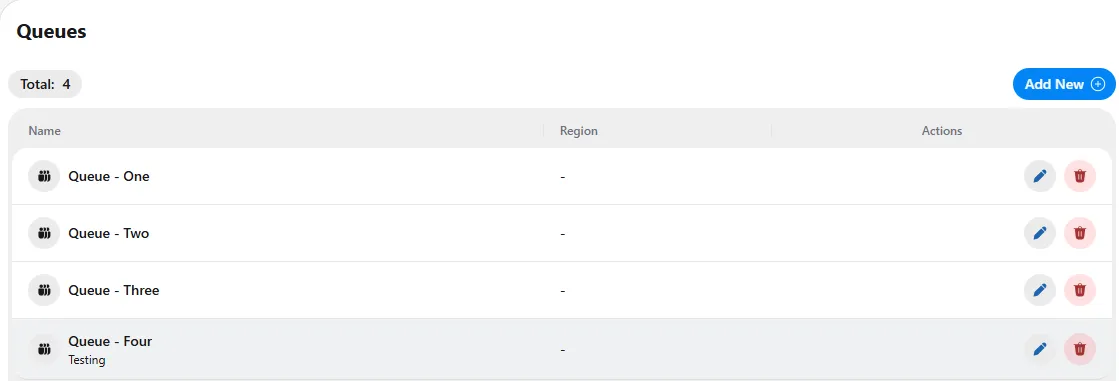
The Queues page is where you manage the call queues used on your platform. A queue holds incoming callers until an available agent can take the call, and it determines how those calls are distributed among agents. You can find this page under the Contact Center section in the left-hand menu.
Understanding the page
The counter at the top shows the total number of queues currently configured (in this example, 4). Each queue is listed in a table with the following columns:
- Name – The name of the queue, along with an optional short description shown beneath it (for example, "Testing").
- Actions – The controls for managing each queue.
Working with queues
To create a new queue, click the Add New button in the top-right corner.
To edit an existing queue, click the blue pencil icon in the Actions column for that row. To delete a queue, click the red trash icon in the same row.
Creating a Voice Queue
The Create Voice Queue dialog lets you define a new queue and how calls are distributed to agents within it. Click Add New on the Queues page to open this dialog, then complete the fields below.
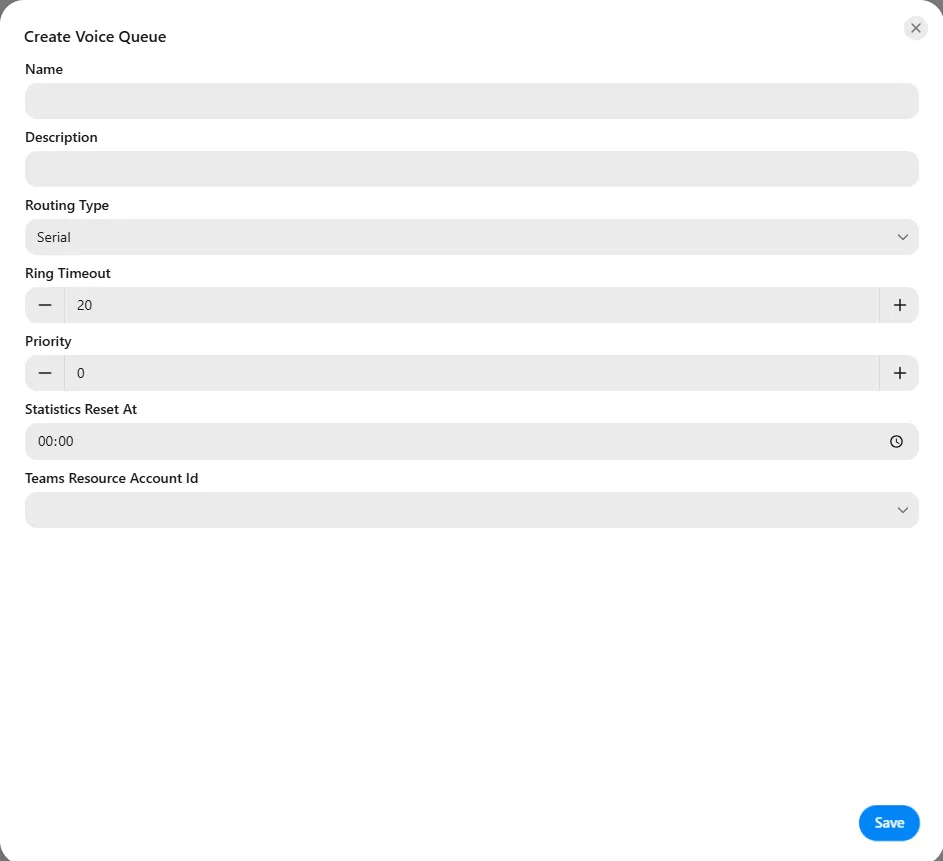
- Name – Enter a name for the queue. This is how the queue will be identified in the queues list.
- Description – Optionally, enter a brief description of the queue to help identify its purpose.
- Routing Type – Select how calls are distributed to agents in the queue. For example, Serial routing offers the call to agents one after another in sequence.
- Ring Timeout – Set how long (in seconds) a call rings with one agent before moving on to the next. Use the plus and minus buttons to adjust the value (the default is 20).
- Priority – Set the priority of the queue. Use the plus and minus buttons to adjust the value (the default is 0). This determines the queue's precedence when calls are being handled across multiple queues.
- Statistics Reset At – Set the time of day at which the queue's statistics are reset (the default is 00:00).
- Teams Resource Account Id – Select the Teams resource account associated with this queue. This resource account is used for outbound calling, and its phone number serves as the caller identification when an outgoing call is placed.
Important: Make sure you have configured and assigned a Teams Voice Policy that allows outbound calling to the resource account, otherwise it will not be able to dial out externally
When you have completed the fields, click Save in the bottom-right corner to create the voice queue.
Routing Type
The Routing Type determines how incoming calls are distributed to the agents in the queue. Click the Routing Type dropdown to choose one of the available options:
- Serial – Calls are offered to agents one at a time, in a fixed order. The call is presented to the first agent, and if they do not answer within the ring timeout, it moves on to the next agent in sequence. This is useful when you want certain agents to be offered calls before others.
- RoundRobin – Calls are distributed evenly among agents by rotating through them in turn. Each new call starts with the next agent in the rotation, helping to balance the workload across the team.
Assigning Agents to a Queue
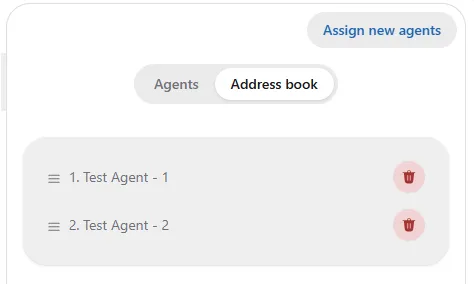
After a queue has been created, you can assign the agents who will handle calls from it. Select the agents tab to manage the agents assigned to the queue.
Working with agents
On the Agents tab, the agents currently assigned to the queue are listed in order (for example, "1. Automated Test User 1"). The number indicates each agent's position, which is relevant for Serial routing, where calls are offered to agents in this sequence.
- To add agents, click Assign new agents in the top-right corner and select the agents you want to add.
- To reorder an agent, use the drag handle (the icon on the left of each row) to move the agent up or down in the list. This changes the order in which calls are offered.
- To remove an agent from the queue, click the red trash icon in that agent's row.
Assigning CRM Replicators to a Queue
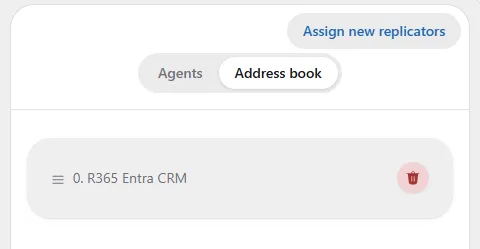
On the CRM tab, you can manage the CRM replicators assigned to the queue. CRM replicators enable CRM recognition, allowing caller information to be matched against your connected CRM systems when a call comes in.
Working with CRM replicators
The CRM replicators currently assigned to the queue are listed here (for example, "R365 Entra CRM"). Here you can manage the CRM configuration for the queue, to be used as a phonebook and for resolving outbound calls.
- To add replicators, click Assign new replicators in the top-right corner and select the replicators you want to add.
- To reorder a replicator, use the drag handle (the icon on the left of each row) to move it up or down in the list. This determines the order in which the replicators are applied.
- To remove a replicator from the queue, click the red trash icon in that replicator's row.