Power frame URL is being triggered on the Agent App when a new call is offered to an agent. Power frame option can be used at the Queues of Contact Center, and Social Messaging.
- Note: If you are using Microsoft PowerApps, then embedding an application is not supported by Microsoft (https://docs.microsoft.com/en-us/powerapps/maker/canvas-apps/limits-and-config#embedding-limits-for-canvas-apps). The alternative would be to open Microsoft Teams application directly in your browser via this url: https://teams.microsoft.com
Available by default URL parameters for Power Frame
Contact Center:
{callId}
{phonenumber}
Social Messaging:
{conversationId}
CRM available URL parameters are listed in documentation page about Custom CRM Replicator – section POST JSON (remember about curly brackets).
You can also use the callflow variables on the Power frame. When you have a variable VAR1 then you can use this in the Power frame URL https://www.example.com?query1={VAR1}
Information about developing apps for power frame
The power frame supports cookies for authentication. However, the power frame is hosted inside an iframe and security restrictions do apply. Eg., if you use an external authentication provider (like Azure) they generally won’t allow the login screen to be displayed in an iframe. (You are able to work around this if you set the cookies elsewhere, like adding a tab in the teams client, or logging in separately in the web client). Furthermore, cookie same-site restrictions do apply. When the same-site policy is strict, or lax, the powerapp won’t send any cookies as the top document URL wont be the same site.
If you want to use your own authentication mechanism. The most straight forward way at this time is to use forms authentication, with samesite=none cookies
For example, using Visual Studio, just create a new ASP.NET Core Web App, with Authentication type “Individual accounts”. This will create a web application with forms authentication (set the database connection and run migrations to generate the tables.) (Note: the default project uses RequireConfirmedAccount=true. For accounts to work, set this to false, or update the entry AspNetUsers.EmailConfirmed). To configure the site to work, you have to disable the X-Frame-Options and set cookie SameSite=None, Secure=true. For an ASP.NET Core Web application, add the following code before builder.Build();
builder.Services.AddAntiforgery(options =>
{
	options.SuppressXFrameOptionsHeader = true;
	options.Cookie.SameSite = SameSiteMode.None;
	options.Cookie.SecurePolicy = CookieSecurePolicy.Always;
});

builder.Services.ConfigureApplicationCookie(options =>
{
	options.Cookie.SameSite = SameSiteMode.None;
	options.Cookie.SecurePolicy = CookieSecurePolicy.Always;
});
You can now add the site to a queue and register and log in.
To enable the Attendant Console feature, an App registration must be created in the customer’s Azure Portal. We have created a PowerShell script or you can follow the manual creation.
Option 1: Automated PowerShell Script (preferred)
Execute this PowerShell script (as Global Admin): Download Script
When the script has executed successfully, you have to manually ‘Grant Admin Consent’. Scroll down below to: Grant Admin Consent and Configure Appid
Option 2: Manual Creation
- Login to the Azure Portal via https://portal.azure.com
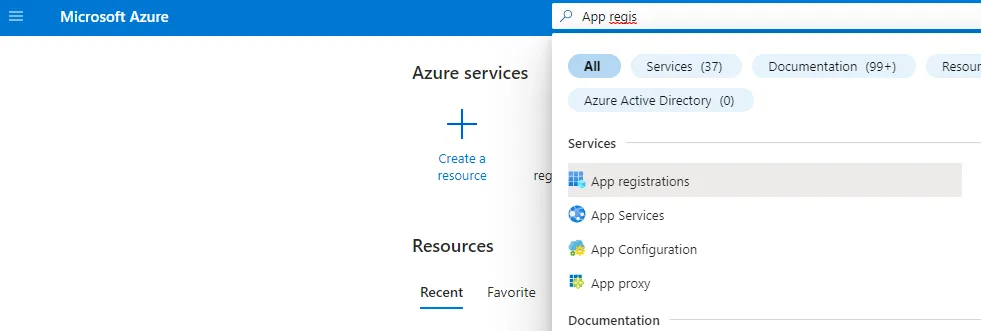
- In the search bar on top, search for ‘App Registration’. Then click the found result ‘App registrations’
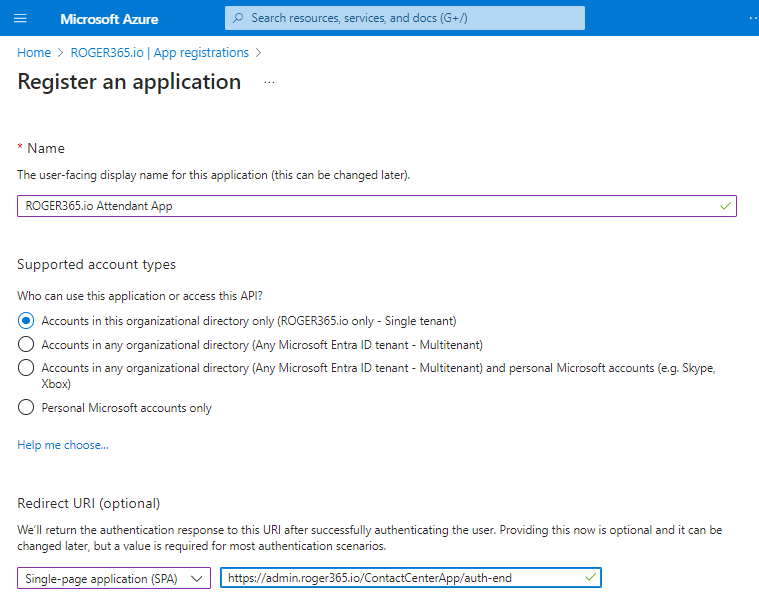
Enter a name
ROGER365.io Attendant AppChoose
Accounts in this organizational directory only (ROGER365.io only – Single Tenant)Redirect URL - Choose Single-page application (SPA) and provide following URLs
https://admin.roger365.io/ContactCenterApp/auth-end
https://admin.roger365.io/portal/Auth-end
-> Now click the “REGISTER” button
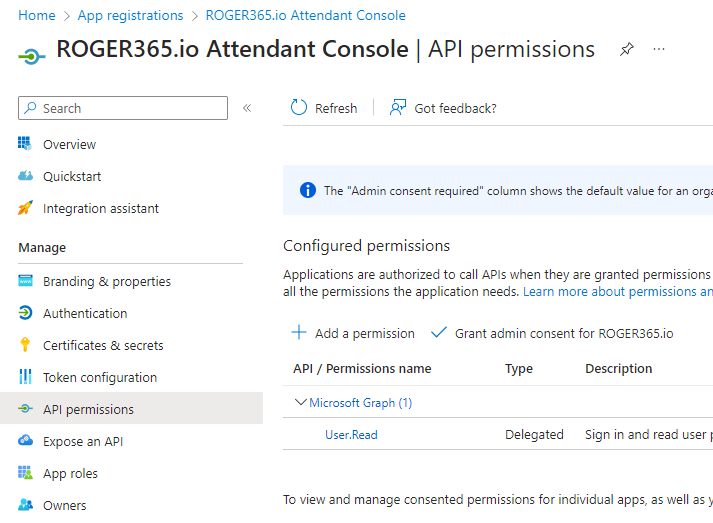
- Then click “+ Add a permission”
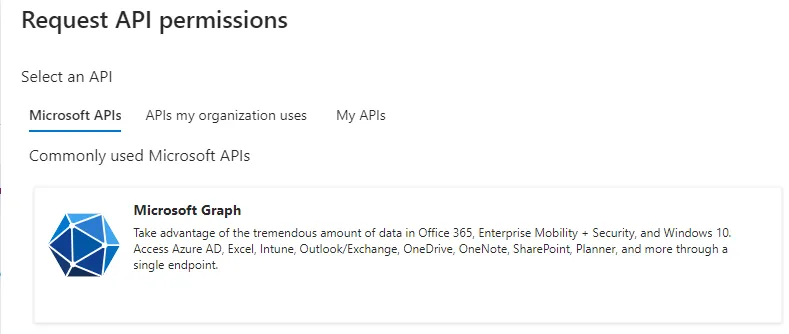
- Choose “Microsoft Graph”
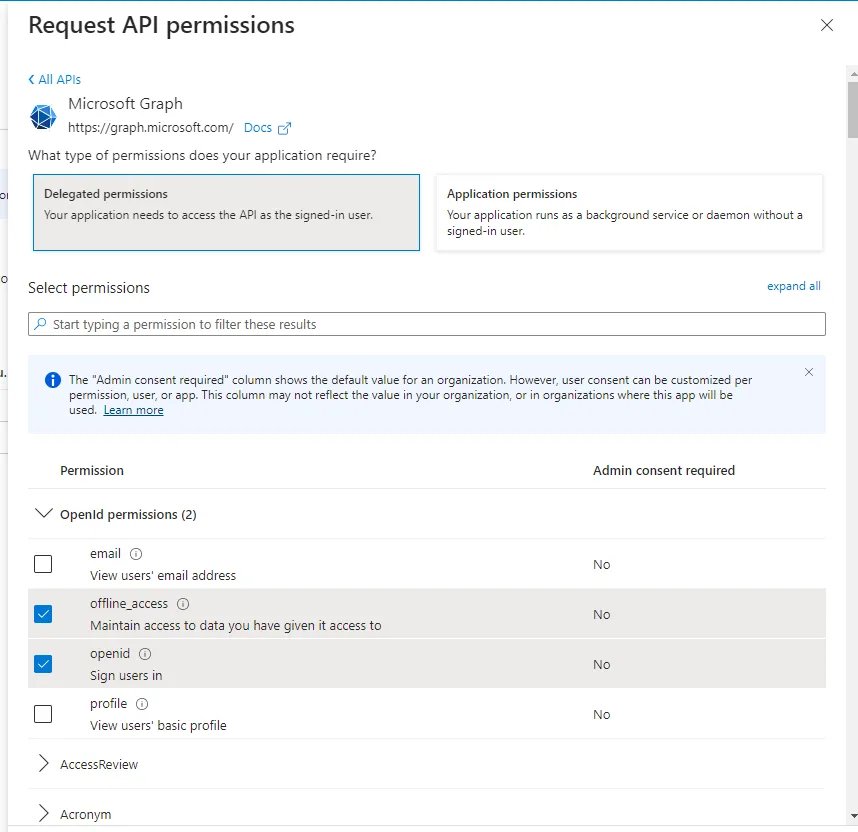
- Choose Delegated Permissions and enable the following permissions:
- OpenId Permissions
offline_access
openid - Calendars
Calendars.Read - Contacts
Contacts.Read - Group
Group.Read.All - People
People.Read - Presence
Presence.Read.All - Sites
Sites.Read.All - Users
User.Read
User.Read.All
User.ReadBasic.All
- OpenId Permissions
Click the “Add Permission” button.
Grant Admin Consent and Configure Appid
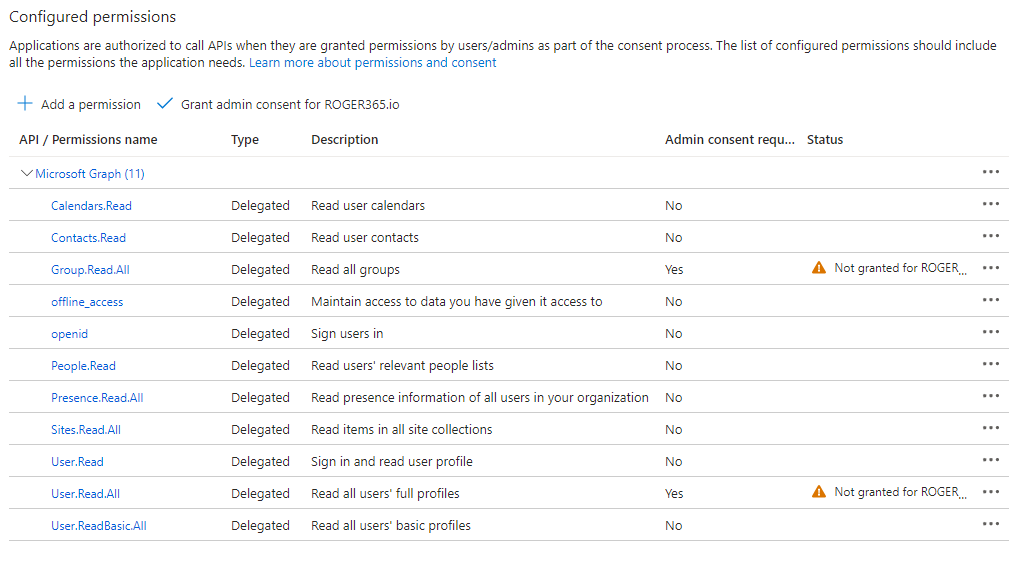
- Click “Grant admin consent for ROGER365.io” and confirm with ‘Yes”
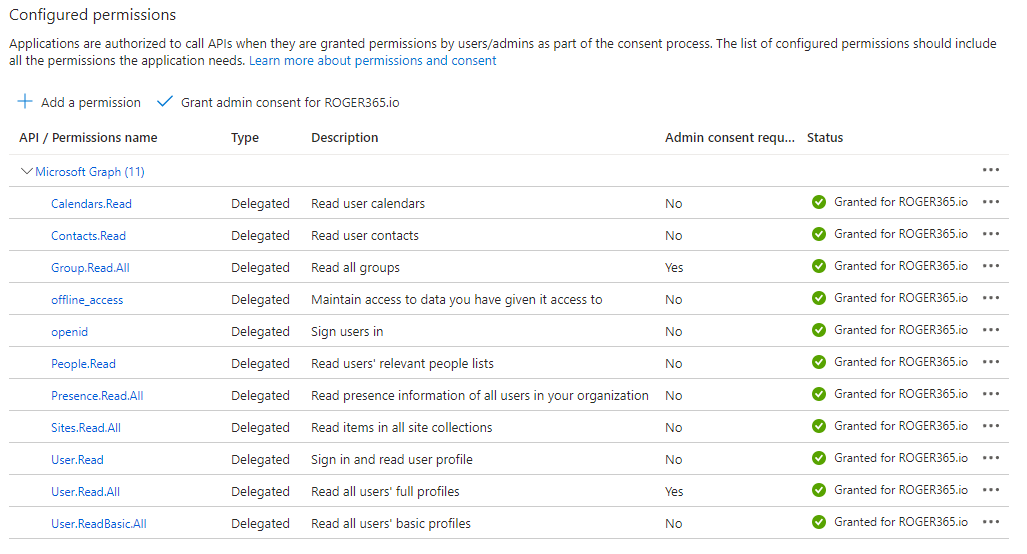
Now, all permissions should be granted
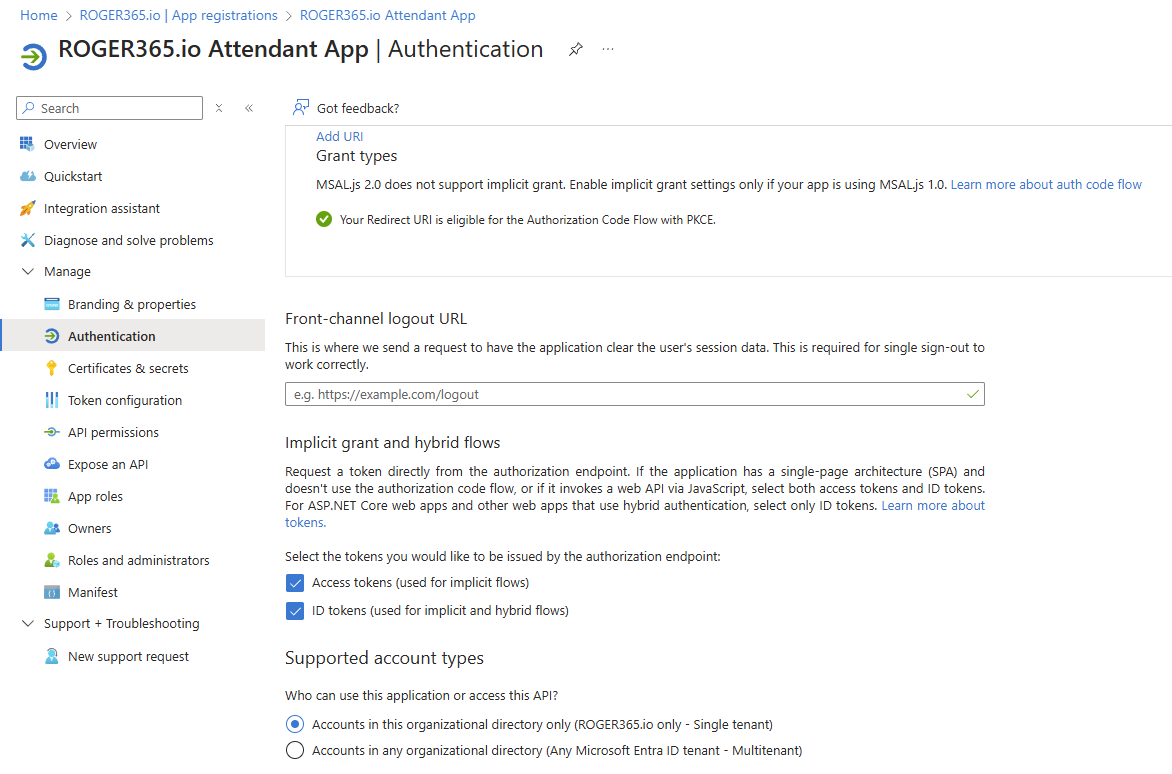
Select ‘Authentication’ on the left navigation menu and check these two options:
- Access Token (used for implicit flows)
- ID tokens (used for implicit and hybrid flows)
Then press the SAVE button.
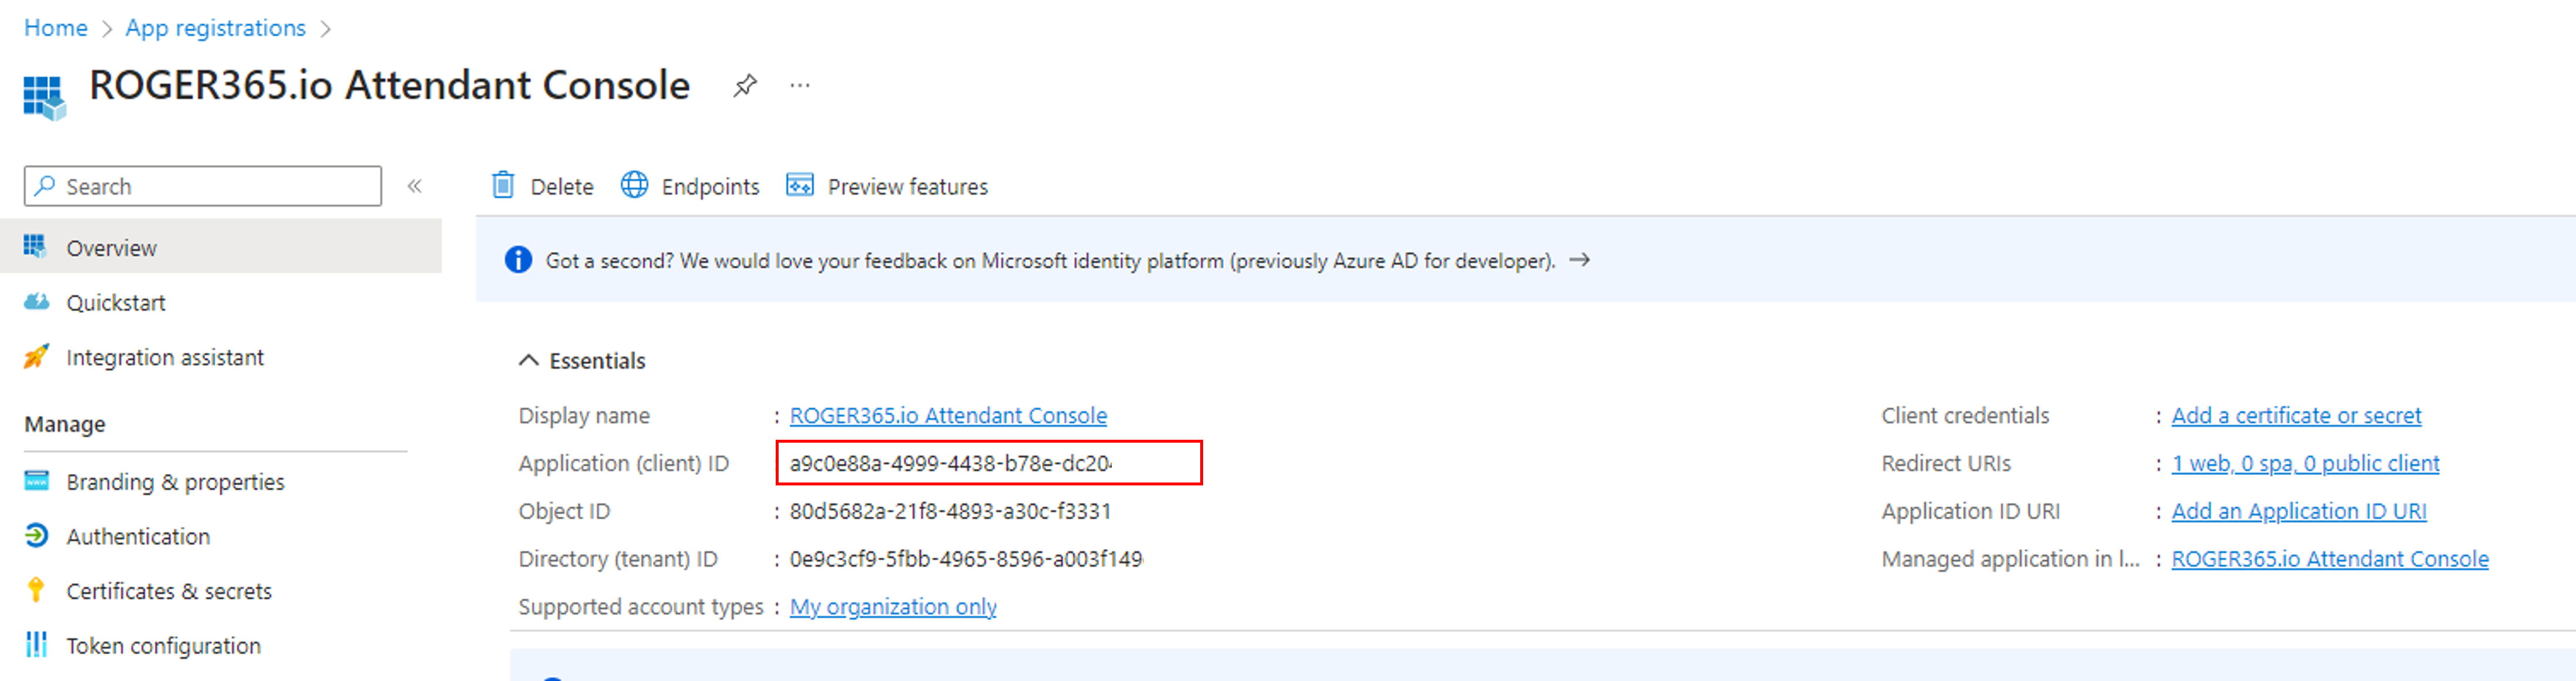
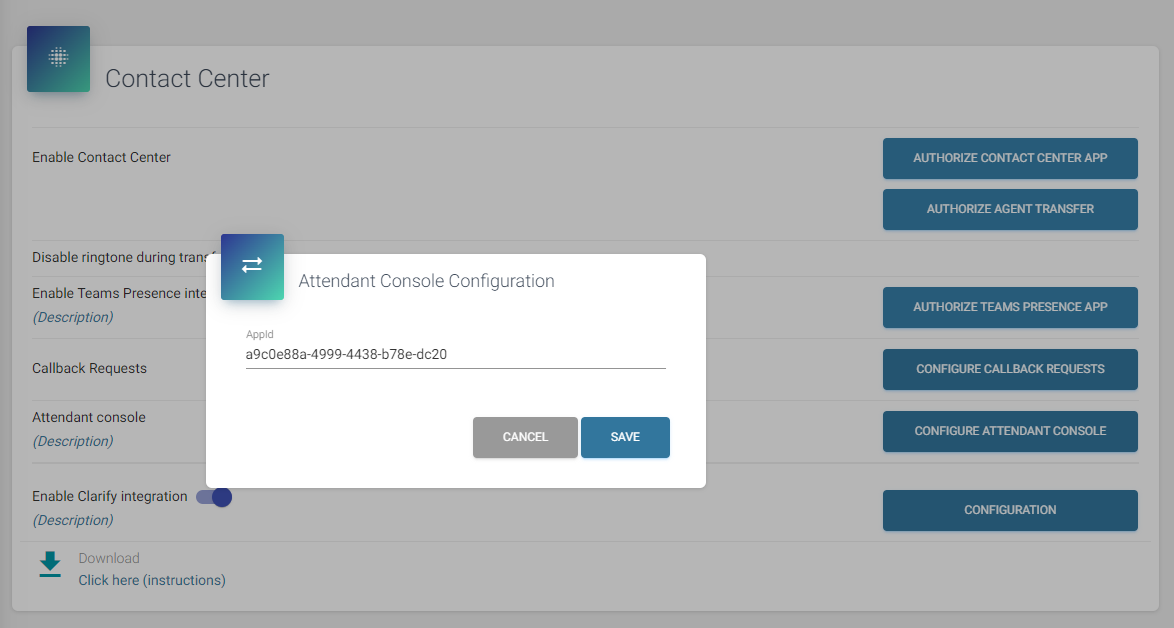
Finally, copy the Application (client) ID and paste it in the ROGER365.io admin portal:
The Callback Request feature is designed to streamline communication with customers by sending a request for a callback. This feature allows businesses to easily initiate follow-up actions and enhance customer engagement, regardless of whether the initial interaction was via a call or other communication methods.
There are three types of callback request options available:
- Email: Send an email to the selected contact with a request for a callback. By default, sender’s email address is “no_reply@roger365.io”, to send Email callback requests using own email address (for instance of Shared Mailbox), make sure that one of the Email configurations is set as “Default”.
- Webhook: Trigger a webhook to automatically send callback data to a specified URL (mostly Logic Apps). This option is perfect for integrating callback requests into automated workflows or systems that handle customer service or follow-up processes.
- Mailto Link: Create a Mailto link that opens the agent’s email client with a pre-configured message requesting a callback. This allows the agent’s email address to be used as the sender, including any configured email signature. It’s a simple and efficient way to request a follow-up action via email.
To configure Callback request navigate to General admin page, and press “Configure Callback Requests”.
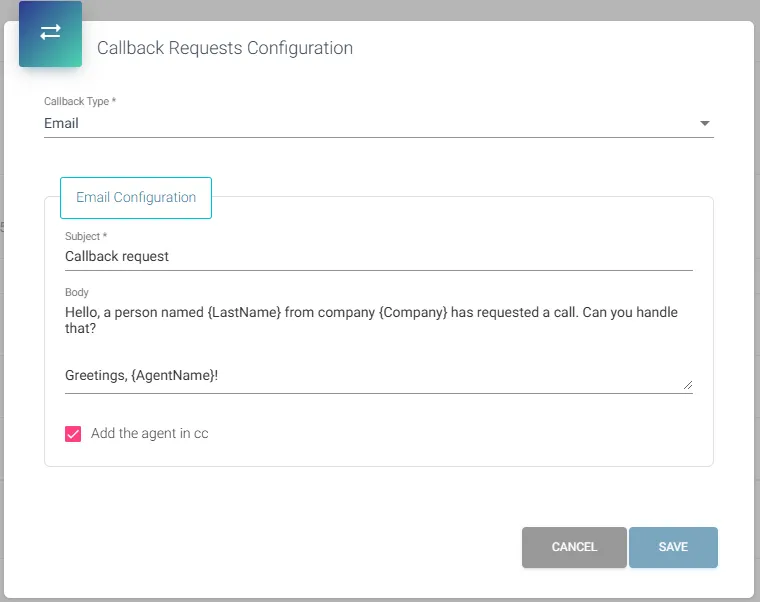
The body of the Callback request supports the use of variables, such as {DisplayName}. You can use any variable from your CRM Replicator, CRM available variables are listed in documentation page about Custom CRM Replicator – section POST JSON (remember about curly brackets). Additionally you can make usage of {AgentName} and {PhoneNumber} variables.
Force terminate
It is possible to force the termination of a call from the Supervisor page. This option is extremely useful in cases where there are issues with a call, for instance when everyone has finished the call, but for some reason, the Agent’s status still appears as Busy, or the call is stuck in the Queue where none of the agents is able to answer or even the call record itself is still visible in the ‘Live calls’ section of the Supervisor page. Before using this option, it needs to be enabled on the Queues admin page for the selected Queue Supervisors.
A call that requires force termination needs to be located in the Voice Queue or Live calls section of the Supervisor page. Next, the agent needs to right-click on the call record. This action will display the “Force Terminate” button. Upon pressing it, a confirmation window will appear. Pressing “Confirm” will terminate the call.
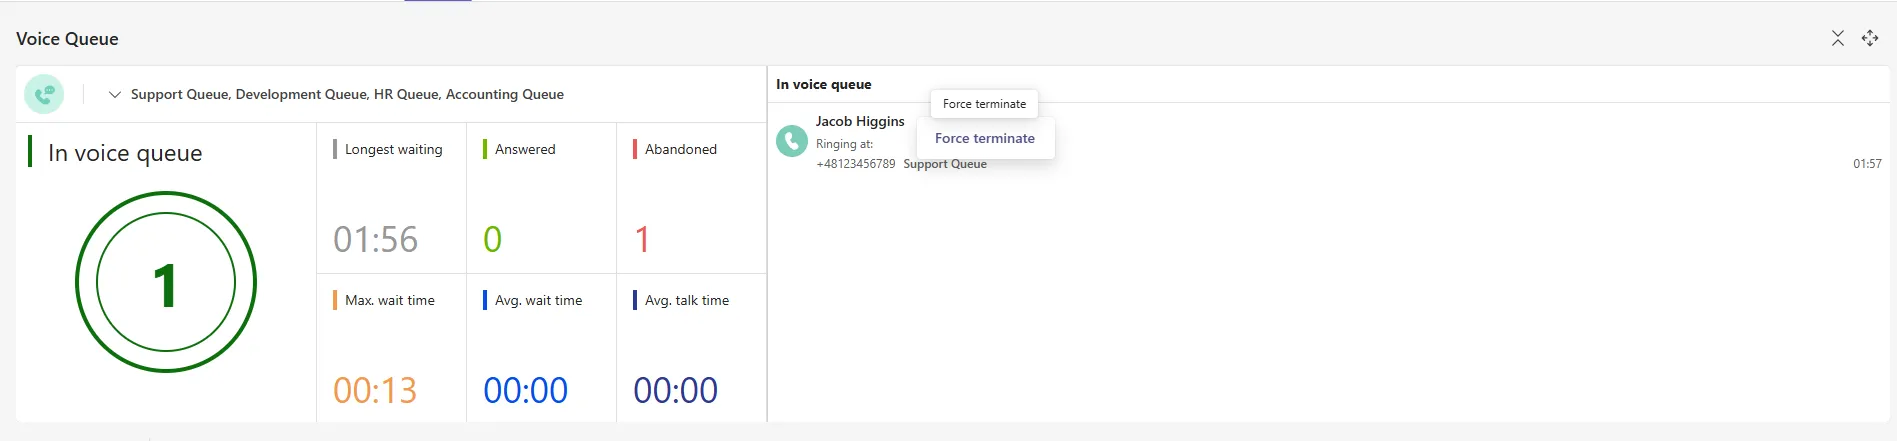
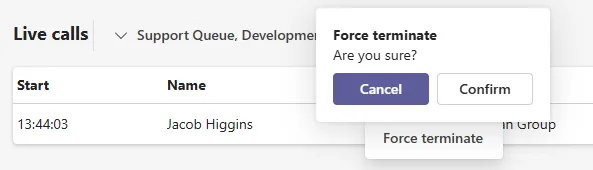
Each force terminating a call by Supervisor is logged into Logging page of ROGER365 admin portal.
Supervisor Assist
It is possible by an agent to request a supervisor assistance. Supervisor Assist empowers agents to instantly notify Supervisors when their expertise is needed, ensuring faster resolutions and improved customer service.
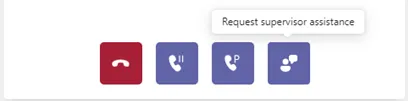
Upon pressing the button, three options will be shown: Monitor, Whisper and Join.
Selecting one of these options will send a parallel invite to join the call to every available Supervisor at the moment.
Notes: To enable this option, a Supervisor Assist option needs to be enabled at Agents or Agent Profiles admin pages. There’s a seat for only one Supervisor per call, so the first one to join wins the seat. It isn’t possible for the second Supervisor to join a call, even if the previous Supervisor has left.
Redirect
Is it possible to redirect a call to another contact while keeping original ID of the caller (phone number) using Redirect option.
First an agent has to be in active call, locate desired user in the search box, click on the 3 dots at far right side of the user (More Actions) and hit “Redirect” button:
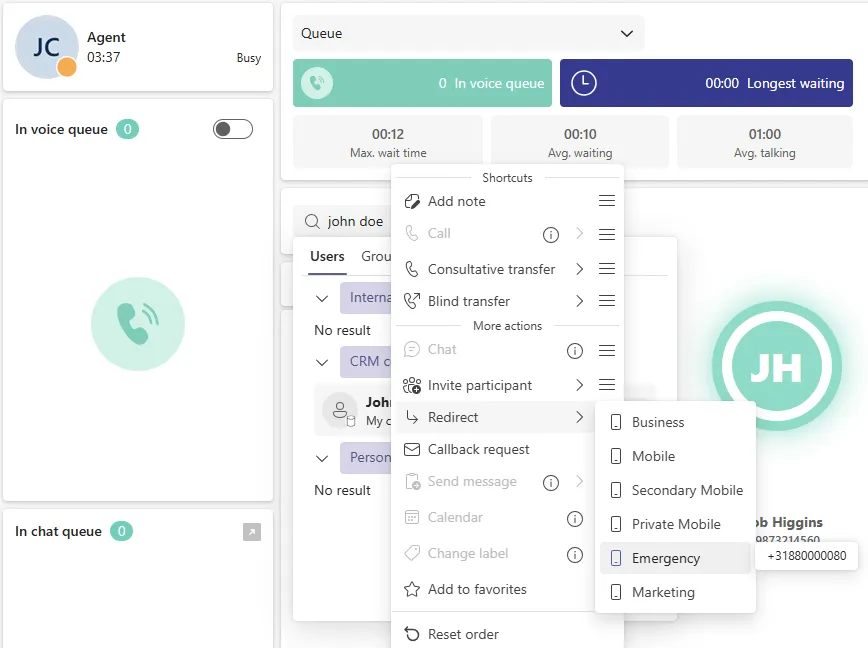
The Redirect operation is depending on your SBC configuration and/or your carrier to work properly. It should be able to set the “from caller”. For most carriers this is only allowed when you have an active inbound call, in other scenario’s the caller ID might be wrong which should be investigated on SIP level.
Virtual wait
In case of having nobody available to serve the customer, it is possible to give the caller an option to wait in virtual queue. It will disconnect a caller from the platform making a record at Agent page to call back a customer. Hourglass icons means that the caller decided to wait in virtual queue.
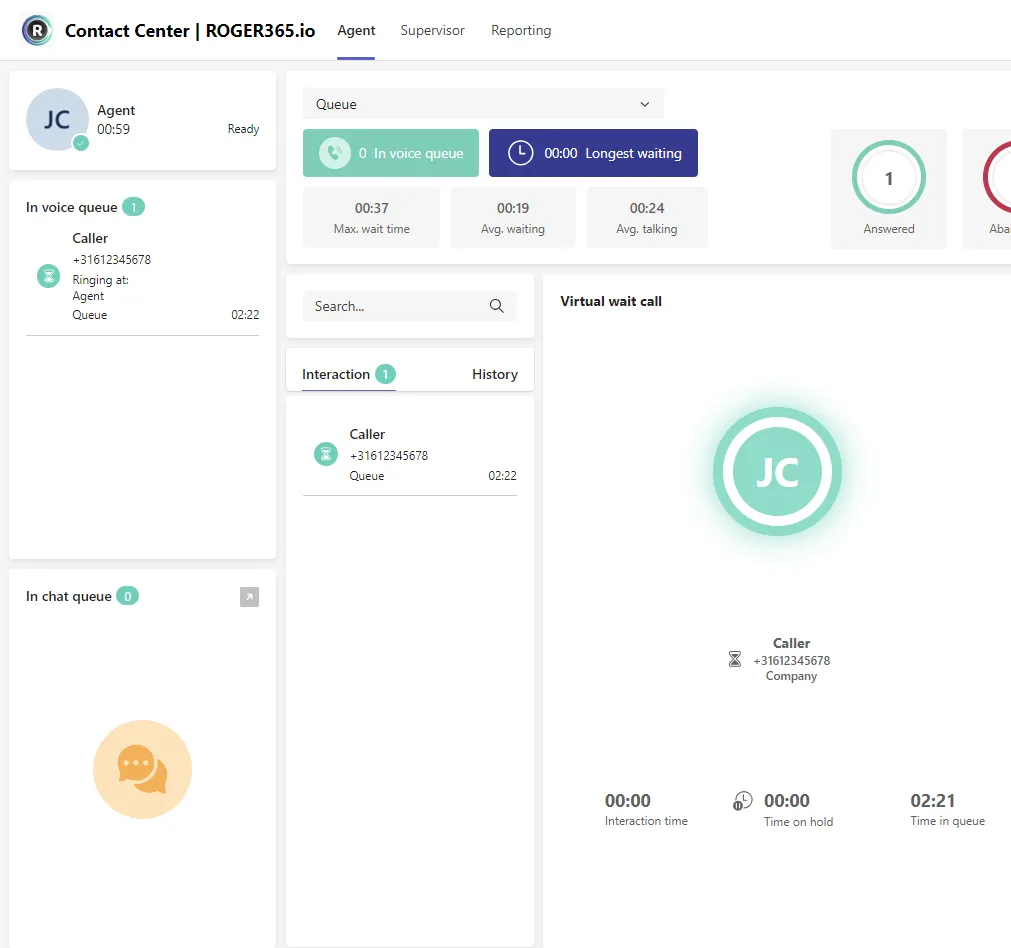
Taking this call as an agent will send a Teams call invite, which upon accepting will send call invite to a caller.
Note: This option must be configured within the callflow designer, check Make Call Virtual action.
Conference call
It is possible to invite other participant(s) to an active call via Conference call option.
First an agent has to be in active call, locate desired user in the search box, click on the 3 dots at far right side of the user (More Actions) and hit “Invite participant” button:
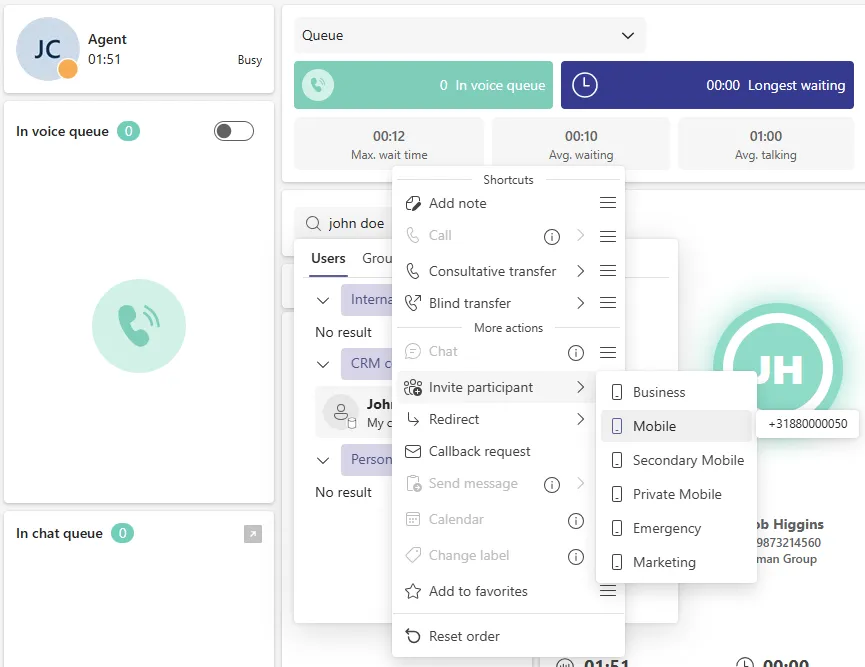
After picking one of the possible calling methods (PSTN/Teams) a chosen user will be invited to a call. This feature is 3-way audio meaning that caller, agent and invited participant will talk to each other.
After an invited user answers for a call, call control and transfer buttons will become unavailable except of Hangup until invited participants will be removed from an active call.
Outbound DTMF
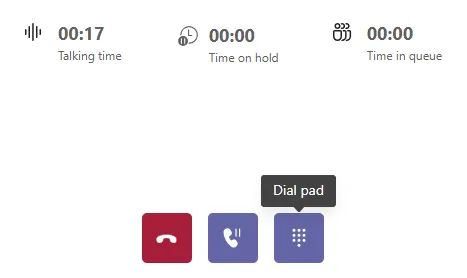
An agent can use the DTMF dial pad when doing an outbound call to a number with IVR menu. Button “Dial pad” appears after answering for an invite for outbound call:
Cancel consultative transfer
There are often situations where the consultative transfer has been made to the wrong person or selected person does not answer. An agent can use Cancel consultative transfer option to keep caller On-Hold which enables agent to plan further steps.
After performing a consultative transfer to the selected contact, an icon will appear next to the contact’s name with the label “Cancel transfer”:
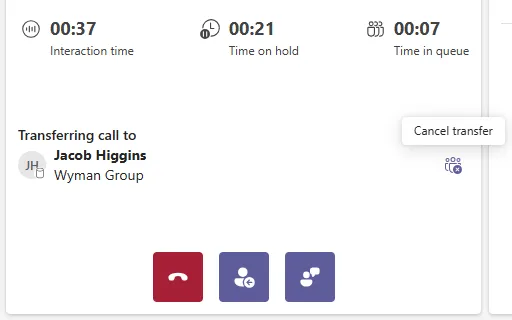
The Cancel transfer option can be used before or after invited target joined a call. Keep in mind that pressing “Resume” button (middle button) still disables Hold from the caller.
Call Park
It is possible to park (hold) the caller for yourself or another agent from the Call Park group configured earlier.
First an agent has to be in active call, and locate first button from right named “Park call”:
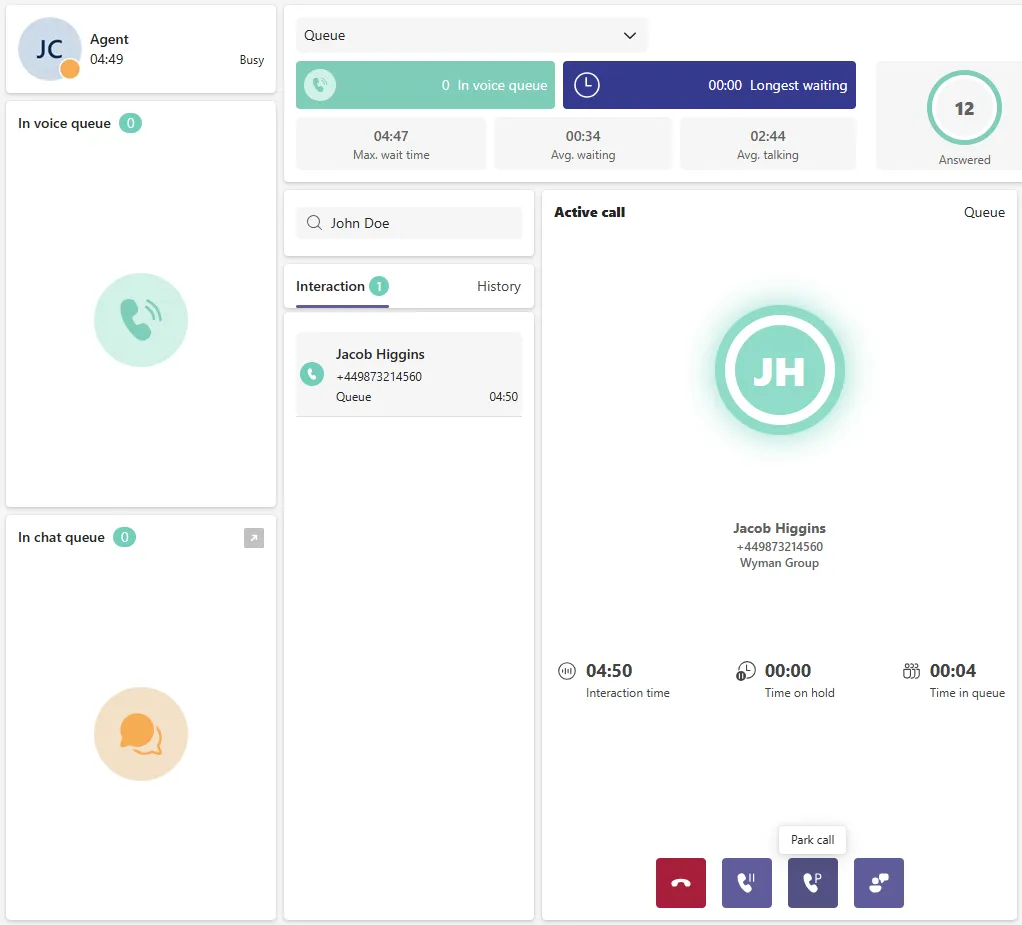
Select Call Park group (available after assignment):
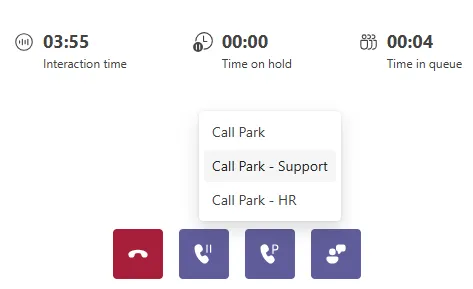
The call is now parked, it is possible to assign note to parked call which is visible for every agent in the same Call Park group. To unpark the call, an agent have to hover over parked call, press “Unpark Call” button, and accept incoming call:
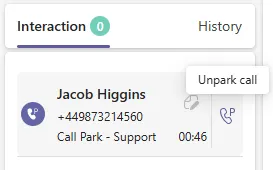
Ensure that your Teams status is not set to 'Do Not Disturb' or any status that automatically rejects incoming calls before un-parking a call. Additionally, do not set your ROGER status to 'Available' during an active call, as failing to observe this may result in the agent receiving an additional call while the current one is still in progress. If the same call is parked a second time, the previously assigned note will remain visible — be sure to update it if necessary.
Reporting
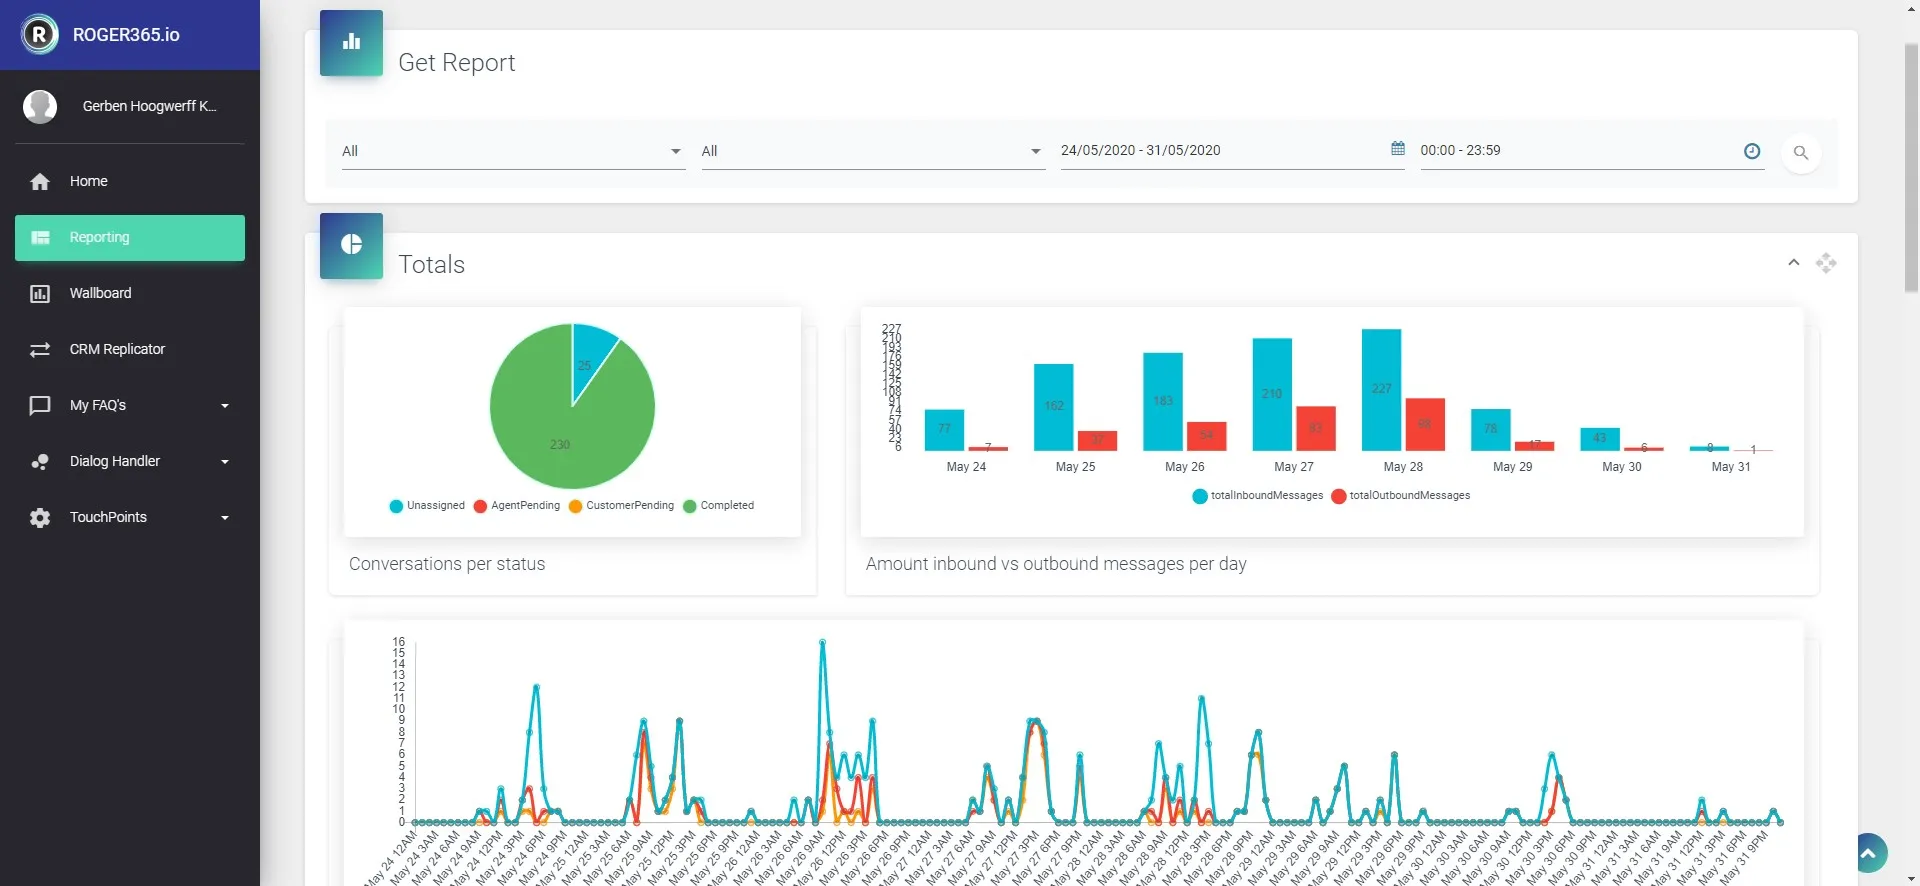
The following report information is by default available trough the administrator portal. A selection per TouchPoint is possible or you can choose a combined overall report. Various types of information is available:
- Average response time
- Average time unassigned
- Average messages per conversation
- Conversation per status – number of assigned/ unassigned conversations, agent or customer pending or completed
- Amount inbound vs outbound messages per day
- Conversation totals
- Agent Totals
- SLA Per Agent
When more information is needed the Microsoft Power BI connector can be used to create your own detailled report.
Wallboard
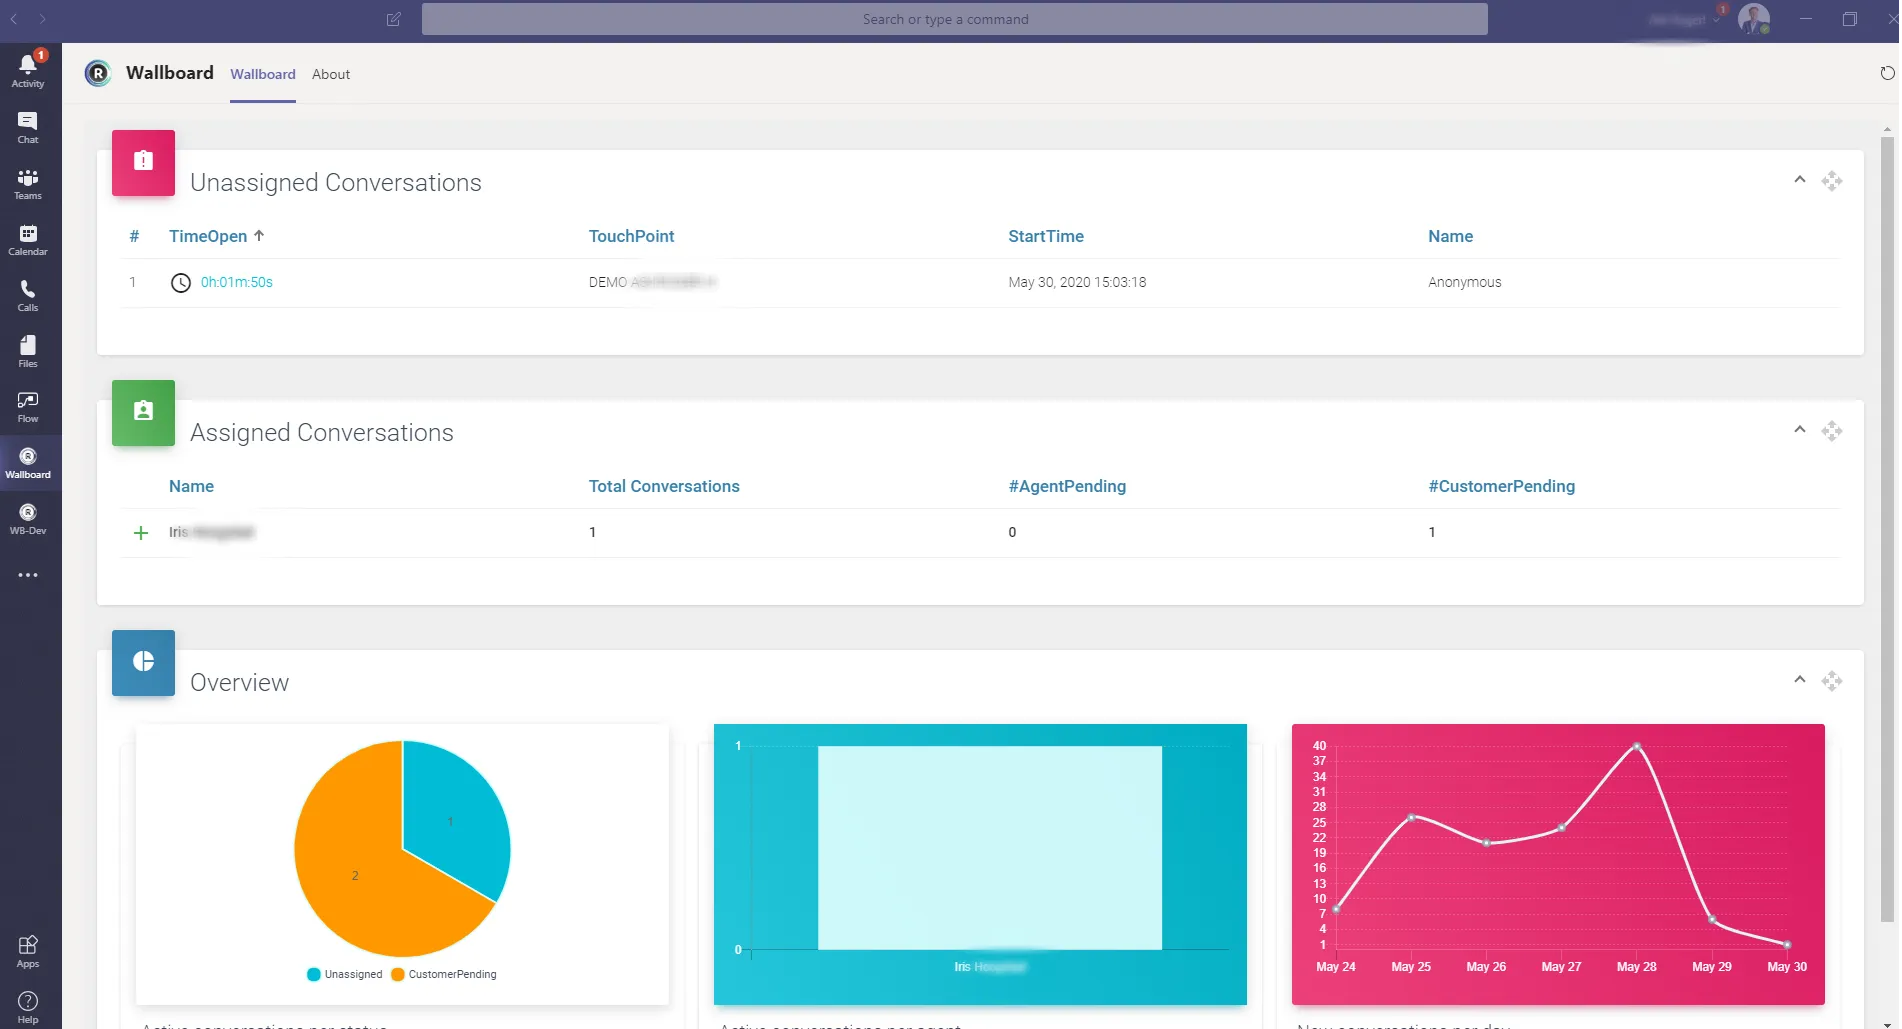
To keep track of all active conversations we have a Wallboard for you available. It shows you in realtime new incoming conversations, to who a conversations is assigned and what the status is. You can access the wallboard from the Administrator Portal, or by installing our Wallboard App in Microsoft Teams.
You can access a conversation directly from the Wallboard by clicking on it.
Workflow & Dialog handler
With the very advanced Dialogue Handler you are in complete control what happens with incoming conversations. You can change the flow at any time by just dragging and dropping the right components. Several predefined template are available for you to use as an example, or of course one of our partners can help you.
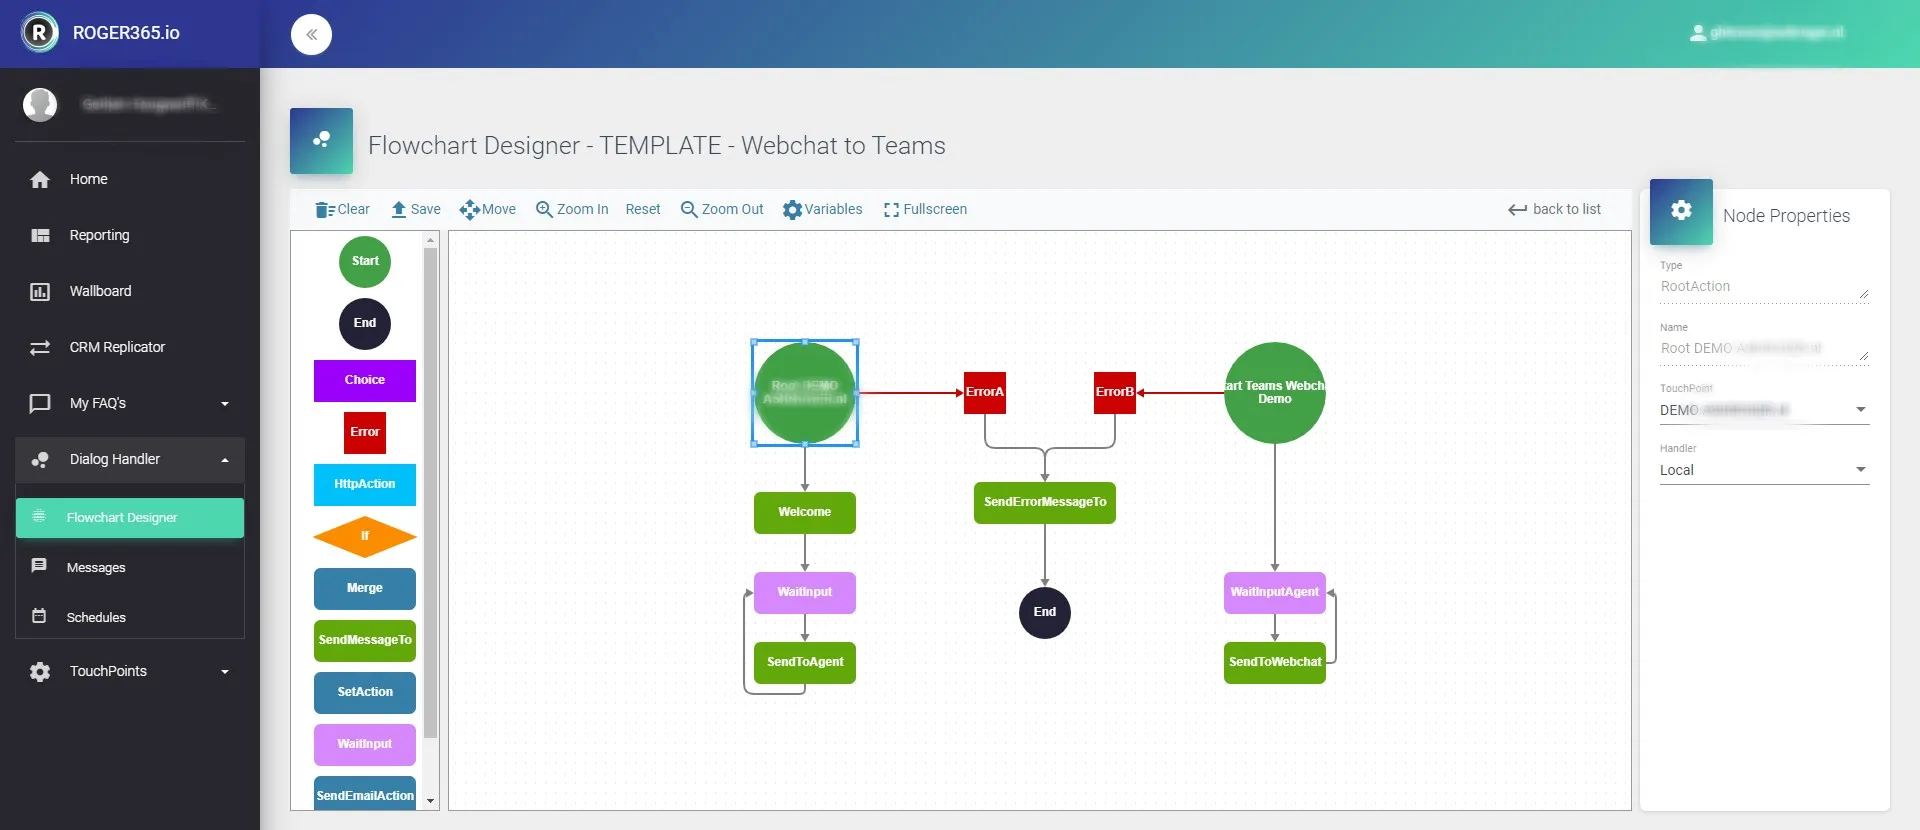
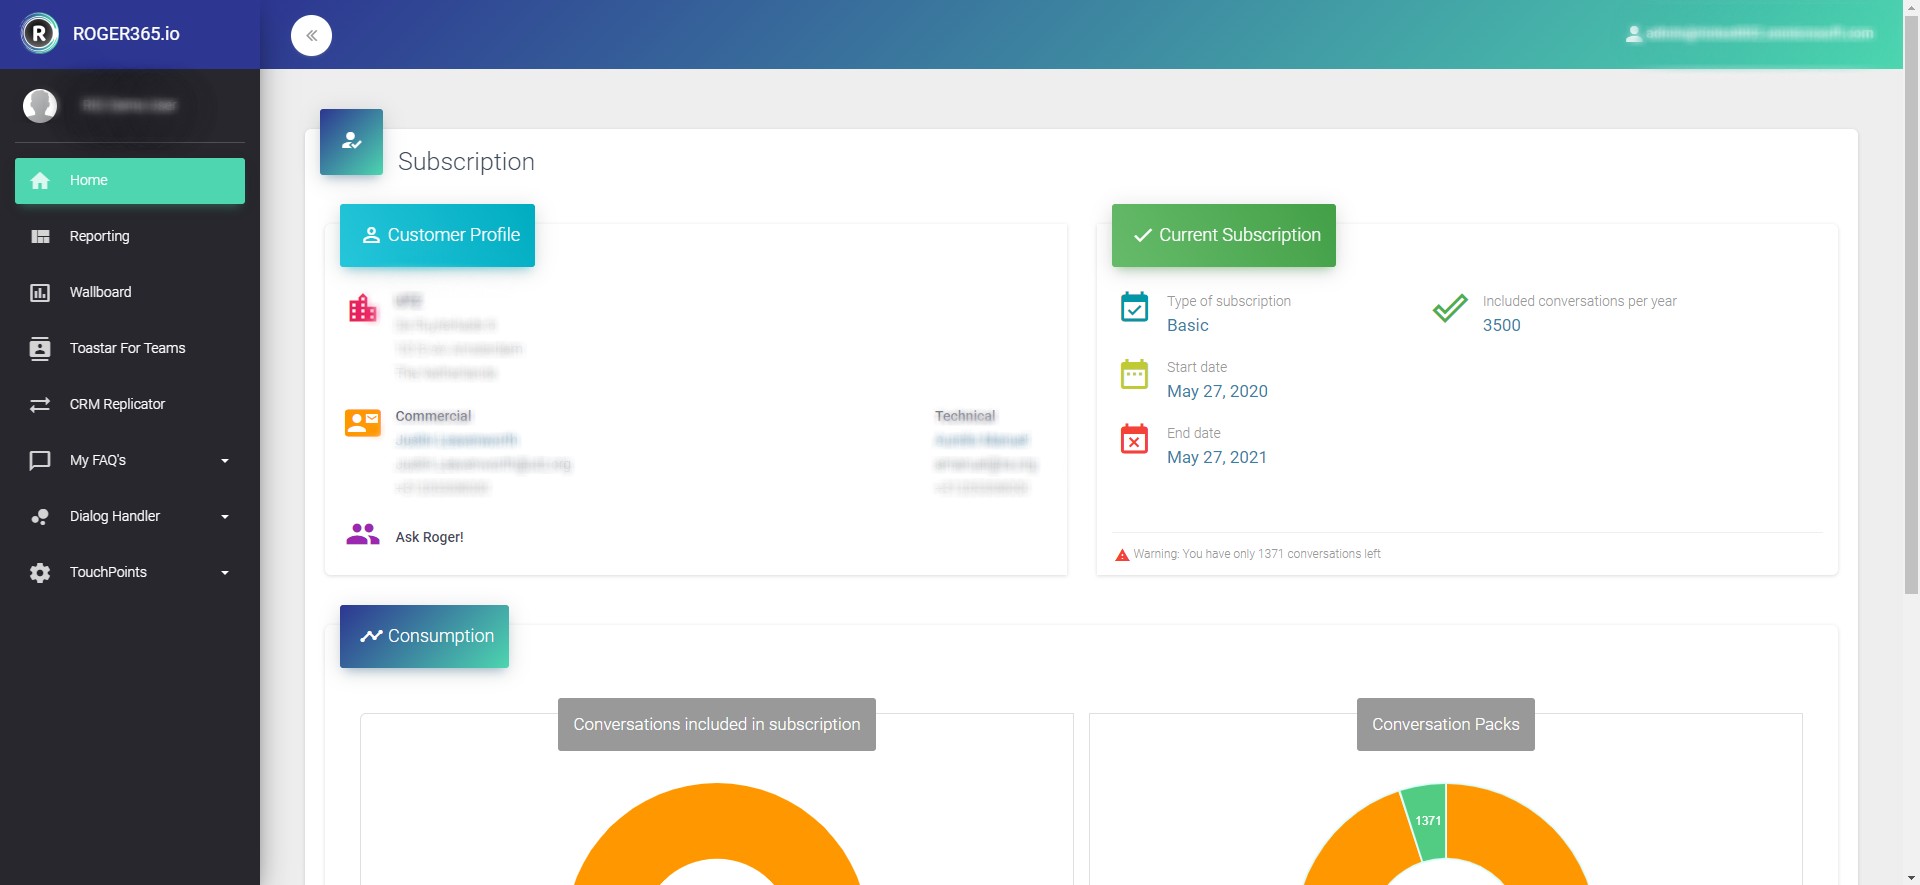
Administrator Portal
Via the administrator portal you can manage all the functionalities of the ROGER365.io platform. You can change/add your TouchPoints or how your incoming conversations are handled. In the portal you can also view a detailled report of your usage. Also more advance tasks can be done here, like connecting your CRM system.
When you are using a chatbot to answer frequently asked questions, in the portal you can manage the database of questions. When the chatbot is used by customers you can evaluate which questions are being asked so you can improve and train the chatbot to become better every day.
You can use Single Sign On to access the portal so no need to remember an extra login
Assign Agent
A big advantage of using Microsoft Teams to handle conversations is dat everybody can collaborate, but how do you know who will be handling the conversation? That’s were the Assign Agent feature comes in. When a new conversation arrives it will have the ‘unassigned’ status. The agent who will handle the conversation can click the Assign button, or you can assign the conversation to another team member. A notification will be send to the agent that a conversation has been assigned.
Once a conversation has been assigned, it will be used in the reporting module and on the wallboard.
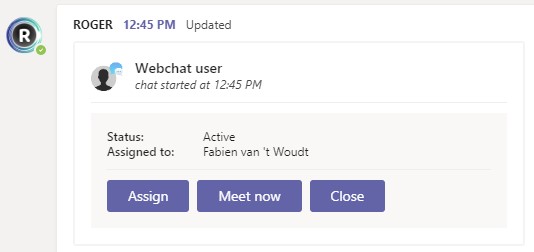
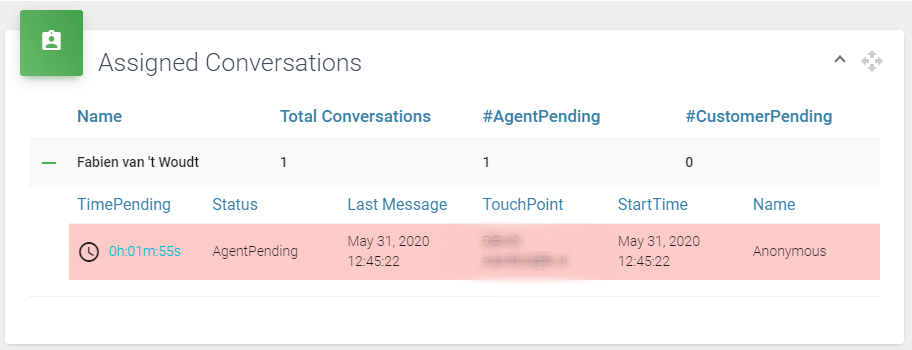
Meet Now - Escalate to Voice/Video
Sometimes a chat conversation can be difficult, for example when you want to explain or show certain things. Wouldn’t it be cool to upscale your chat to a live voice and/or video conversation? With the Meet Now feature this is very easy.
During a chat conversation, just push the Meet Now button. The ROGER365.io platform will create an instant meetingroom which both parties can join. When both parties click the link, they join the meeting. If the webchat user doesn’t have the Microsoft Teams application installed, then he/she will join using their webbrowser. For mobile users it’s mandatory to install the app via the appstore. They don’t have to signup for an account, installing the app is enough.
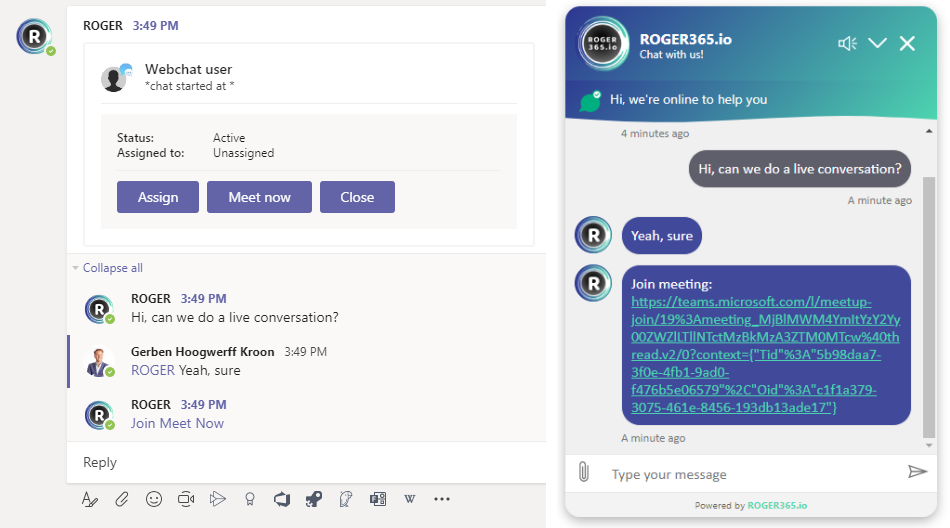
From Teams a Meet Now meeting is initiated. The webchat user receives a link to the meeting

Enhanced Scheduling + Callback notification
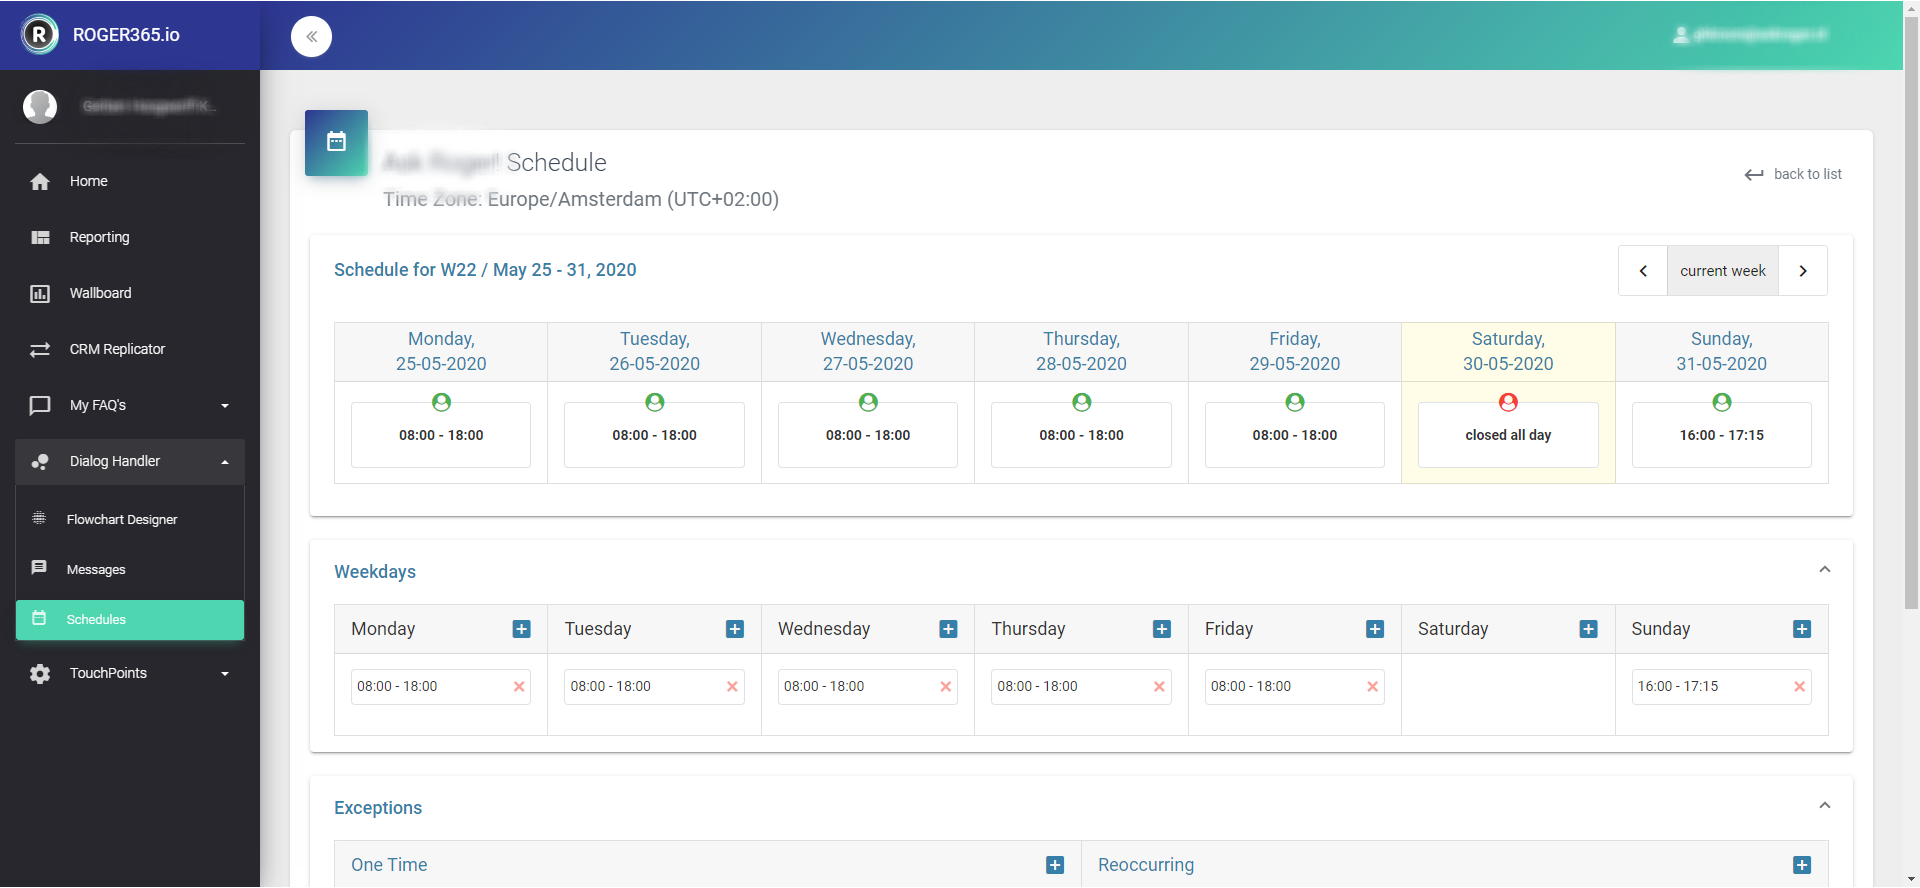
When you want to handle incoming conversations differently for example during out of office hours, you can add an enhanced schedular to your TouchPoint. You can create normal week schedule and add (recurring) exceptions for example holidays.
For example: during office hours your chatbot handles frequently asked questions and if it can’t help your customer completely, the conversation can be escalated to a Microsoft Teams channel. But when your office is closed, you might want to handle this conversation differently. Maybe by asking the customer for his phone number so you can call him/her back the next day. This callback information can be posted in a Teams channel or send to you by email.
You can add our smart chatbot to your TouchPoints. The bot can provide answer to frequently asked questions. No need to -exactly- phrase the question, our bot is smart enough to intepret what the user is asking. If the user is not happy with the answer, we can redirect the user to a Teams channel to talk with a live agent. The agent will receive a transscript of what the user has been asking, so no need to ask the questions again.
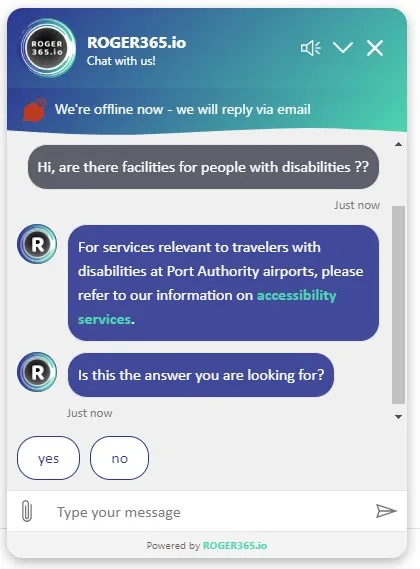
Altough you’re offline, users can ask questions to the smart bot
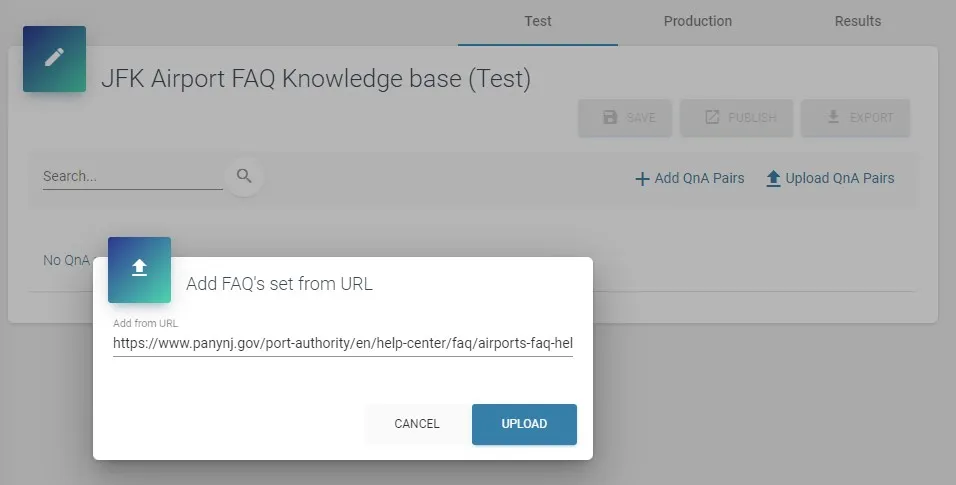
If you already have a FAQ on your website we can automatically crawl trough you site to create your initial database. Also importing XLS or CSV files are supported.
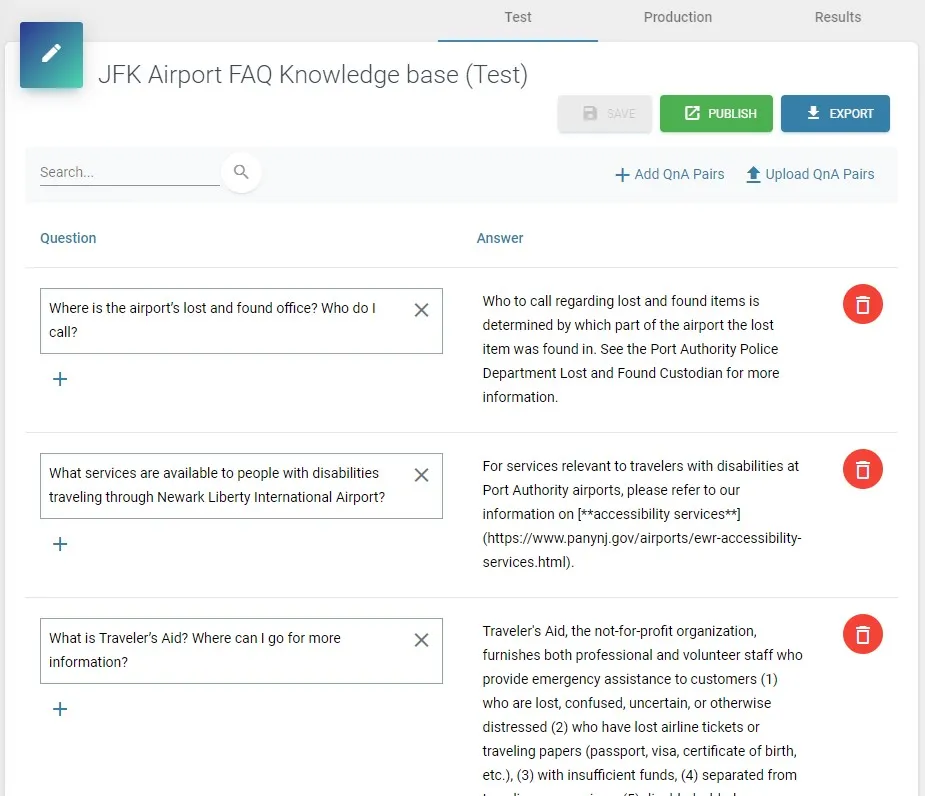
The database is filled with existing questions. You can easily extend the database by added more questions to the same answer to make your bot even smarter.
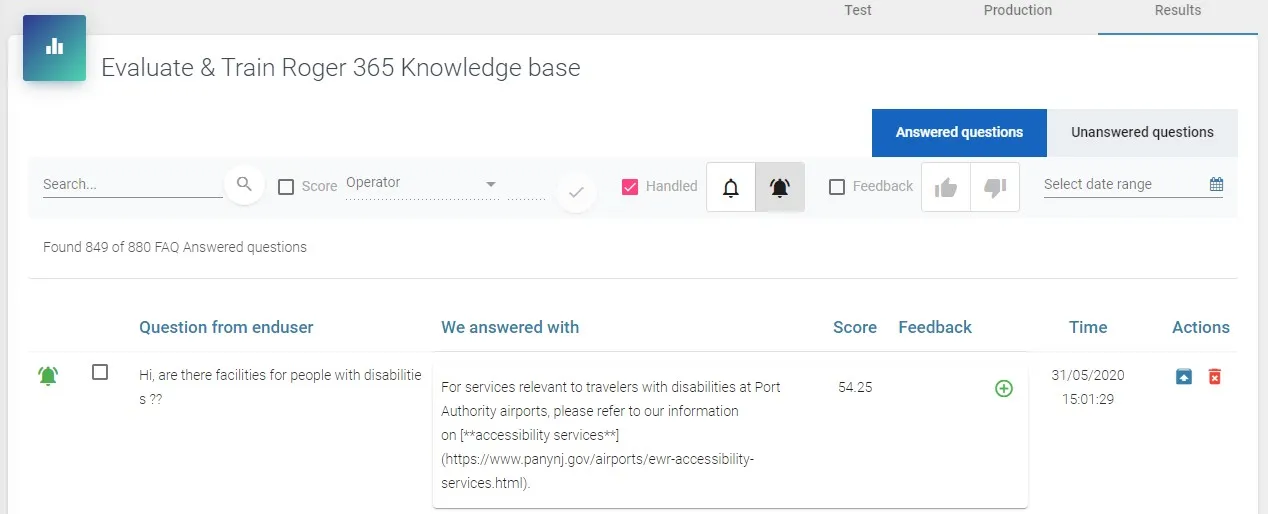
All questions asked by users are stored and you can evaluate them reguarly. Maybe add additional ways a question is being asked, or add answers to questions which aren’t in the database.
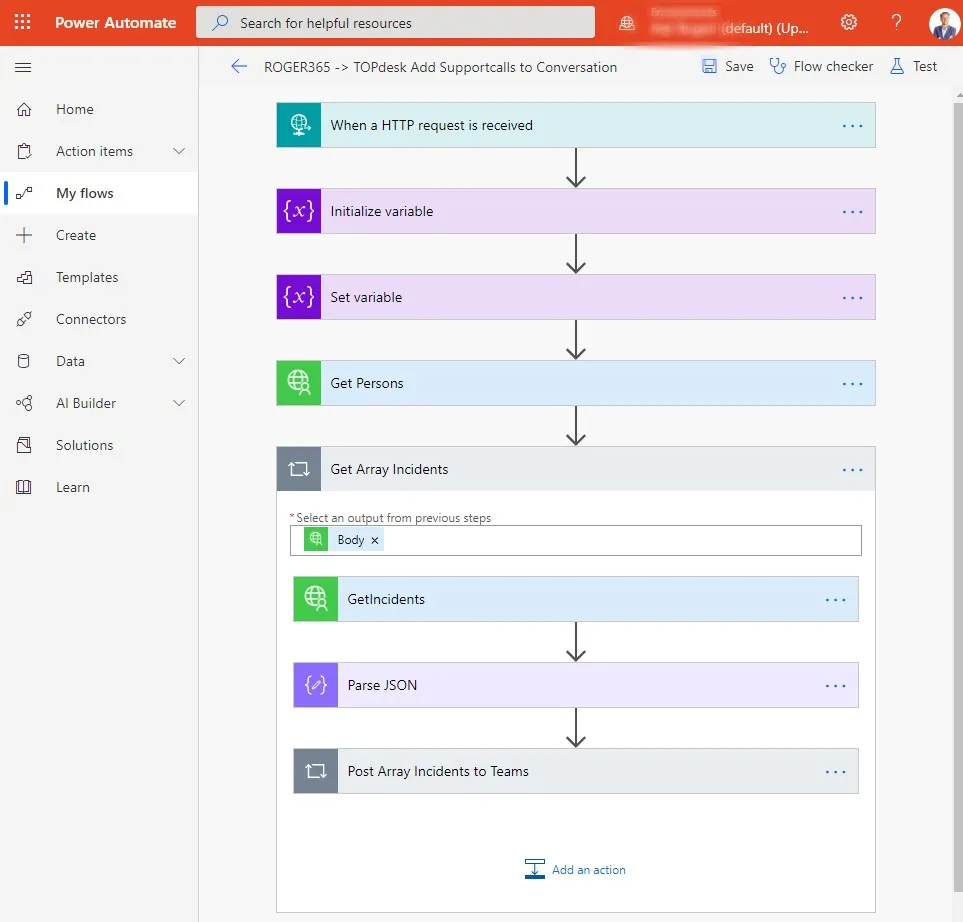
Power Automate is a service that helps you create automated workflows between your favorite apps and services to synchronize files, get notifications, collect data and more.
ROGER365.io can send triggers to Power Automate to start automated workflows. For example a trigger can be send when a new conversation arrives. The information can be used to query a CRM or servicemanagement system to retrieve information like open opportunities or open incidents. This information can be send back to Teams where it will be added to the conversation.
Another solution could be to automatically fill a CRM timeline, or change the light in your office to pink if your favorite customer sends you a message 😉
Search your CRM for contacts from Teams
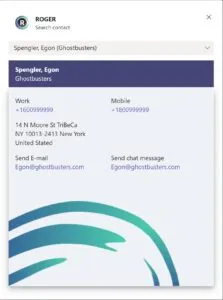
With the phonebook application, you can quickly search from Teamsin your CRM contacts database. By just entering a few characters from a contacts name or company, the phonebook shows you the found contacts. On the results page you’ll see the contacts address, phonenumbers and email address. By just clicking the phonenumber a call from your Teams client will be initiated. You can also click the email address to send an email or choose to start a chat conversation from Teams with the found contact.
Embedded in Teams
The phonebook is accessable via the conversation context menu everywhere in Teams. By just clicking the ROGER icon and selecting ‘search contact’ you can start searching.
Then just search for a contact, company name or phonenumber. You can also use a wildcard like *smith or *12345. When you select a found contact, all data is displayed
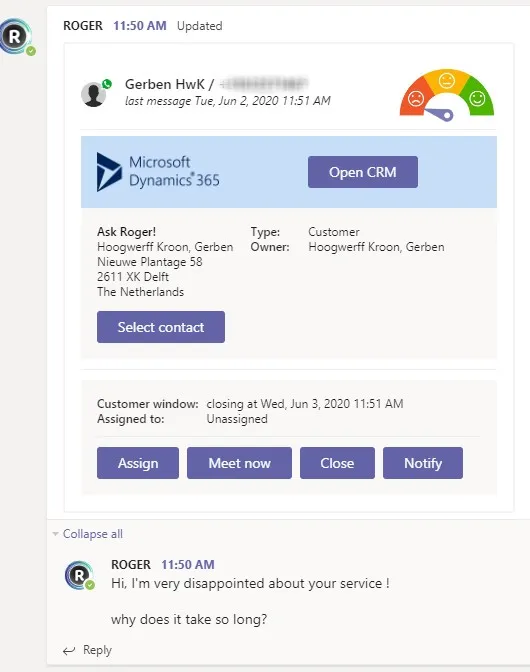
With sentiment analysis you can monitor your conversations in realtime. Every time the client sends a message, we’ll rate the sentiment of that message using an Artificial Intelligence algorithm. Every time a new message arrives we sum the rating of all individual messages and calculate the average.
The sentiment is displayed at the conversation, the wallboard and Contact Center Hybrid Queue.
SMS
Text messaging, or SMS, is still very often used by a lot of users. The biggest advantage is that you can send it to every mobile phone, no need to install an app like WhatsApp or Facebook. The downside is that rich media messages, like sending images, are not available. Sending emoticons although are available.
Obtaining a SMS number
To start using the SMS TouchPoint you need a subscription from a SMS service provider (like cm.com) They will assign you a number and the necessary keys. With these keys you can Add a SMS TouchPoint in the ROGER365.io portal.
WhatsApp for Business
Using WhatsApp as one of your communications channels is getting very popular. Especially since WhatsApp offers a business subscription. In order to smoothly handle incoming WhatsApp conversations we’ve added WhatsApp for Business as one of our available TouchPoints.
Users can send a WhatsApp message to your company number, which we will route to a channel in Microsoft Teams. If you would like to see the CRM data of the user, then just connect your CRM system like Microsoft Dynamics 365, TOPdesk or others to our platform.
Features
Here’s an overview of the available features. Some are not available yet by WhatsApp. If this changes in the future, we will add them to the platform.
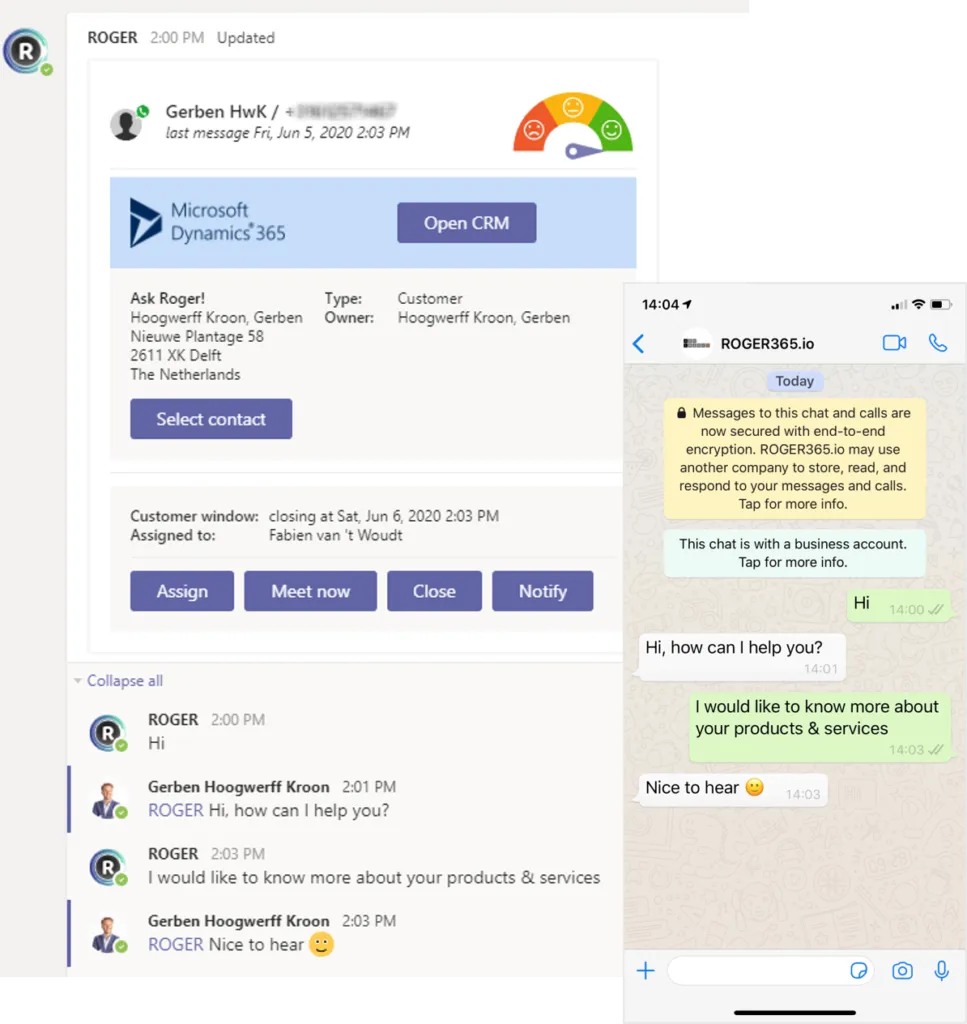
Sending/Receiving Images and documents
From WhatsApp a user can send images/video’s and attachments to the Teams user. The other way around is limited: you can send emoticons and inline photo’s to WhatsApp. Inline means pasting a photo into the textbar. Using the attach icon in Microsoft Teams is currently not supported. As an alternative you could send a hyperlink to a OneDrive files, or another online filesharing solution.
To send a photo inline from the Microsoft Teams channel to the WhatsApp for Business touchpoint, please follow these steps:
- Mention the ROGER bot with “@” in the Reply section under the initial WhatsApp user message in your Microsoft Teams channel.
- Immediately after mentioning the bot, paste the image (Important: do not use any spaces and enters!).
- Send the message.
Template example: “@ROGER<image>”
Notes: From your clipboard, paste the copied photo by pressing CTRL+V. You cannot send videos using the inline method.
Initiate WhatsApp Conversation (WhatsApp Out)
It’s also possible to initiate a WhatsApp conversations with someone. If enabled, you can click the ROGER icon in the icon bar when you click the ‘New Conversation’ icon in a channel in Teams. If a WhatsApp number is configured with that channel, that number will be automatically selected as the ‘sending’ number. If you initiate the conversation from another channel, then you are given the option to select the correct TouchPoint.
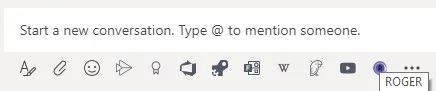
You can search the CRM database for the mobile number of a contact, or enter a number manually. After selecting a number, the ‘opt-in’ status is shown. To send a WhatsApp message to a user, WhatsApp requires that the user has given you permission to send messages. You are responsible to ask and register the opt-in from the user. We have an API available to register the OPT-IN permissions.
You can only send pre-defined template messages (WhatsApp charges you for sending a template). Directly after sending a message, a new conversation is created in the MS Teams channel. When the WhatsApp user responds to the template message, you can continue the conversation.
Smart Chatbot Integration
If you would like to automate the conversation with the user, you can integrate our Smart Chatbot solution into your WhatsApp TouchPoint. When a user initiates a conversation first the chatbot can try to help the customer and answer frequently asked questions. When the user chooses to escalate to a live agent, the conversation is routed to a Microsoft Teams channel. The transcript of the conversation with the chatbot will be presented to the agent.
Webchat
Webchat is one of the TouchPoints you can add to your website. Just add a few lines of code to the body of your website, and you’re ready to go! Your website visitors can easily start a conversation with you, and of course this conversation is routed to a Microsoft Teams channel.
Look and feel
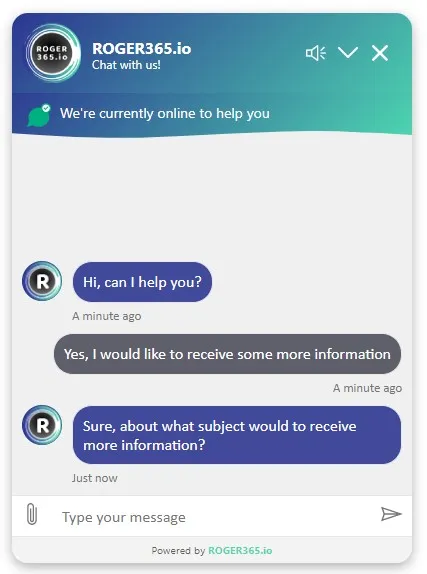
In this screenshot you see the default layout of our webchat module. The styling and heading of the webchat module can be adapted to your own company branding.
Status Message
You can set a default status message like ‘We’re currently online’ which users will see. This can be based on a schedule so you can show a different message when you’re unavailable. We support multiple languages and show the right message based on the users’ browser.
Notifications
When a user sends a message they often browse to another tab or application. When a response is received the user will receive a sound notification. When the webchat is minimized the sound is also played and the user sees an ‘unread’ messages notification.
Attachments
When a user wants to share an attachment, then this can be easily done trough the webchat interface. The attachment is then send to the active conversation in Microsoft Teams.
Microsoft Teams
The webchat conversation is send to the right channel in Microsoft Teams. From here the conversation can we assigned to the person who will handle the session. Also the conversation will be displayed on the Wallboard. When it’s better to have a more personal way of communicating the conversation can be transformed in to a voice and/or video call via the Meet Now button.
After the conversation is finished, the session can be closed.
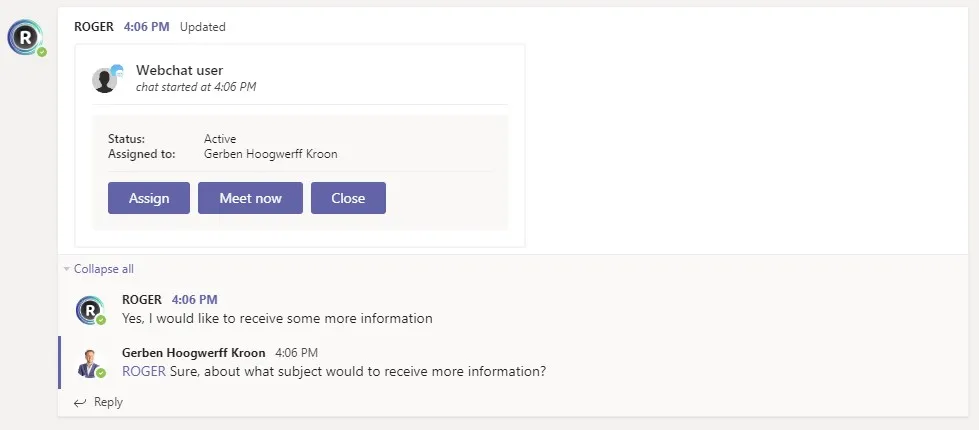
The native Microsoft Teams app, Contact Center | ROGER365.io, is available to all configured agents and supports chat interactions from various channels like messaging and social media when Social Queues are enabled. Although chat can be handled without Social Queues, using the Contact Center app for chat requires Social Queues to be enabled.
Internal messages
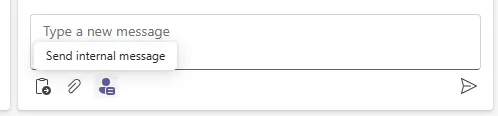
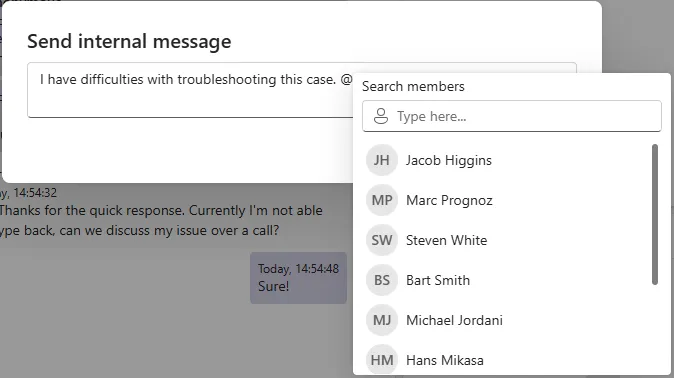
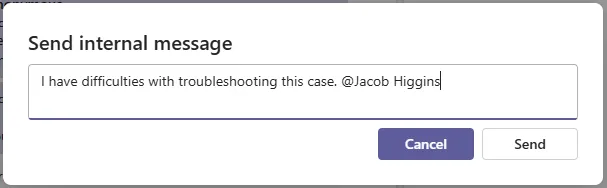
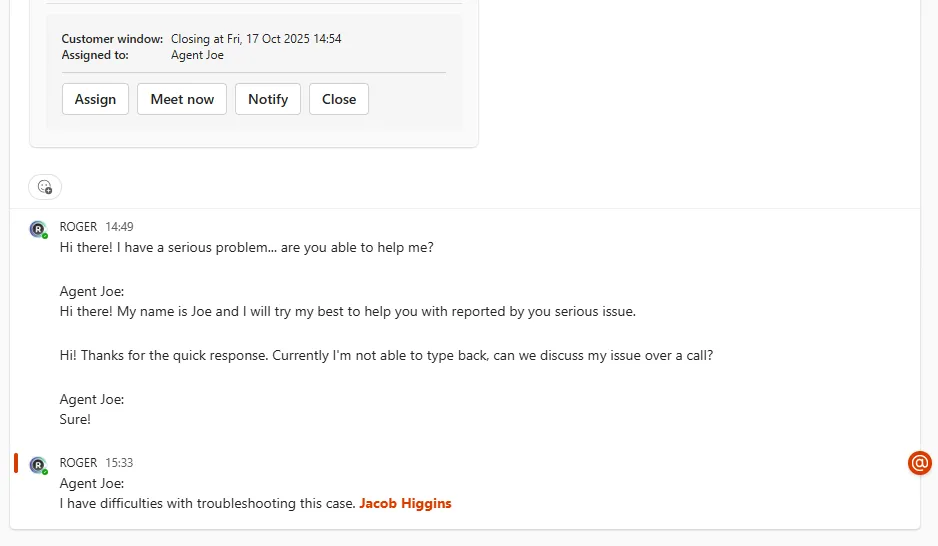
During various social conversations there are often situations where you would like to leave internal message (note) for yourself or other colleagues. With Internal messages feature it is possible to leave internal note and/or mention colleague for help. Internal messages cannot be seen by the customer.
Call button
During WhatsApp conversations, it is sometimes better to escalate certain topics to a call. With the Call button, it is possible to directly call a WhatsApp participant using a previously configured Voice Queue that is enabled for outbound calling.
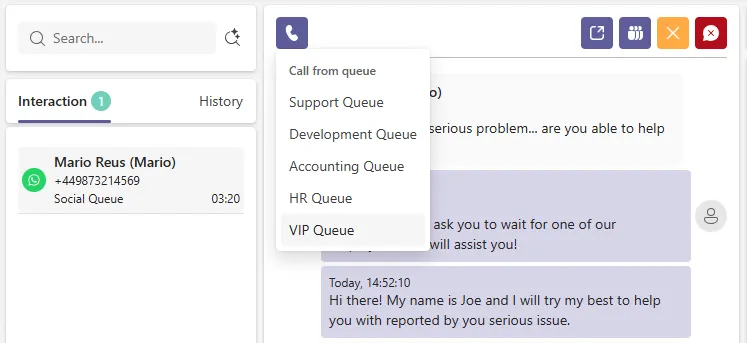
The Call button will be disabled when the phone number format of a WhatsApp participant is incorrect.
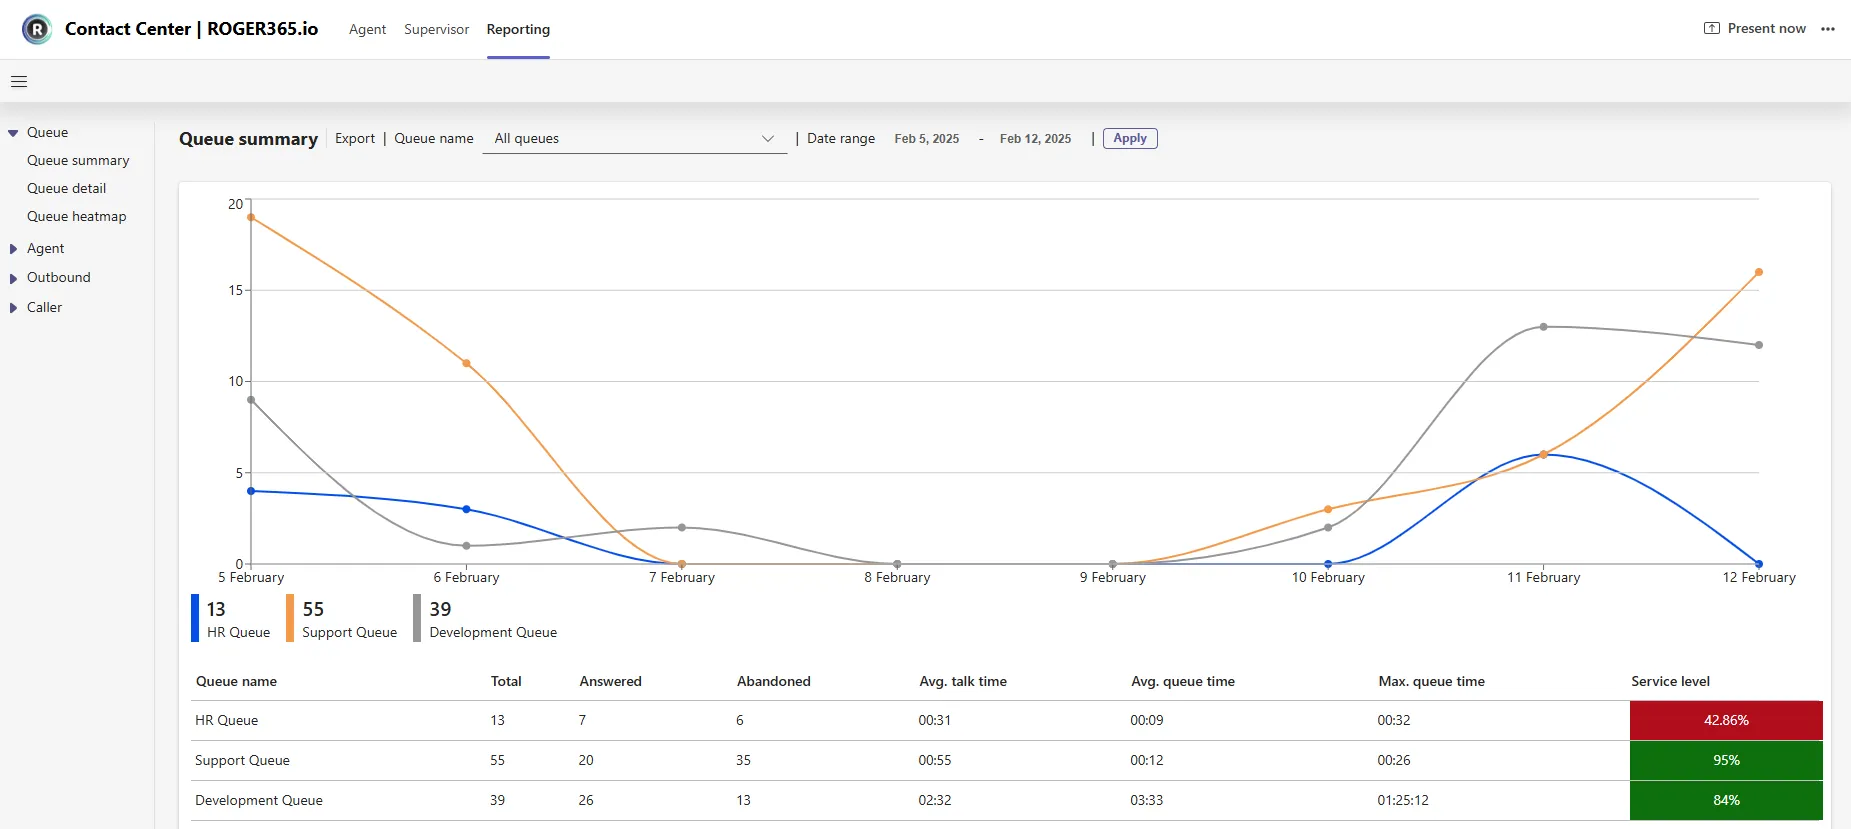
The Reporting page shows information at a queue, agent, or caller level. Access is granted via the Report Viewer role, assigned at the Queue level, giving the user access to reports related to that queue.
Queue-based reports (such as Queue Summary, Queue Detail) show data scoped to the assigned queue only.
Agent-based reports (such as Agent Summary, Agent Detail, Agent Log) reflect an agent’s overall activity, so they’re organized around the agent rather than the queue. As a result, a user with Report Viewer access to an agent through one queue also sees that agent’s data from any other queue they belong to.
Caller-based reports (such as Caller Summary, Caller Detail) are organized around the caller rather than a single queue, and a single call may involve more than one queue.
The information can be downloaded as a CSV file, or accessed via an API.
Queue Summary
Queue Detail
Agent summary
Agent detail
Agent log
Queue detail (Outbound)
Agent detail (Outbound)
Resource Account (Outbound)
Caller summary
Caller detail
Caller not queued
Live queue & Agent Statistics
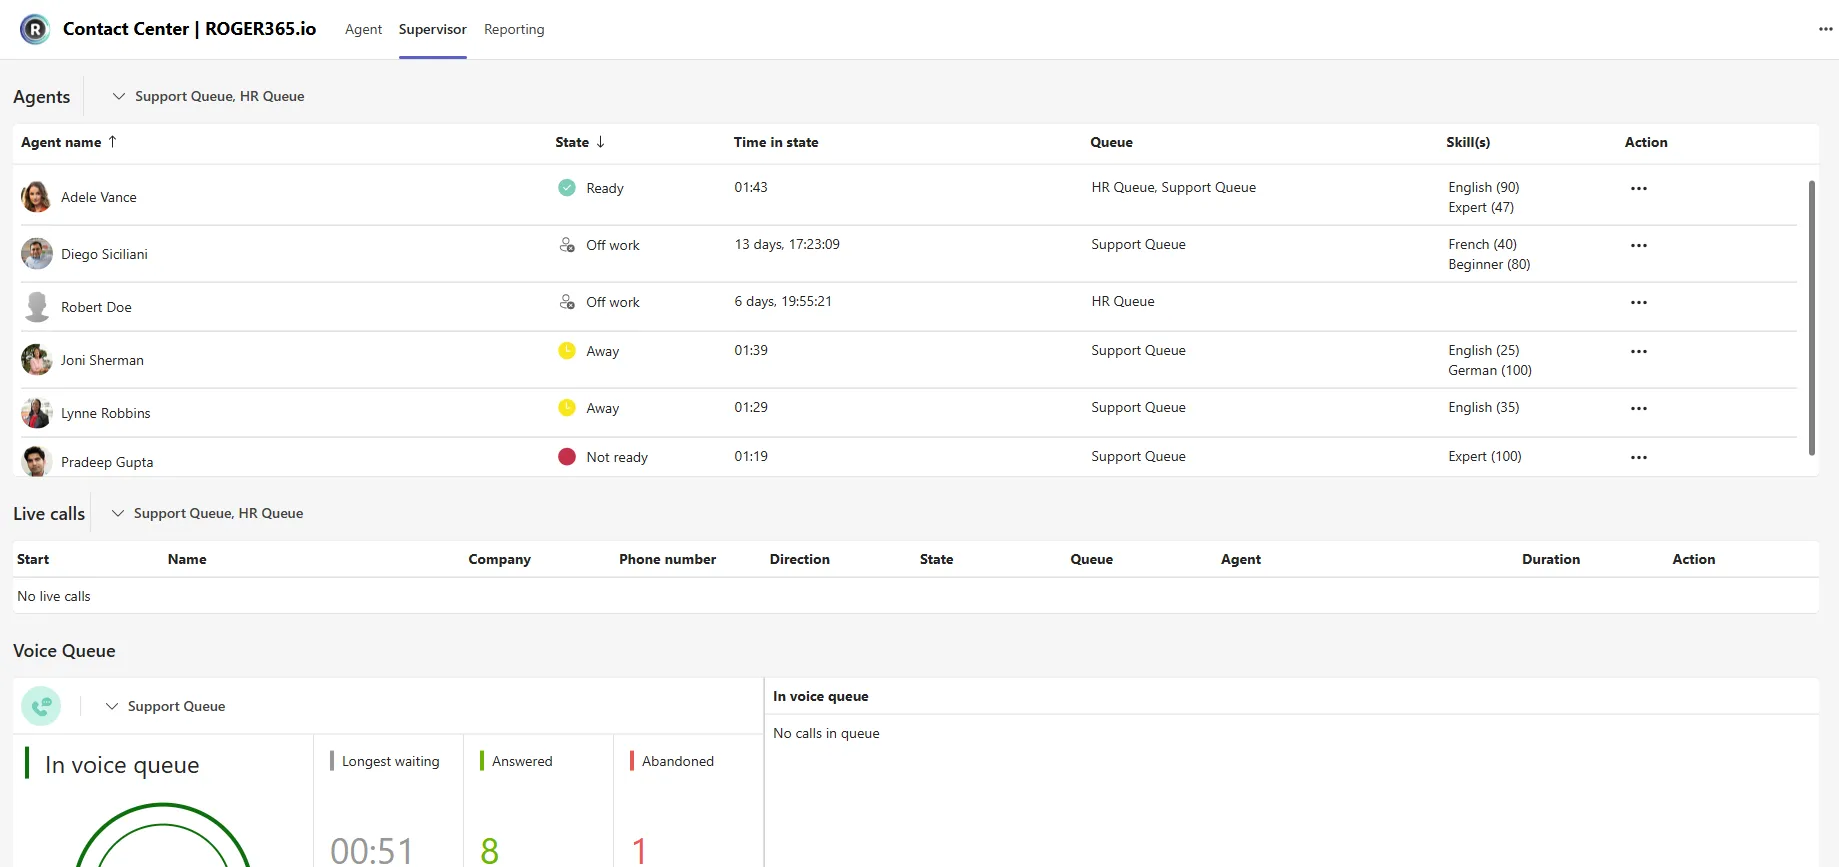
In the supervisor tab, live information is shown about all queues. This includes metrics like amount of callers, total calls answered, total calls abandonded, longest waiting etc. Also information about agents and their current status is available.
Agent Status Overview & Override
An overview of all agents shows their current status and the amount of time since the last status change. Also is visible in which queue the agent is logged into. As a supervisor you can change the status of an agent and log them into a queue.
Live Calls Overview
All live calls which are routed through the Contact Center application are visible. This also includes name, company and with which agent there are connected.
Live Chats Overview
All live conversations connected via Social Queues and routed through the Contact Center applications are visible. This includes information such as the Start time, user name, Company, Phone number, and so on.
Monitor & Join
A supervisor can monitor or join active calls. With monitoring the supervisor becomes a participant in the call, but the microphone is muted. Joining the call means the supervisor can speak with the agent and caller.
Queue Service Level
The Supervisor tab provides visibility into the configured Queue Service Level for specific queues. This feature is particularly valuable for large organizations, offering insights into the effectiveness of call handling across different queues. The Supervisor page displays the Service Level (in percentage) for both Voice and Social Queues.
Drag & Drop
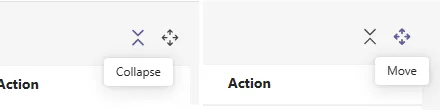
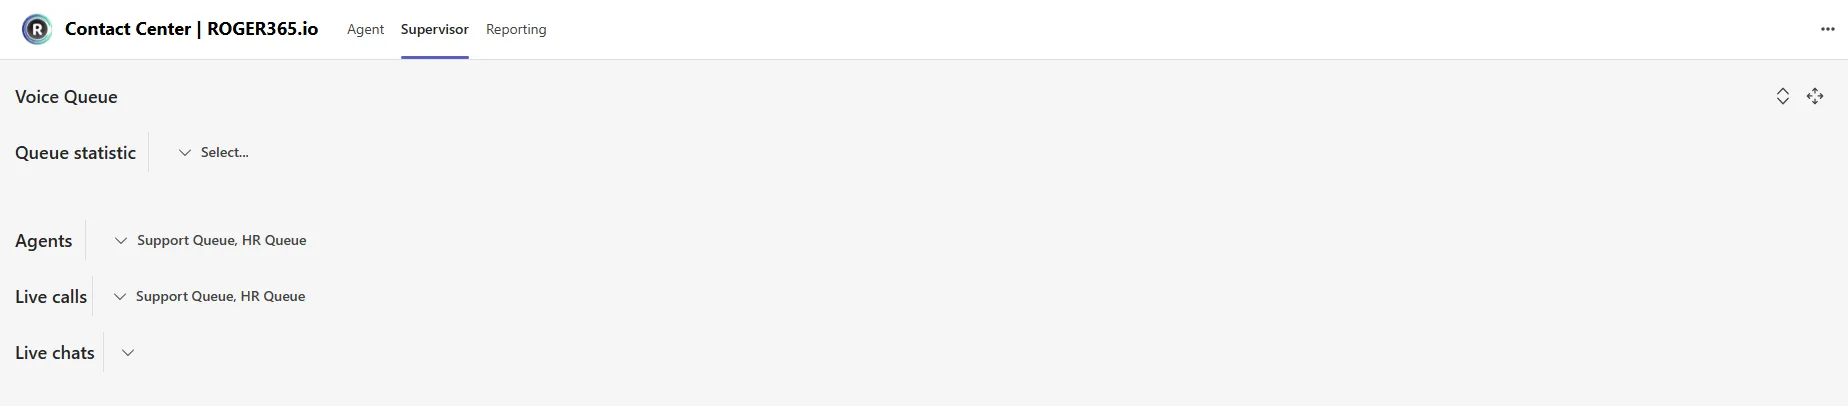
Each section of the Supervisor tab can be moved around or collapsed on agent’s demand. This feature is useful for the agents who prefer to have most important information on top of the tab and/or collapse not needed ones.
To “Collapse” or “Move” certain section, an agent should press, or press and hold highlighted buttons at the far-right side of specific section:
A native Microsoft Teams app is available for every ROGER365.io Contact Center Agent. The app offers all kind of functionalities and insight of the call queue.
Availability & Reason Codes
Every agent is able to set their own availability status: Available, Not Ready, Away & Off Work. When an agent is in an active call, the status is changed to Busy. In addition to the Away status, specific reason codes like Lunch or Training can be configured via the Admin portal.
Call parking
An agent is able to park a call for himself or other agent from Call Park group. Caller will be waiting on hold till one of the agents will unpark (unhold) the call, ideal for demanding users where only the best of the best agents can handle the situation, or very busy contact centers that prefer not to advise callers to hang up and call back later.
Conference calls
An agent can invite other participants to an active call. Conference call is very useful feature for Agents who need help with a current conversation.
Multiple Queue Login
An agent can log in to multiple queues at the same time. If the agent is configured as ‘Formal’ then he/she is able to login and logout of the queue. To prevent this, the agent must be configured as ‘Informal’.
Wrap up Time
The Wrap up Timer gives an agent some time after finishing the call to process the conversation. For example update the CRM system, or create a support ticket. The default time can be configured in the Admin portal. If the time isn’t enough, the agent can manually add some extra time by clicking one of the buttons.
Live Queue Insight & Statistics
Every agent has insight in the amount of callers waiting in the queue. Per caller is shown the amount of time waiting and in which queue they are. Also on top of the app statistics are displayed about the selected queue. For example amount of calls today, average waiting time etc. Also information about other queue agents is available like amount of agents with status ready, not ready etc.
CRM Integration
If a CRM system is connected, the name of the caller is also shown when waiting in the queue. When the call is offered to an agent, also the company name is visible. For advanced CRM integration you can take advantage of the Powerframe which allows you to create your own applications with the all information needed for the agent.
Customizable Call Action
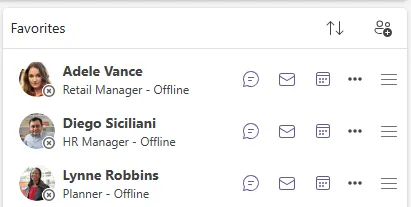
Depending on your activities in the app (whether you’re focused on calling or messaging) certain actions may seem unnecessary. In those cases, you can customize your shortcut actions by selecting which exactly buttons should be visible next to person’s name.
Press ellipsis button (More actions) next to a contact’s name to open window listing all actions:
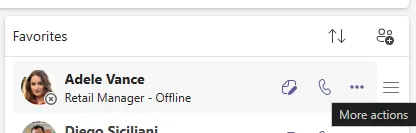
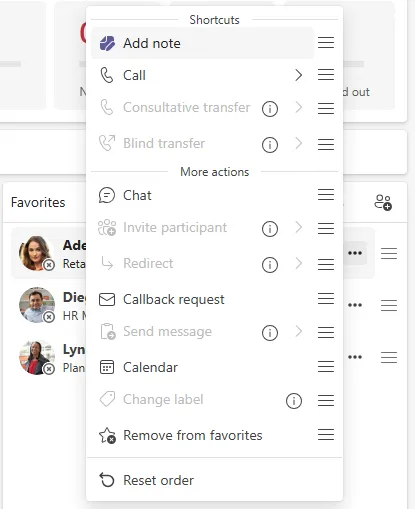
To set selected actions as the shortcut, drag & drop specific action from the More action section via ≡ icon into the Shortcuts. The informational icon next to grayed out action explains the reason behind unability to use this specific action.
Dynamic application scaling
The Agent page of the Contact Center application adjusts its user interface based on the current screen resolution. Whether you’re using a laptop, working with monitors that have high scaling, or simply prefer a smaller screen, this feature ensures that agents have a seamless experience without sacrificing functionality.
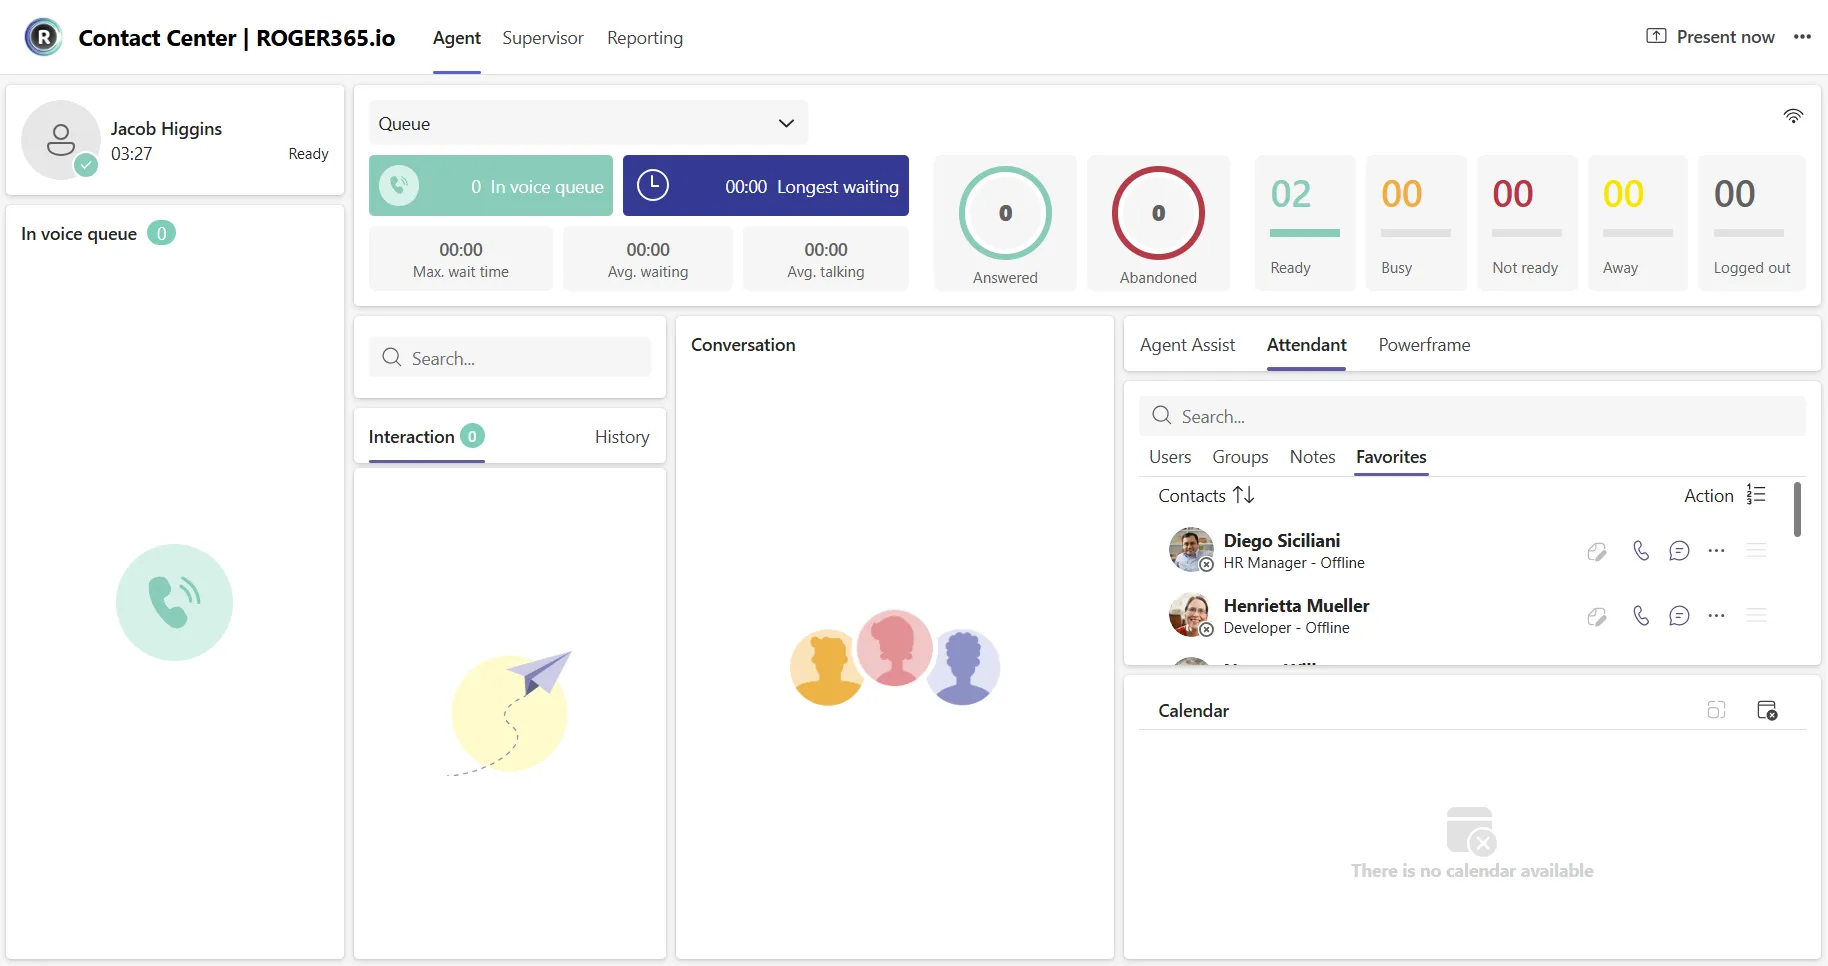
Note: The Favorites section of the Attendant Console is now located next to the “Users”, “Groups”, and “Notes” sections. When the “Favorites” section is focused and a search is performed, the agent will search within the Favorites list.
Collapsible left panel
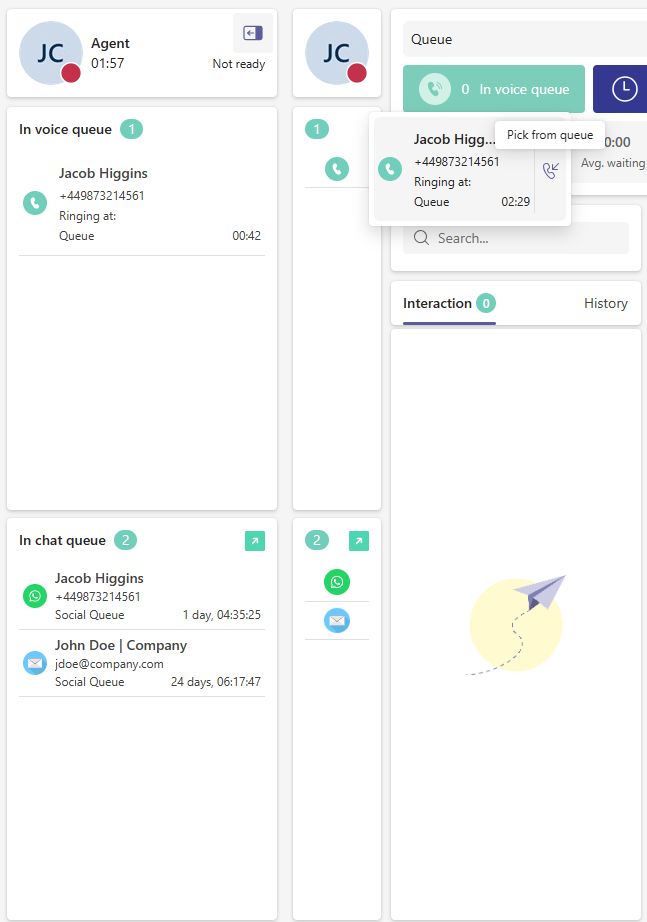
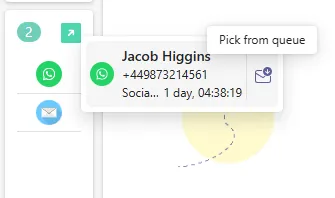
An agent is able to enlarge its working space by collapsing the left side of an application which is responsible for seeing incoming calls or waiting for response conversations. This can be done by pressing on the icon in the top left corner of Agent information. When left panel is collapsed, to answer incoming call or accept conversation, press using left mouse button on the record. Now you can use either “Pickup from the queue” button (visible after hovering mouse over the record), or by pressing right mouse button on the record.
In the screenshot example this button was avaiable to an Agent while having Not ready status. This is possible due to Cherrypicking option.
Group as Favorite
The Attendant Console feature for Agent page of Contact Center application allows to create groups of favorite contacts. This feature is really helpful to organize contacts in defined manner. Favorite contacts which are not part of any group can be dragged into one by using ☰ icon (drag & drop action). Groups can be collapsed and opened using > or ˅ signs. When certain group is collapsed it is possible to change its name, rearrange order or remove entire group.
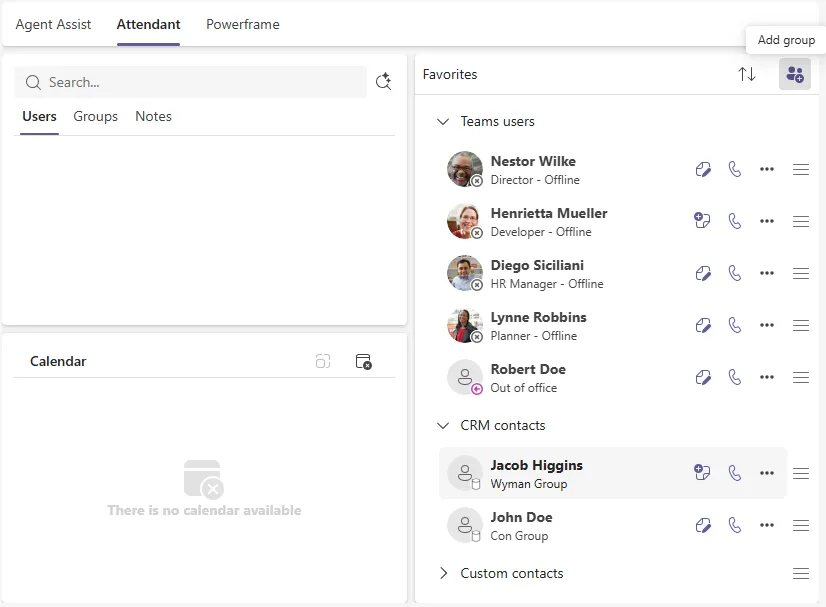
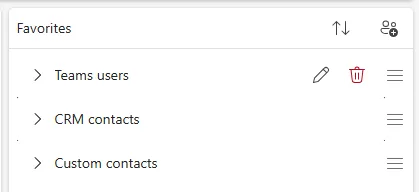
Note: When removing group as favorite, all of the contacts inside are removed from Favorites section of Attendant Console and shall be added again if needed.
Copy group members to Favorites
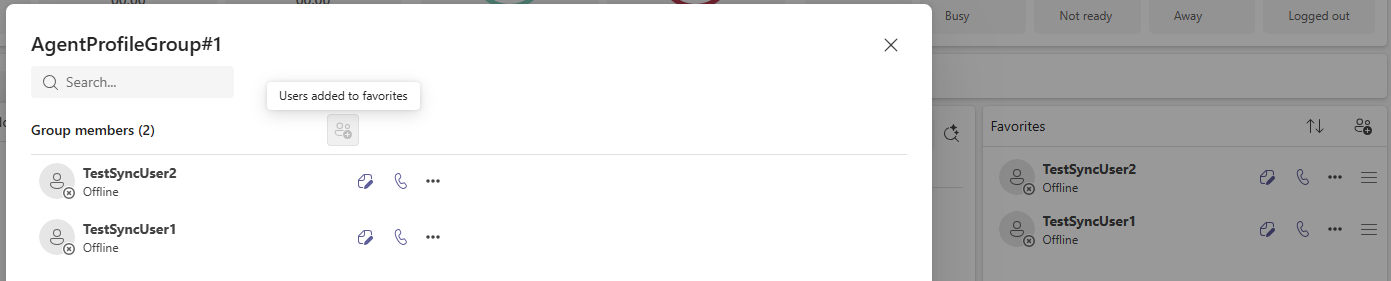
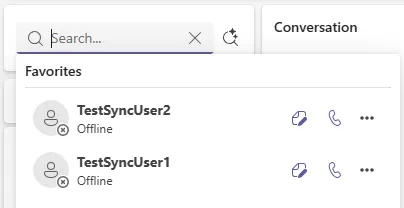
An agent is able to copy all group members with one simple action which greatly saves up time spent on manual adding each person using ellipsis button (“More actions”).
Once the group has been found in Contact Center application via any search field, the “Add users to favorites” button will be available to an agent:
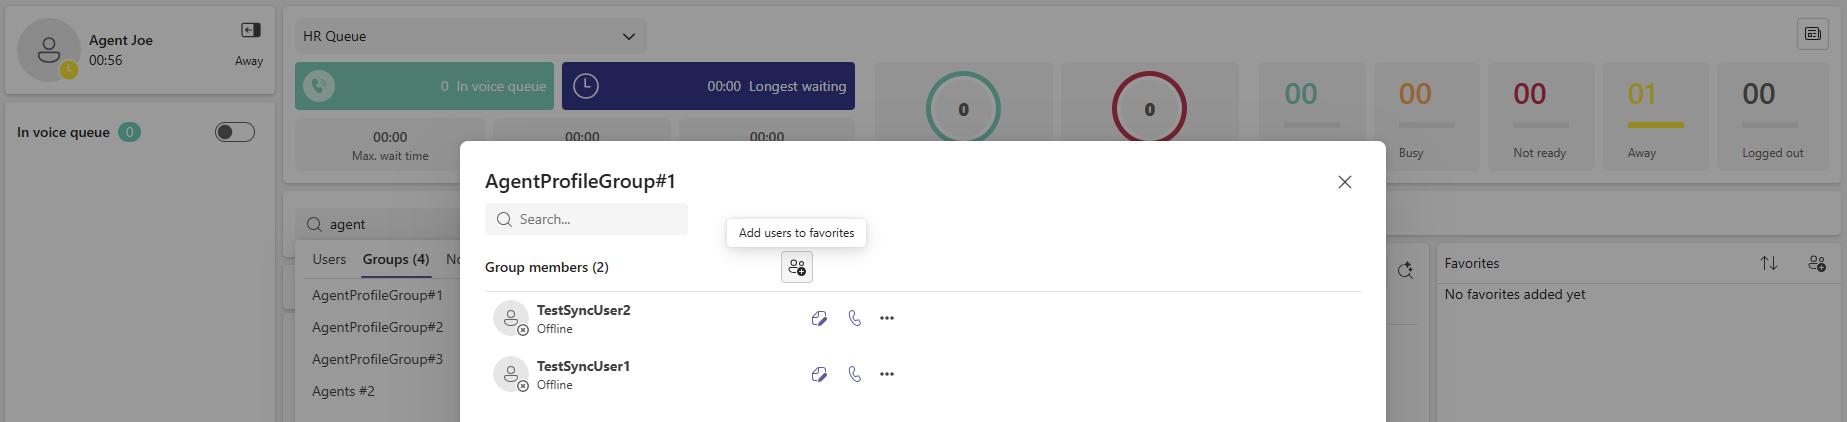
Upon pressing, listed group members will be added to the Favorites section – unless they are already there, in such case nothing will happen.
Filter logged-in queues
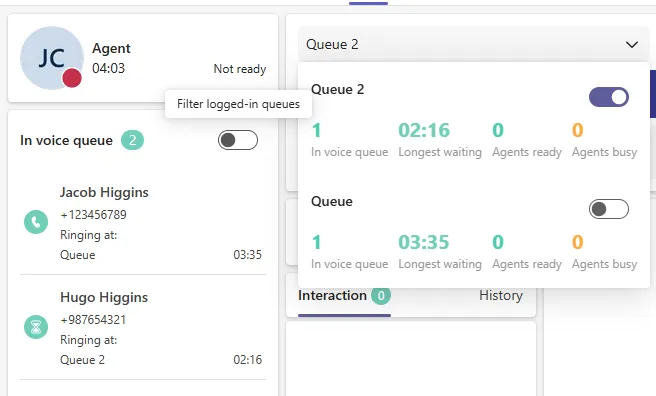
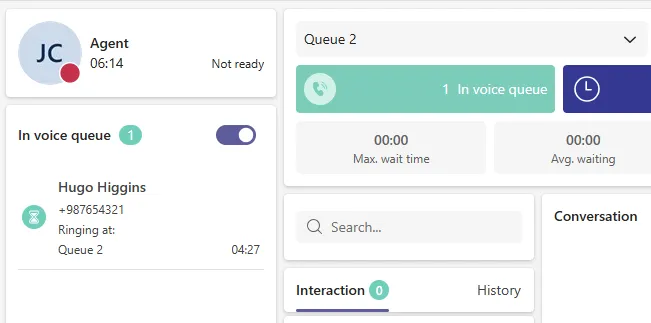
The Agent page does offer a functionality which allows an agent to hide calls that are waiting in Queues from which the agent is currently logged out. It helps provide a clearer overview of which calls should be handled by the agent currently logged into a certain Queue.
At the Agent page of Contact Center application next to a “In voice queue” label you can find switch with the tooltip description “Filter logged-in queues”.
Advanced search
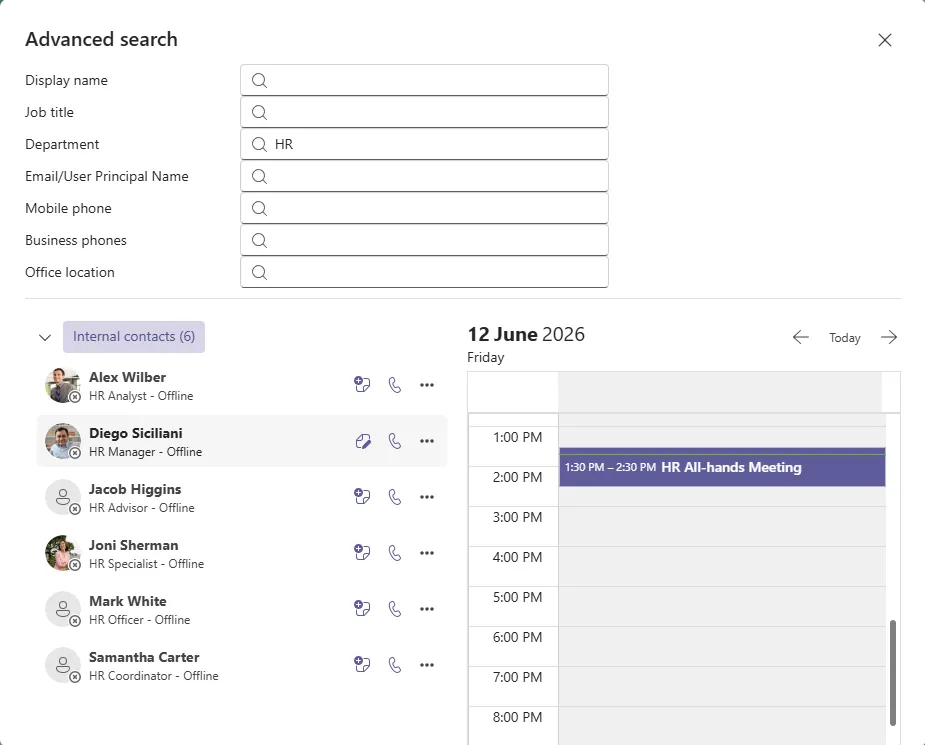
The Advanced Search feature enhances standard contact search by allowing more specific search criteria, helping users find the right information faster and with greater accuracy. This feature must be first enabled at either Agents or Agent Profiles admin pages.
After enabling the Advanced Search feature, in Contact Center application the new magnifying glass icon will appear:
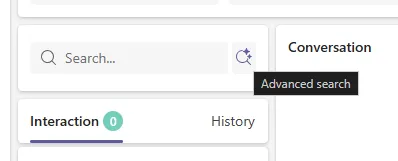
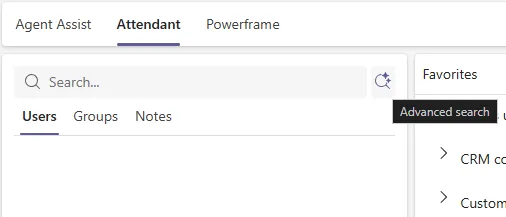
Upon pressing, new Advanced search window will appear where you can search for desired contacts based on enabled properties (Display name, Department, Job title etc).
Peers
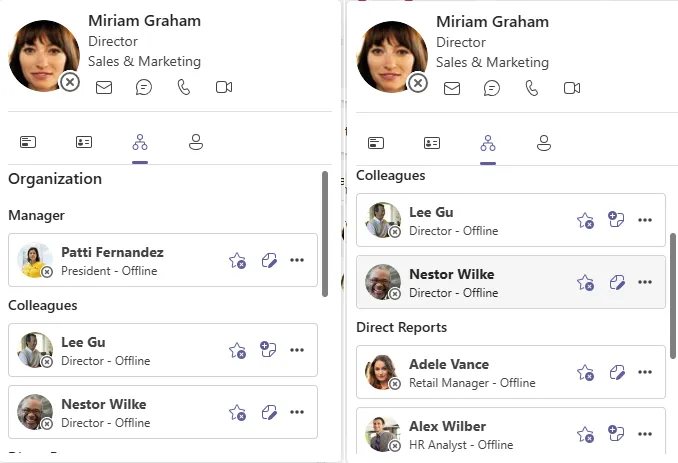
Hovering over a contact’s avatar opens their Contact Card. For Microsoft Entra ID users, the Contact Card includes an Organization view showing their manager, colleagues, and direct reports. Clicking on any of these people opens that person’s Contact Card in turn, showing their own manager, colleagues, and direct reports. This gives agents a quick way to explore a contact’s wider organization.
Obtaining a WhatsApp for Business Number
You need to have a Facebook Business account to connect your phone number to WhatsApp for Business.
Make sure that this Facebook Business account belongs to your organisation. If you have done this, please send us the Facebook Business Manager ID:
- Go to your Company settings: https://business.facebook.com/settings/info
- under the Information about Business Manager you can see the ID number
After we have the ID we can validate it and if it is correct we can onboard you with WhatsApp.
What happens after you provided us your Facebook Business Manager Account ID?
- One of our WhatsApp for Business Solution Providers will onboard your company and WhatsApp number
- At that moment you will receive a message in your FBM, we will inform you when this is done
- After that go to your Facebook Business Manager: https://business.facebook.com/settings/requests/received_requests
- Accept the WhatsApp notification (make sure you have the “Admin” role when you login)
Your company details need to be verified by Facebook. When this is done your WhatsApp account will go in final approval.
After the account is approved we can schedule the registration. WhatsApp will make a phone call to your phone number and then you need to pick up the phone directly. A 6 digit code will be spoked out and you would need that code entered directly.
When you have successfully enrolled into ROGER365 and you have access to the portal, you can try to configure your first communication channel. Here you find the steps to take (and where to find the documentation how to configure it).
Contact Center
If you already are using Teams Calling (via a Microsoft Calling Plan, Operator Connect or Direct Route) you can activate the Contact Center Functionality. You need to follow these steps:
- Authorize Contact Center and install the ROGER365.io Teams App (click here)
- Create Resource Account and connect a phone number. (click here)
- Configure Audio Prompts (click here)
- Configure a schedule (click here)
- Configure reason codes (click here)
- Create and configure a queue (click here)
- Create and configure a callflow (click here)
Social Messaging
Creating a flow between a TouchPoint like Webchat or WhatsApp all have the same principle.
TIP: You can test our WhatsApp for Business integration with Teams. Our partner CM provides a ‘sandbox’ test environment. You can connect a test-WhatsApp number to Microsoft Teams Using ROGER365.io. Find the description how to configure this here.
If you want to get onboarded into ROGER365.io you can signup and activate your environment yourself. After finishing the signup and enrollment process, your 14-day evaluation period will start. After this period (or directly after onboarding) you can choose a permanent subscription. Here you can find the subscription options.
You need a Microsoft 365 account to complete the enrollment process.
You can watch the steps described underneath in this tutorial video.
Enrollment
To successful go through the enrollment process you need:
- Microsoft 365 account
- This account must have Global Administrator, an Application Administrator, or a Cloud Application Administrator permissions
First start your 14-day evaluation on our website
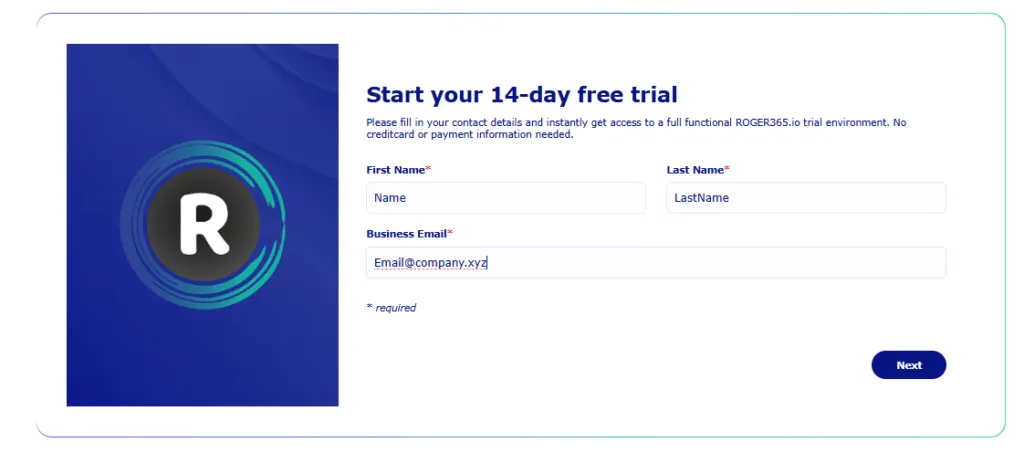
Fill in your name and emailaddress and click next
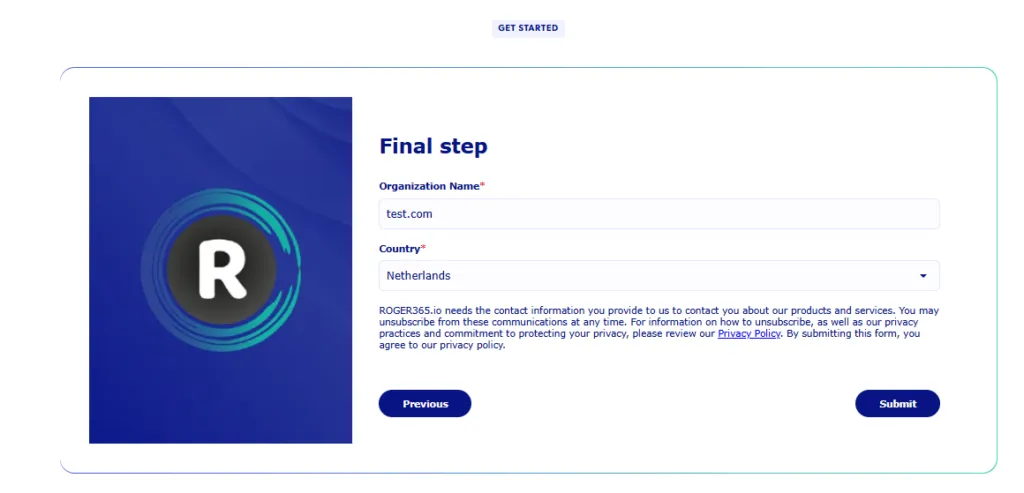
In the final step fill in your company name and location.
You will receive an Email with information and a button to start the free trail. The button opens a new webbrowser tab with the following popup.
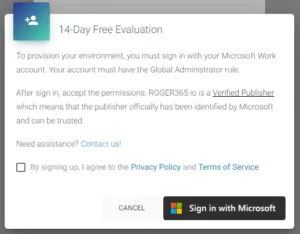
Enable the privacy checkbox and click the ‘Sign in with Microsoft’ button
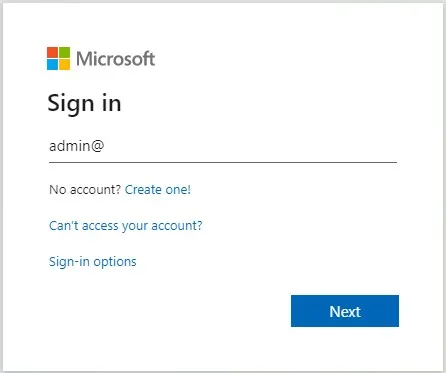
Here you can sign in with your Microsoft 365 account, make sure you have Global Administrator, an Application Administrator, or a Cloud Application Administrator permissions. If you don’t know what this means, please contact your IT Administrator to help you.
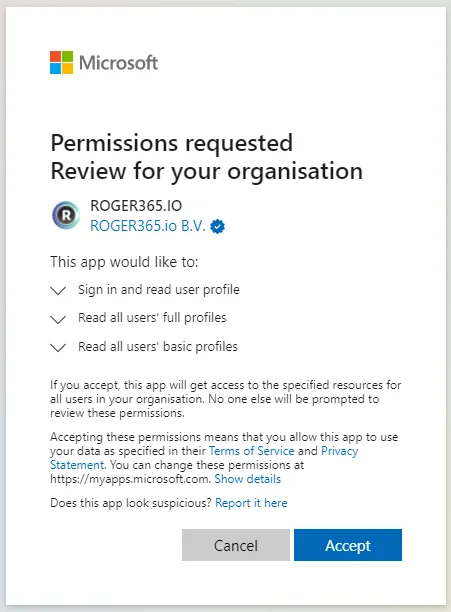
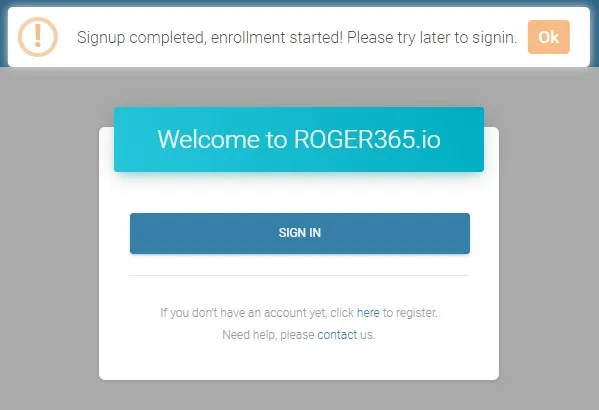
Click accept to give us your consent. We need these permissions so your can use your own Microsoft 365 credentials to login to ROGER365.io. After accepting you will be logged out from the Microsoft website and redirected to ROGER365.io.
In this phase your ROGER365 environment will be setup, this will take approximately 5-10 minutes.
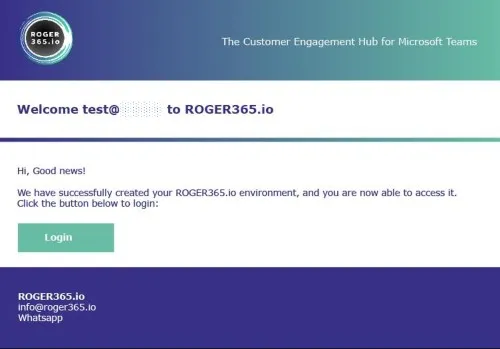
When your environment has been setup successfully, you’ll receive this email.
Now you’re able to login into the ROGER365 Portal. If you receive an email with the notification that the setup has failed, our support team is automatically notified. We’ll try to help you as soon as possible, or contact us.
SummaryExport
This API retrieves the AI Summary results of a social conversation. The AI Summary must first be configured in the End node.
To extract data from this section you have to create API Key with ‘DataExport‘ scope.
/v1.0/AI/export/Social/Summary
Example
{
  "items": [
    {
      "tenantId": 123,
      "conversationId": "4f5f2545-133-123-3214-d9800a7db3b3",
      "createdAt": "2026-02-02T14:09:53.3370323+00:00",
      "isDeleted": false,
      "lastModified": "2026-02-02T14:09:59.4661919+00:00",
      "results": [
        {
          "aspect": "recap",
          "text": "The agent welcomes the user to a Webchat Social Messaging conversation."
        },
        {
          "aspect": "narrative",
          "text": "Agent_1 welcomed the attendees to a Webchat Social Messaging conversation."
        }
      ],
      "editedByUserId": null,
      "editedResults": null,
      "errorMsg": "",
      "status": 4
    }
  ]
}
Model
For summary aspect settings reference the microsoft documentation. How to setup the end node Cognitive Endpoint you can find here
ReplicatorConfig
This API shows the created (and deleted) CRM replicators and the configured properties.
To extract data from this section you have to create API Key with ‘DataExport‘ scope.
/v1.0/CRM/export/ReplicatorConfig
Output
{
  "items": [
    {
      "id": 1,
      "isDeleted": false,
      "lastModified": "",
      "tenantId": ,
      "created": "",
      "name": "",
      "startTime": "",
      "frequency": 1,
      "interval": 1,
      "description": "",
      "contactUrl": "",
      "type": 0
    }
  ],
  "batchToken": ""
}ReplicatorJobStatus
This API shows the last and next execution time, as wel as the amount of replicated records. Also the result of the job is included
To extract data from this section you have to create API Key with ‘DataExport‘ scope.
/v1.0/CRM/export/JobStatus
Output
{
  "items": [
    {
      "id": ,
      "replicatorConfigId": ,
      "isDeleted": false,
      "lastModified": "",
      "tenantId": ,
      "executedAt": "",
      "nextExecutionAt": "",
      "replicatedRecordsCount": ,
      "jobState":
    }
  ],
  "batchToken": ""
}TouchPoints
This API shows the created and deleted TouchPoints.
To extract data from this section you have to create API Key with ‘DataExport‘ scope.
/v1.0/TouchPoints/export
Output
{
   "items":[
      {
         "id": ,
         "isDeleted": ,
         "lastModified":"",
         "tenantId": ,
         "type": ,
         "name":""
      }
   ],
   "batchToken":""
}Chatbots Languages
This API shows the available Chatbots and their configured language.
To extract data from this section you have to create API Key with ‘DataExport‘ scope.
Output
{
   "items":[
      {
         "id": ,
         "isDeleted": ,
         "lastModified":"",
         "tenantId": ,
         "name":"",
         "language":""
      }
   ],
   "batchToken":""
}Chatbot Knowledgebases
This API shows the created and deleted (Chatbot) knowledgebases.
To extract data from this section you have to create API Key with ‘DataExport‘ scope.
/v1.0/faq/export/knowledgeBase
Output
{
  "items": [
    {
      "id": 12,
      "isDeleted": true,
      "lastModified": "2020-05-31T11:55:27.0983688+00:00",
      "tenantId": 4,
      "name": "Schiphol KB"
    }
  ],
  "batchToken": ""
}Tenant Information
This API shows the company information from the tenant, including the configured contactpersons.
To extract data from this section you have to create API Key with ‘DataExport‘ scope.
/v1.0/UserManagement/export/CustomerTenant
Output
{
    "items": [
        {
            "id": 4,
            "isDeleted": false,
            "lastModified": "",
            "tenantId": ,
            "created": "",
            "company": "",
            "address": "",
            "country": "",
            "assignedPartner": "",
            "contacts": [
                {
                    "id": 1,
                    "isDeleted": false,
                    "lastModified": "",
                    "tenantId": ,
                    "type": "Commercial",
                    "name": "",
                    "email": "",
                    "phoneNumber": ""
                },
                {
                    "id": 2,
                    "isDeleted": false,
                    "lastModified": "",
                    "tenantId": ,
                    "type": "",
                    "name": "",
                    "email": "",
                    "phoneNumber": ""
                },
                {
                    "id": 3,
                    "isDeleted": false,
                    "lastModified": "",
                    "tenantId": ,
                    "type": "Administrative",
                    "name": "",
                    "email": "l",
                    "phoneNumber": ""
                }
            ]
        }
    ],
    "batchToken": ""
}
Subscription
This API shows the start- and enddate of the subscription, including the amount of included and used conversations.
To extract data from this section you have to create API Key with ‘DataExport‘ scope.
/v1.0/subscriptions/export
Output
{
    "items": [
        {
            "id": ,
            "isDeleted": false,
            "lastModified": "",
            "tenantId": ,
            "startDate": "",
            "endDate": "",
            "isActive": true,
            "remainingConversations": ,
            "subscriptionType": {
                "name": "Business",
                "description": "Business",
                "conversations":
                }
        },
            ],
    "batchToken": ""
}Conversation Packs
This API shows the available conversations packs, including the remaining amount of conversations.
To extract data from this section you have to create API Key with ‘DataExport‘ scope.
/v1.0/conversationPacks/export
Output
{
    "items": [
        {
            "id": ,
            "isDeleted": false,
            "lastModified": "",
            "tenantId": ,
            "remainingConversations": ,
            "conversationPackType": {
                "name": "",
                "description": "",
                "conversations":
            }
        }
    ],
    "batchToken": ""
}Conversations
This API shows all conversations from the tenant.
To extract data from this section you have to create API Key with ‘DataExport‘ scope.
/v1.0/Orchestrator/export/Conversations
Output
{
   "items":[
      {
         "id":"",
         "state": ,
         "stateName":"",
         "currentActionId":"",
         "isDeleted":false,
         "lastModified":"",
         "tenantId": ,
         "created":"",
         "ended":"",
         "touchPointsIds":[

         ]
      }
   ],
   "batchToken":""
}Messages
This API shows the amount of messages for a TouchPoint per conversation. Please mind that a conversation can have multiple TouchPoints, so to count the total amount of messages for a conversation, include all TouchPoints.
To extract data from this section you have to create API Key with ‘DataExport‘ scope.
Teams
/v1.0/teams/messagelogs/export
WhatsApp for Business
/v1.0/whatsapp/messagelogs/export
Webchat
/v1.0/webchat/messagelogs/export
SMS
/v1.0/sms/messagelogs/export
/v1.0/facebook/messagelogs/export
Output
{
   "items":[
      {
         "isDeleted":false,
         "lastModified":"",
         "tenantId": ,
         "orchestratorConversationId":"",
         "messagesCount":
      }
   ],
   "batchToken":""
}Toastar Users
This API shows the enabled users for Toastar (CRM Calling).
To extract data from this section you have to create API Key with ‘DataExport‘ scope.
/v1.0/ToastarForTeams/export/users
Output
{
  "items": [
    {
      "id": ,
      "name": "",
      "isEnabled": ,
      "isDeleted": ,
      "lastModified": "",
      "tenantId":
    }
  ],
  "batchToken": ""
}Toastar Conversations
This API shows the conversations for which the Toastar was triggered.
To extract data from this section you have to create API Key with ‘DataExport‘ scope.
v1.0/ToastarForTeams/export/conversations
Output
{
  "items": [
    {
      "id": "",
      "registeredUtc": "",
      "userAadObjectId": "",
      "contactUri": "",
      "teamsActivityId": "",
      "tenantId": ,
      "isDeleted": false,
      "lastModified": ""
    }
  ],
  "batchToken": ""
}When a new conversation arrives, you can configure a Powerhook to your application (for example a Microsoft Logic app) ,which includes information about the conversation. After you (for example) retrieved information from your CRM system, you can post an adaptive card into the conversation in Teams. How to create an adaptive card, click here. Send your adaptive card to this url:
To extract data from this section you have to create API Key with ‘Teams‘ scope.
/v1.0/teams/postcard/{conversationId}/{endpointConfigId}
Adaptive Card with Postback
An adaptive card can include action buttons, which can postback information to your application. Underneath you’ll find an example of an adaptive card with a button:
{
  "$schema": "http://adaptivecards.io/schemas/adaptive-card.json",
  "body": [
    {
      "items": [
        {
          "actions": [
            {
              "data": {
                "CallerGUID": "",
                "action": "PostBack",
                "line": 1,
                "rioAuthKeyPostback": "",
                "rioAuthKeyTranscripts": "",
                "url": "https://prod-29.westeurope.logic.azure.com:443/workflows/"
              },
              "iconUrl": "",
              "title": "Button1",
              "type": "Action.Submit"
            }
          ],
          "type": "ActionSet"
        }
      ],
      "type": "Container"
    }
  ],
  "type": "AdaptiveCard",
  "version": "1.2"
}
After clicking the button, the output underneath will be send to you application:
{
  "headers": {
    "Connection": "",
    "Expect": "",
    "Host": "",
    "ConversationId": "",
    "ConfigId": "",
    "rio_tenantid": "",
    "EndpointConversationId": "",
    "Request-Context": "",
    "traceparent": "",
    "Content-Length": "",
    "Content-Type": "application/json; charset=utf-8"
  },
  "body": {
    "activity": {
      "type": "message",
      "id": "",
      "timestamp": "",
      "localTimestamp": "",
      "serviceUrl": "https://smba.trafficmanager.net/emea/",
      "channelId": "msteams",
      "from": {
        "id": "",
        "name": "",
        "aadObjectId": ""
      },
      "conversation": {
        "isGroup": true,
        "conversationType": "channel",
        "tenantId": "",
        "id": ""
      },
      "recipient": {
        "id": "",
        "name": ""
      },
      "locale": "",
      "attachments": [],
      "entities": [
        {
          "type": "",
          "locale": "",
          "country": "",
          "platform": "",
          "timezone": ""
        }
      ],
      "channelData": {
        "channel": {
          "id": "2"
        },
        "team": {
          "id": "2"
        },
        "tenant": {
          "id": ""
        },
        "source": {
          "name": "message"
        },
        "legacy": {
          "replyToId": ""
        }
      },
      "replyToId": "",
      "value": {
        "action": "PostBack",
        "line": 1,
        "rioAuthKeyPostback": "",
        "rioAuthKeyTranscripts": "",
        "url": "https://prod-78.westeurope.logic.azure.com:443/workflows/"
      }
    }
  }
}
The ROGER365.io platform provides a database to register active opt-in registrations. Via this API registrations can be inserted or deleted.
To extract data from this section you have to create API Key with ‘WhatsappConsent‘ scope.
Uploading consent
POST /v1.0/whatsapp/Consent HTTP/1.1
Host: api.roger365.io
Auth-Key: <authorization key>
Content-Type: application/jso
{
  "UserWhatsAppId": "<Phone number in e164 format>",
  "OptinReceived": "<Date time>"
}
Deleting a single consent
DELETE /v1.0/whatsapp/Consent HTTP/1.1
Host: api.roger365.io
Auth-Key: <authorization key>
Content-Type: application/json
{
  "UserWhatsAppId": "<Phone number in e164 format>"
}
Delete all consent registrations
DELETE /api/whatsapp/Consent/all HTTP/1.1
Host: api.roger365.io
Auth-Key: <authorization key>To create your own TouchPoint integration, you can use the API TouchPoint feature. With this API you can connect your own conversational system with the ROGER365.io platform.
First add an API TouchPoint via the portal. How to do this can be found here.
API URL POST
https://api.roger365.io/api/apiendpoint/listener
JSON body for POST to API touchpoint listener
{
  "From": "",
  "To": "",
  "ConversationId": "",
  "Content": {
    "Text": ""
  },
  "EndpointKey": ""
}
- From: The id of the remote participant. This may not contain the scheme (scheme is configured in the portal)
- To: The Identifier of the API TouchPoint taken from ROGER365 admin portal.
- ConversationId: Optional, a value that will be used to identify a conversation. If the conversation is closed in the platform
a new conversation will be created. If this value is omitted, the value from the From field will be used. - Content: An object with the content of the message with property text, which contains the actual message.
- EndpointKey: The key for this touchpoint.
Webhook content
{
  "TimeStampUtc": "",
  "EndpointKey": "",
  "From": "",
  "ConversationId": "",
  "To": "",
  "Content": {
    "Text": ""
  }
}
- TimeStampUtc: The time this message was scheduled to be send
- EndpointKey: The key for this touchpoint
- From: The name of the endpoint configuration
- ConversationId: The value for this conversation. In case of an OUT-message, this will contain an unique value.
- To: The id of the remote participant.
- Content: An object with the content of the message with property text, which contains the actual message.
You can use the Campaign API to send WhatsApp or SMS messages via your own application. When a message is send to a user, we log the message in a campaign database. If a user responds then to a message we'll show the last 'campaigns' in which the user was included. Every send message will consume 1/20 of a conversation from your subscription.
To extract data from this section you have to create API Key with 'Campaign' scope.
You can only send WhatsApp templates to a user. So in the POST message you must also include the TemplateNameSpace, TemplateName and template variables in the body. Also keep in mind that you need consent from the receiver that allows you to send them messages. This is your own responsibility and you can read all about it here. We have a WhatsApp Consent API available for you to register the received consent.
POST URL
/v1.0/Campaign/SendMessage
Body
{
  "Name": "",
  "Description": "",
  "Targets": [
    "",
    ""
  ],
  "ConfigId": null,
  "Whatsapp": {
    "DisplayName": "",
    "TemplateName": "",
    "TemplateNamespace": "",
    "Language": "",
    "IgnoreConsent": false,
    "Parameters": [
      "",
      {
        "type": "text",
        "text": ""
      },
      {
        "type": "date_time",
        "date_time": {
          "value": ""
        }
      },
      {
        "type": "currency",
        "currency": {
          "currencytype": "",
          "amount": null
        }
      }
    ],
    "HeaderParameters": [
      {
        "type": "text",
        "text": ""
      },
      {
        "type": "document",
        "url": "",
        "name": ""
      },
      {
        "type": "image",
        "url": ""
      },
      {
        "type": "video",
        "url": ""
      }
    ],
    "ButtonsParameters": [
      {
        "type": "text",
        "text": "",
        "index": 0
      }
    ]
  }
}
Return
After posting you'll receive a return value with the results:
{
  "Returns": {
    "succeeded": [
      ""
    ],
    "failed": {
      "": "NoConsent"
    }
  }
}
- Name: Here you can fill in the name of the campaign
- Description: Extra description field
- Targets: Destination numbers
- Configid: Id of the sending TouchPoint
- TemplateNamespace/Name: Name of the template which should be used
- Language: Language version of the template
- IgnoreConsent: If this value is set to True, then you will ignore the WhatsApp consent registration
- Parameters: The content of the parameter values used in the template
When sending failed with the reason 'NoConsent' then this means that there is no active consent registration found in the consent database.
SMS
Body
{
  "Name": "",
  "Description": "",
  "Targets": ["", ""],
  "ConfigId": ,
  "Sms": {
    "Text": ""
  }
}
- Name: Here you can fill in the name of the campaign
- Description: Extra description field
- Targets: Destination numbers
- Configid: Id of the sending TouchPoint
- Text: Content of your sms message
With this API you can retrieve the transcript of a conversation. Make sure that the 'Save Transcripts' option is enabled on both TouchPoints in the ROGER365.io admin portal.
To extract data from this section you have to create API Key with 'Transcript' scope.
Transcript (JSON output)
/v1.0/transcriptsExport/Conversation/export
Output
[
  {
    "timeUTC": "",
    "direction": "",
    "text": ""
  },
  {
    "timeUTC": "",
    "direction": "",
    "text": ""
  }
]
Transcript (String output)
/v1.0/transcriptsExport/Conversation/exportasstring
Output
2020/12/10 16:49:09 > Hi
2020/12/10 16:49:50 < Hello
To extract data from this section you have to create API Key with ‘DataExport‘ scope.
FeedbackExport
This API allows to retrieve given by the callers feedback score.
/v1.0/contactcenter/export/FeedbackExport
Example
{
    "items": [
        {
            "tenantId": ,
            "id": 19,
            "description": "How helpful was our team?",
            "feedbackScore": 5,
            "createdAt": "2025-09-03T08:38:33.6148323+00:00",
            "participantId": "+123456789",
            "callId": 27852,
            "isDeleted": false,
            "lastModified": "2025-09-03T08:38:33.6313929+00:00"
        },
        {
            "tenantId": ,
            "id": 20,
            "description": "How well did we meet your needs and expectations?",
            "feedbackScore": 4,
            "createdAt": "2025-09-03T08:38:37.0299366+00:00",
            "participantId": "+123456789",
            "callId": 27852,
            "isDeleted": false,
            "lastModified": "2025-09-03T08:38:37.0303284+00:00"
        }
   ]
}
Model
To create, delete or check status of an Outbound Call Campaign (Virtual Call) you must create an API key with ‘ContactCenter‘ scope.
This API allows to create Virtual Call record in agent app, useful option for calling back customer when there wasn’t anybody to serve a call at the time. Picking up this call as an agent initiates Teams invite which must be accepted, afterwards invite is sent to a target destination.
Start Outbound Call Campaign
POST /v1.0/ContactCenter/VirtualCall/Start HTTP/1.1
Host: api.roger365.io
Auth-Key: <authorization key>
Content-Type: application/json
JSON Body:
{
  "CallFlowId": <<callflow id from admin portal>>,
  "Target": "tel:+31612345678",
  "ResourceAccountId": "<<GUID of resource account>>"
}
Output:
{id}
Provided in body callflow must not have Accept action!
This API allows to check the status of Virtual Call.
Check status of Outbound Call Campaign
GET /v1.0/ContactCenter/VirtualCall/{id} HTTP/1.1
Host: api.roger365.io
Auth-Key: <authorization key>
Content-Type: application/json
Output:
{
    "callState": 3,
    "isVirtual": true,
    "queuePosition": {
        "position": 0,
        "queuedTime": "2024-10-08T08:56:06.3837662"
    },
    "info": [
        {
            "id": 63,
            "virtualDateTime": "2024-10-08T08:56:06.4771386",
            "callId": 23167,
            "requestId": 16751,
            "originalCallId": "d1c49337-fce2-45d4-94e3-46ec255f7b03",
            "callOutDateTime": null,
            "connectedDateTime": null,
            "isDeleted": false,
            "lastModified": "2024-10-08T08:56:06.477412+00:00"
        }
    ]
}
This API allows to Delete Virtual Call from agent app (only if its not active with an agent).
Delete Outbound Call Campaign
DELETE /v1.0/ContactCenter/VirtualCall/{id} HTTP/1.1
Host: api.roger365.io
Auth-Key: <authorization key>
Content-Type: application/json
To extract data from this section you have to create API Key with ‘DataExport‘ scope.
From the callflow you can send multiple webhooks to trigger your application.
Custom Property & Custom Header
Both are expression fields, meaning you can use them to send data from the callflow designer or static content. E.g. when a string value is configured (“static” – including the quotes) this value is just taken into the header or property, however if you enter a statement (1+1, or varA) the result of that statement is used (thus the result would be 2, or the value of variable with the name varA)
Custom Header is send as a header, with name R365-Custom. Custom property is send as a property in the body of the webhook.
Example
{
   "CurrentDateTime":"datetime",
   "StartedDateTime":"datetime",
   "EndedDateTime":"datetime",
   "Caller":"string",
   "Called":"string",
   "CallId":"string",
   "State":"int",
   "CustomProperty":null,
   "Requests":[
      {
         "QueueName":"string",
         "QueuedDateTime":"datetime",
         "DequeuedDateTime":"datetime",
         "AnsweringAgentId":"string"
      }
   ]
}
Model
To extract data from this section you have to create API Key with ‘DataExport‘ scope.
Agent Eventlog
Entry for every change to an agent state. These can be used to determine agent statistics (e.g. the time the agent was available for calls in a specific queue).
/v1.0/contactcenter/export/AgentEventLogEntryExport
Example
[
   {
     "tenantId": 0,
     "id": 0,
     "agentId": 0,
     "eventDateTime": "datetime",
     "eventType": "string",
     "par1": "string",
     "par2": "string",
     "isDeleted": false,
     "lastModified": "datetime"
   }
]
Model
To extract data from this section you have to create API Key with ‘DataExport‘ scope.
Agent workEntry
An entry for each work item related to a answered queue offer.
/v1.0/contactcenter/export/AgentWorkEntryExport
Example
[
   {
      "tenantId":0,
      "agentId":0,
      "startWorkDateTime":"datetime",
      "callId":"string",
      "scheduledEndDateTime":"datetime",
      "endedWorkDateTime":"datetime",
      "isDeleted":false,
      "lastModified":"datetime"
   }
]
Model
To extract data from this section you have to create API Key with ‘DataExport‘ scope.
Call Stream Change
Call stream changes are monitored to determine how long a call was put on hold. Each change received from the Teams platform is saved.
/v1.0/contactcenter/export/CallStreamChangeExport
Example
[
  {
    "tenantId": 0,
    "callId": null,
    "callStateId": 98765,
    "eventDateTime": "2026-07-27T13:18:14.5935371",
    "participantId": "d2888888-7496-69f7-5e47-12345cbef1d9",
    "streamDirection": "SendReceive",
    "isDeleted": false,
    "lastModified": "2026-07-27T13:18:14.6315958+00:00"
  }
]
Model
To extract data from this section you have to create API Key with ‘DataExport‘ scope.
Execution Results
One entry for each processing of an action in a call. There might be a large amount of entries in this table, as 1 call might contain tens of records.
/v1.0/contactcenter/export/ExecutionResultExport
Example
[
   {
     "tenantId": 0,
     "id": 0,
     "callId": "string",
     "callFlowId": 0,
     "configId": 0,
     "executedAt": "datetime",
     "success": true,
     "completed": true,
     "logInfo": null,
     "messageType": "string",
     "isDeleted": false,
     "lastModified": "datetime",
     "notificationDateTime": "datetime",
     "actionName": "string"
   }
]
Model
To extract data from this section you have to create API Key with ‘DataExport‘ scope.
Request
One record for each time a queue request is done. At this time, only CC makes use of the queueing module of R365, so it translates to 1 record for each time a call is put into a queue (effectively; when the call enters the ‘queue-action’. However, a call might be dequeued and put in another queue in which case there will be 2 request entries for the same call)
More modules might start making use of the queueing module in the future.
/v1.0/contactcenter/export/RequestExport
Example
[
  {
    "tenantId": 0,
    "id": 0,
    "queueName": "string",
    "dateTimeRequested": "datetime",
    "dateTimeQueueIndex": "datetime",
    "dateTimeFinished": "datetime",
    "isReserved": false,
    "referenceid": "string",
    "answeredByAgentId": "string",
    "lastAttemptAgentOrderIndex": null,
    "isDeleted": false,
    "lastModified": "string",
    "agentsAttempted": "string",
    "prio": 0,
    "preferredAgentId": null,
    "preferredAgentAttempted": false,
    "languageAwareRouting": false
  }
]
Model
To extract data from this section you have to create API Key with ‘DataExport‘ scope.
Queues
Export of configured queues.
/v1.0/contactcenter/export/QueueExport
Example
[
   {
     "tenantId": 0,
     "isDeleted": false,
     "lastModified": "datetime",
     "id": 0,
     "queueName": "string",
     "routingType": 0,
     "statisticsResetAt": "datetime",
     "useAutomaticWorkTime": false,
     "automaticWorkTimeSeconds": 0,
     "powerFrameUrl": null
   }
]
Model
To extract data from this section you have to create API Key with ‘DataExport‘ scope.
Calls
Represents a call involving ROGER365 Contact Center. There might be more records in case the call was transferred to another R365 CC resource.
/v1.0/contactcenter/export/CallDataExport
Example
{
   "items":[
        {
            "tenantId": ,
            "isDeleted": ,
            "lastModified": "",
            "direction": "",
            "id": ,
            "callId": "",
            "callState": ,
            "started": "",
            "lastUpdate": "",
            "ended": "",
            "caller": "",
            "called": "",
            "calledObjectId": ,
            "redirected": ,
            "lastRedirectName": ,
            "lastRedirectTarget": ,
            "callFlowId": ,
            "language": ,
            "endActionExecuted": ,
            "outboundCallState": "",
            "outboundCallType": "",
            "invitedAt": ,
            "connected": "",
            "initiatedFrom": "",
            "tag": "Tag or phone number"
        }
   ]
}
Model
To extract data from this section you have to create API Key with ‘DataExport‘ scope.
Agent Export
Retrieve current status of an Agent, including name and some settings
/v1.0/contactcenter/export/AgentExport
Example
[
  {
    "tenantId": 0,
    "id": 0,
    "azureId": "guid",
    "status": "0",
    "statusInfo": "string",
    "lastStateChange": "datetime",
    "displayName": "string",
    "email": "string",
    "ignoreInviteTimeouts": false,
    "ignoreInviteDeclines": false,
    "presenceEnabled": false,
    "isDeleted": false,
    "lastModified": "datetime"
  }
]
Model
To extract data from this section you have to create API Key with ‘DataExport‘ scope.
CallParticipants
Export of the call participants of a contact center call.
/v1.0/ContactCenter/export/CallParticipantExport
Example
{
   "items":[
      {
         "tenantId": ,
         "id": ,
         "azureId": "",
         "type": ,
         "callStateId": ,
         "invited": null,
         "joined": "",
         "left": ,
         "participantId": "",
         "invitedBy": ,
         "isDeleted": false,
         "lastModified": ""
      }
   ]
}
Model
Swagger UI is a crucial asset for corporate documentation, streamlining API development and promoting collaboration. This open-source tool offers a user-friendly web interface, facilitating easy exploration and comprehension of API functionalities. Its visually intuitive layout simplifies endpoint navigation, request parameter handling, and understanding of response formats. With these features, Swagger UI plays a pivotal role in enhancing documentation efficiency and supporting collaboration among development teams and corporate stakeholders.
To authorize yourself into Swagger tool for API you have to have API key with Conversations scope.
URL to access Contact Center Swagger UI: https://api.roger365.io/Public/Api/ContactCenter/Swagger/index.html
Authorize yourself to API tool by clicking on “Authorize” button and pasting the API Key from ROGER’s admin portal which contains Conversations scope.
With Contact Center component you can for example: create your own Wallboard out with most important information from the GeneralStatistics and QueuedRequests sections. Perfect solution for your TV’s, or external displays. You can update the status of an agents, assign skills and more.
To extract data from this section you have to create API Key with ‘ToastarForTeams‘ scope.
The Toastar for Teams feature can send a webhook to an external application with information about the caller. Here you can find more information about that.
After receiving the JSON via the Webhook you could, for example, retrieve extra CRM info. This new info can be posted back to the already displayed info in Microsoft Teams. You have to send this info in an adaptive card format. More information how to create an adaptive card, click here.
To make sure the info is posted back to the right user, you must include the “conversationId” in your postback url.
https://api.roger365.io/v1.0/tft/postcard/<convid>JSON schema for configuring callback request. Request POST have to be sent to configured webhook at callback request settings
{
    "CurrentDateTime": "2024-07-04T09:45:25.9519312Z",
    "StartedDateTime": "2024-07-04T09:45:25.906Z",
    "CallId": "",
    "RequestSender": "Sender's name",
    "RequestSenderAzureId": "Sender's account GUID from AzureID",
    "Request": {
        "Recipients": [
            {
                "Id": "Recipient's account GUID from AzureID or email",
                "Name": "Recipient's name or email",
                "Email": "email@box.com"
            }
        ],
        "Contact": {
            "Name": "Garry Crown",
            "Company": "Company",
            "PhoneNumber": "+00123456789"
        },
        "Note": "Please call back this customer, thanks in advance!"
    }
}
After doing POST request with JSON above, the default “Email” option of callback request will be lost and changed to Webhook. The CallId property is filled only when the callback request form is triggered at the Contact Center application during the active call or Wrap-up, it mustn’t be defined manually!
Conversation API
To extract data from this section you have to create API Key with ‘Conversations‘ scope.
When you add a Powerhook in your flow, information about the conversation will be sent to your enpoint. Information which is included in that JSON can be used to query other API’s. For example to retrieve the found contacts in CRM, or get the transcript of the conversation
Output
{
   "ConversationId":"",
   "ConversationCreated":"",
   "RootFlowName":"",
   "CurrentActionId":"",
   "CurrentActionExecutedAt":"",
   "SourceEndpointConfigId":,
   "SendingEndpointConfigId":,
   "EndpointTypes":[
   ]
}
Conversations - Teams
/v1.0/teams/conversations/{convid}output
{
    "endpointConversations": [
        {
            "participants": [],
            "endpointConversationId": "",
            "endpointConversationState":
        }
    ]
}
Conversations - Webchat
/v1.0/webchat/conversations/{convid}output
{
    "endpointConversations": [
        {
            "webSessionId": "",
            "trackerId": "",
            "endpointConversationId": "",
            "endpointConversationState": ,
            "participantId": ""
        }
    ]
}
Conversations - WhatsApp
/v1.0/whatsapp/conversations/{convid}output
{
    "endpointConversations": [
        {
            "endpointConversationId": "",
            "endpointConversationState": ,
            "participantId": ""
        }
    ]
}
Conversations - SMS
/v1.0/sms/conversations/{convid}output
{
    "EndpointConversations": [
        {
            "EndpointConversationId": "",
            "EndpointConversationState": ,
            "ParticipantId": ""
        }
    ]
}
Conversations - Facebook
/v1.0/facebook/conversations/{convid}output
{
    "endpointConversations": [
        {
            "touchpointName": "",
            "conversationId": "",
            "endpointConversationId": "",
            "endpointConversationState": 1,
            "participantId": "",
            "touchpointId": ,
            "custom": {
                "displayname": null
            }
        }
    ]
}
Conversations - API
/v1.0/apiendpoint/conversations/{convid}output
{
    "endpointConversations": [
        {
            "touchpointName": "",
            "conversationId": "",
            "endpointConversationId": "",
            "endpointConversationState": 1,
            "participantId": "",
            "touchpointId": ,
            "custom": {
                "displayname": null
            }
        }
    ]
}Classification export
To extract data from this section you have to create API Key with ‘DataExport‘ scope.
This API allows to check configuration of created Classification.
GET /v1.0/contactcenter/export/CallClassificationExport HTTP/1.1
Host: api.roger365.io
Parameters: startFromDate
Auth-Key: <authorization key>
Content-Type: application/json
Example
{
    "items": [
        {
            "id": 1,
            "name": "Support",
            "description": "Support agents",
            "parentId": null,
            "isDeleted": false,
            "lastModified": "2025-05-16T08:28:11.0374123+00:00",
            "labels": [
                {
                    "language": "de_DE",
                    "classificationId": 1,
                    "languageCode": 69,
                    "label": "Unterstützung",
                    "isDeleted": false,
                    "lastModified": "2025-05-16T08:28:11.0374205+00:00"
                },
                {
                    "language": "nl_NL",
                    "classificationId": 1,
                    "languageCode": 44,
                    "label": "Ondersteuning",
                    "isDeleted": false,
                    "lastModified": "2025-05-16T08:28:11.0374894+00:00"
                }
            ],
            "tenantId":
        },
        {
            "id": 2,
            "name": "Printer",
            "description": "Printer",
            "parentId": 1,
            "isDeleted": false,
            "lastModified": "2025-05-16T08:28:41.614278+00:00",
            "labels": [
                {
                    "language": "de_DE",
                    "classificationId": 2,
                    "languageCode": 69,
                    "label": "Drucker",
                    "isDeleted": false,
                    "lastModified": "2025-05-16T08:28:41.6142816+00:00"
                },
                {
                    "language": "nl_NL",
                    "classificationId": 2,
                    "languageCode": 44,
                    "label": "Drukker",
                    "isDeleted": false,
                    "lastModified": "2025-05-16T08:28:41.614281+00:00"
                }
            ],
            "tenantId":
        }
    ],
Model
Classification Mapping
This API allows to check assigned during the interaction Classification.
GET /v1.0/contactcenter/export/CallClassificationMappingExport HTTP/1.1
Host: api.roger365.io
Parameters: startFromDate
Auth-Key: <authorization key>
Content-Type: application/json
Example
{
    "items": [
        {
            "tenantId": ,
            "classificationId": 7,
            "callId": 24125,
            "conversationType": 0,
            "createdDate": "2024-12-17T08:52:51.4031862+00:00",
            "createdBy": 93,
            "updatedBy": null,
            "updatedDate": null,
            "isDeleted": false,
            "remarks": null,
            "lastModified": "2024-12-17T08:52:51.4336247+00:00"
        }
    ]
}
Model
Here you’ll find the basic prerequisits to get started using the ROGER365.io platform. Some features have additional requirements, but they are described at the feature- or the configuration pages.
By design, ROGER365.io is optimized for the Teams desktop environment on physical devices guaranteeing the enterprise-grade reliability, performance, and consistency your organization depends on, right where front-line staff handle critical communications every day.
The Administrator Portal requires Google Chrome and/or Microsoft Edge, to ensure a reliable and consistent user experience.
For optimal performance, the Contact Center application should be accessed via the Teams desktop client. Alternatively, it can be used through Teams on the web, provided one of the supported browsers listed above is used.
The ROGER365.io Contact Center solution is optimized for a screen resolution of 1920×1080 at 100% scale.

Cloud Platform
The ROGER365.io is a full cloud platform: you don't have to boot any server or stay up late to install software updates. All you need is a browser and Microsoft Teams. It's also not necessary to install or support applications on your workstation or mobile devices. Updates happen automatically in the background, so you always work with the latest version without lifting a finger. Your team can log in from anywhere, on any device, and the experience stays exactly the same. Security and backups are handled for you too, so you can spend your time on actual work instead of IT maintenance.

Microsoft Teams
For many users Microsoft Teams is used daily to collaborate, share information of have meetings. ROGER365.io uses the Teams platform as the frontend application to channel all kind of TouchPoints so that users are able to communicate via one single application. To use the functionalities of the ROGER365.io platform your organisation must have a (licensed) Microsoft Teams environment and users must be enabled to use Microsoft Teams Phone Sytem. Teams is part of the Microsoft 365 (formally known as Office365) suite. Click here to see the license options.

Azure Active Directory
ROGER365.io uses the Azure Active Directory for user management. When you enroll into our platform we’ll ask you to provide us limited access to your Active Directory. You’ll need administrative access to do this. Contact your IT Administrator if you need help with this. The advantage of using Azure AD is that you can access our platform via Single Sign On using your existing Microsoft credentials. If you don’t have an Azure AD, or you don’t want to connect your own environment to our platform: you can create a free Azure account.
Subscription types
ROGER365.io offers various types of subscriptions which include both our Social Messaging and Contact Center functionality. Depending on the features you can choose which subscription fits best to your needs. The minimum subscription period is 12 months.
Check our latest subscriptions here: https://www.roger365.io/Subscription
Social Messaging
For this functionality we offer a consumption model based on the amount of conversations which are handled. Each subscription already included an amount of conversations. You can purchase additional conversations packs. A conversation is counted from the start until the end and can contain multiple messages. A conversation is ended when the Teams agent closes the call, or automatically after a specific time period.
Contact Center
Next to the subscription you choose, you pay per configured queue. A queue can have a maximum of 50 agents. For every queue you can configure 3 resource accounts.
Every subscription supports an amount of maximum concurrent calls. If needed this can optionally be expanded.
Features within subscription
Discover which ROGER365.io subscription fits your flow and explore all available features.
View all pricing and features here
Conversation Packs
When there are not enough included conversations or toasts customer can purchase conversation packs like Small, large and Extra Large (these conversations are valid as long as subscription runs).
Billing
ROGER365.io subscription price is per month.
Minimal contract period is 1 year and the total will be invoiced at once.
For other invoice options like monthly or per quarter please contact us.
A call flow defines how the caller is routed trough the system and what audio prompts will be used. The callflow operated between the configured Resource Account and Queue.
ROGER365.io provides 3 options to create a callflow:
- Form Based Callflow: This is an quick and easy way to create a callflow. By just filling in the form and enabling options you can do this in minutes.
- From Library: A quick and user-friendly way to configure your call flow using predefined templates after entering the required details.
- Graphical Flow Designer: When you need a more advanced callflow, you can use the graphical callflow designer. You’ll need some more skills and experience to configure these callflows, but it does give you much more options and flexibility
You can review the “SubFlows” column to see which callflow is used as a super flow of specific subflows. Click on the blue circle from “SubFlows” column to open a box with redirection option to the specific flow.
To extract data from this section you have to create API Key with ‘DataExport‘ scope.
This API allows checking the state of the Flows (of AI Flow feature) for each call it processes.
GET /v1.0/AI/export/Flows HTTP/1.1
Host: api.roger365.io
Parameters: startFromDate
Auth-Key: <authorization key>
Content-Type: application/json
Example
{
    "items": [
        {
            "tenantId": ,
            "id": ,
            "aiFlowDescriberId": 300,
            "callId": 25478,
            "errorMsg": "",
            "flowStatus": 4,
            "lastUpdateTime": "2025-03-12T07:53:21.9413383",
            "state": {
                "currentAction": "",
                "actionBeforeCurrent": "",
                "flowInstanceId": 348,
                "flowStatus": "Completed",
                "errorMsg": "",
                "teamsCallDto": {
                    "id": 25478,
                    "started": "2025-03-12T07:51:49.5738153",
                    "callChainId": "9ec32c24-980f-46f0-9dda-f35b0dba8c87",
                    "participantCount": 2,
                    "type": "InboundTeamsCall"
                }
            },
            "isDeleted": false,
            "lastModified": "2025-03-12T07:53:42.7433339+00:00"
        }
   ]
}
Model
The Copilot TouchPoint is only available in the Enterprise subscription.
Disclaimers:
- The ROGER365.io does not supply the Copilot Agent configuration and is not responsible for unexpected results or being flagged as a violator of Terms of Use.
- Please be aware of the cost-aspect for utilizing your Copilot Agent configuration used in this integration – Pricing.
This integration connects the Copilot agent (created in Copilot Studio) with the ROGER365.io platform, allowing you to have Webchat or WhatsApp conversations with the Copilot agent – with an option to escalate a conversation to a human agent. Depending on its configuration, the Copilot agent can provide powerful and flexible assistance across a wide range of scenarios, adapting its capabilities to meet your specific needs.
Copilot Studio portal
Authentication
After the Copilot Agent is created, navigate to its settings.
Open the “Security” section followed by “Authentication”:
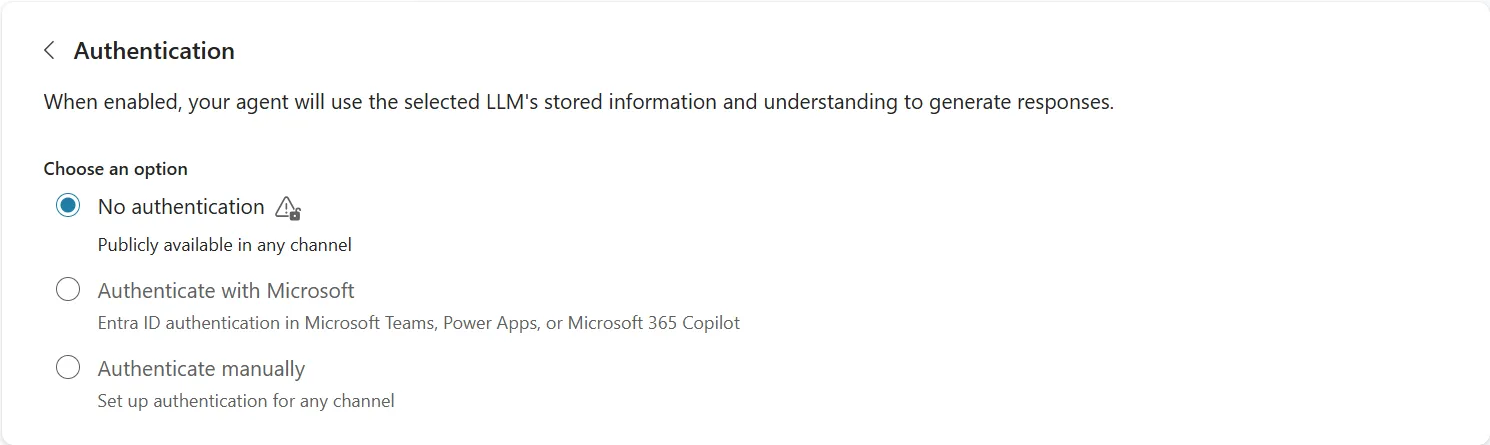
Set the authentication option to ‘No Authentication‘.
This is the only Microsoft-supported configuration that does not require end users to sign in before interacting with the agent; the alternative options, ‘Authenticate with Microsoft’ and ‘Authenticate manually’, are both built around a user sign-in flow. As the Copilot-integrated chatbox may be embedded on any website within the network, requiring individual sign-in is not practical for this use case.
“No Authentication” doesn’t mean the agent is unsecured. With ‘Require secured access’ enabled (see the Obtaining a Secret section below), clients must authenticate using a Direct Line secret (token) before reaching the agent – blocking unauthorized access even without individual user sign-in.
Administrators should also scope the agent to expose only topics and data appropriate for this access level.
Obtaining a secret (Microsoft Copilot Studio reference)
In the same “Security” section of the Copilot Agent settings, navigate to “Web channel security”:
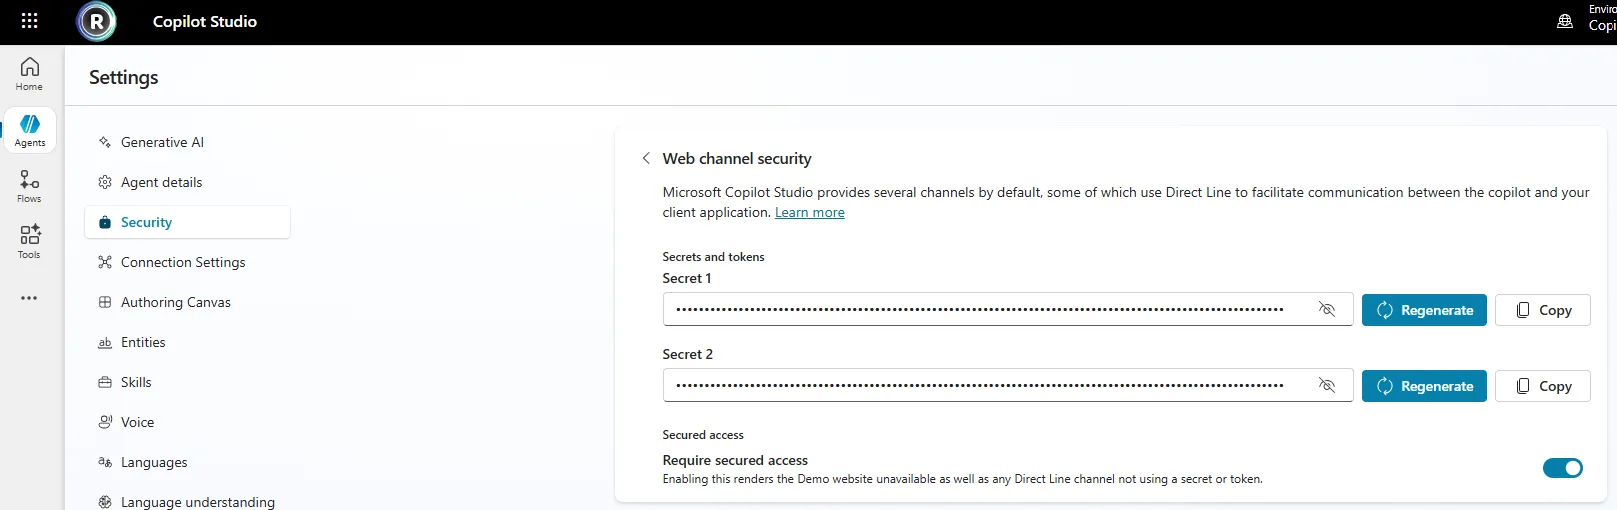
On this page, copy “Secret 1” to a safe place – this Secret will be used during the creation of the Copilot TouchPoint in the ROGER365.io admin portal.
For maximum security of the Copilot Agent configuration, it is advised to enable the “Require secured access” option (if already enabled, leave it as it is).
System Topics
By default, the Copilot Agent configuration includes a set of built-in System topics. The integration relies on the “Escalate” and “End of Conversation” System topics. Based on Copilot’s response in these topics, the messageflow on the ROGER365.io side will act accordingly.
Example of “Escalate” System topic
During a conversation with the Copilot Agent, a user may request to be transferred to a human agent for further support. The “Escalate” system topic handles this by asking the user for confirmation. Once confirmed, Copilot sends a predefined message that triggers the handoff to a live agent on the ROGER365.io side.
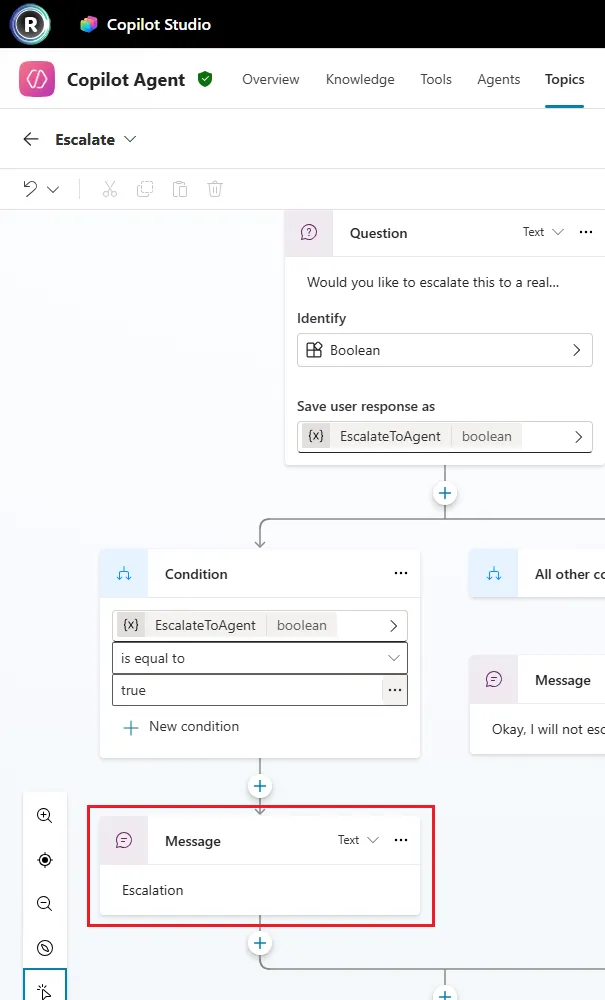
This message can be altered according to specific requirements.
Important: The configured escalation text must be saved to a clipboard, as it will be referenced during the creation of the messageflow from library – see Using the library documentation.
Example of “End of Conversation” System topic
The “End of Conversation” system topic manages the closing stage of an interaction with the Copilot Agent. Before ending, Copilot asks the user if any further assistance is needed, and upon confirmation to close, sends a farewell message that triggers the closure of the conversation on the ROGER365.io side.
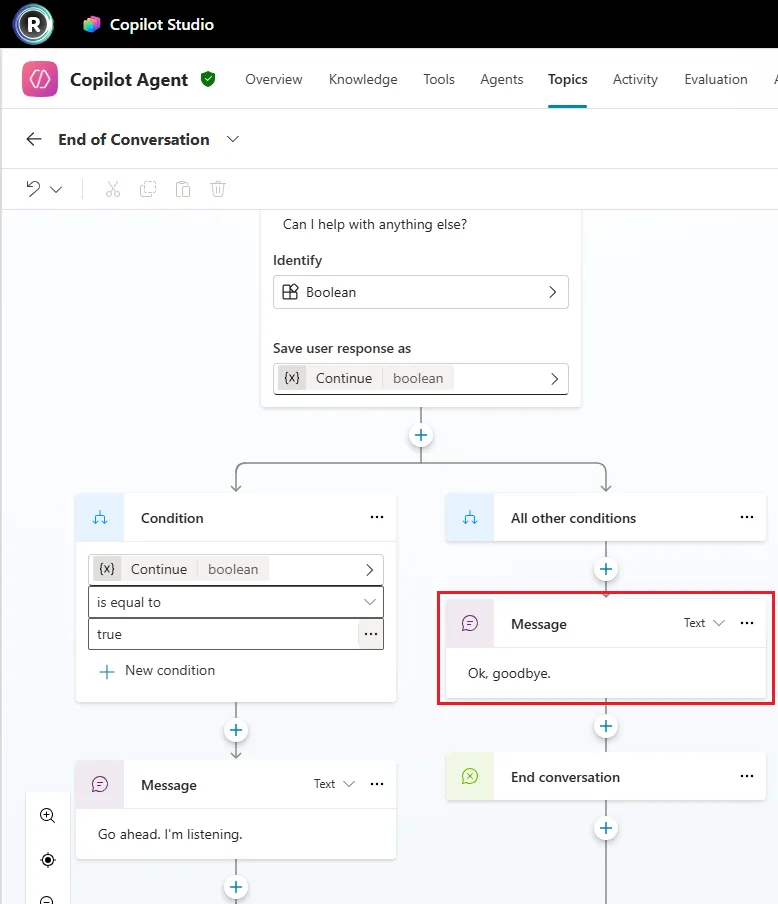
This message can be altered according to specific requirements.
Important: The configured closing text must be saved to a clipboard, as it will be referenced during the creation of the messageflow from library – see Using the library documentation.
Adding Copilot as TouchPoint
- Go to [Social Messaging] ➝ [Copilot Touchpoints],
- On the right top click [+ Add Copilot Touchpoint].
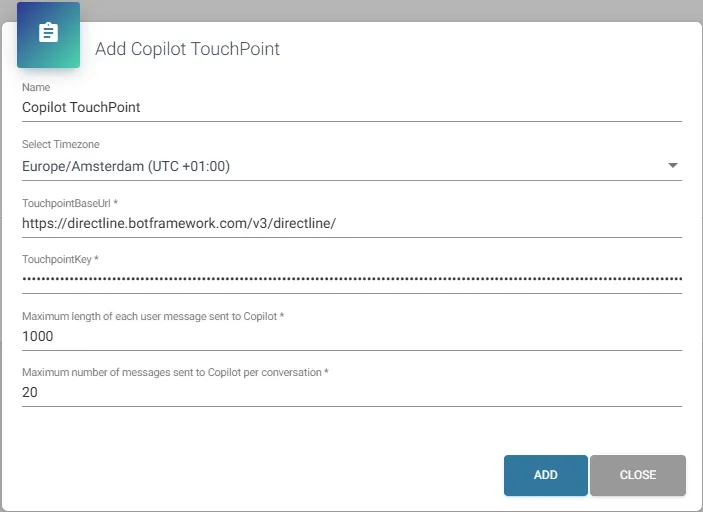
When reviewing the settings of a created Copilot TouchPoint (accessed via the “Edit” button), information is displayed about the Copilot endpoint sending a “MaxMessageReached” message. This message is tied to the maximum user messages option and can be used in the messageflow configuration for routing purposes.
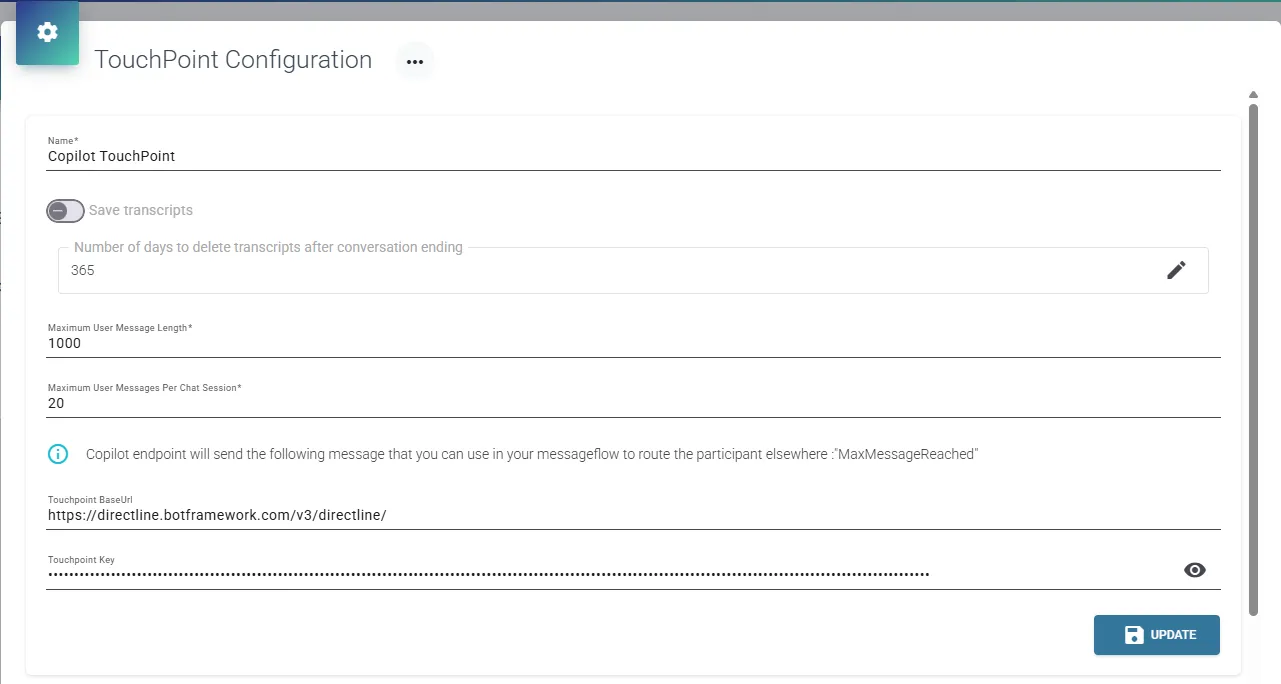
Example of how it works
Webchat conversation – escalating to a human agent
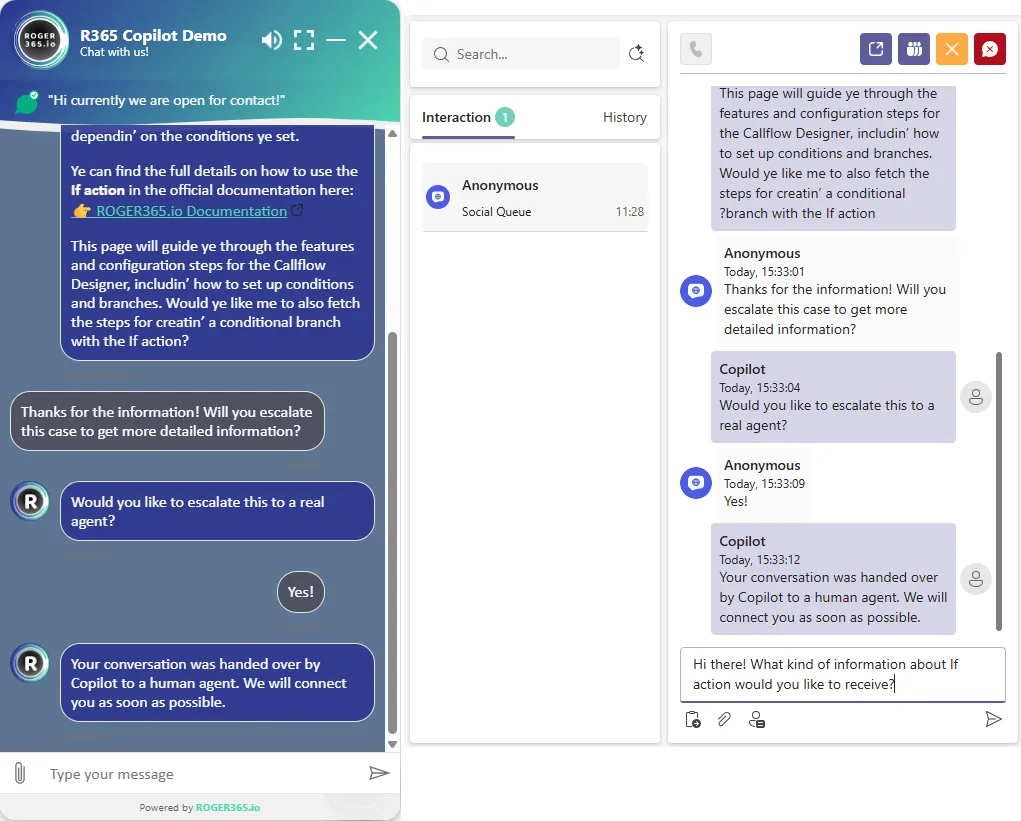
Webchat conversation — closing the conversation at the user’s request
Webchat conversation – closing the conversation after reaching the maximum sent messages
Introduction
This PowerBI report provides key insights into your Contact Center’s performance, covering Calls, Queues, and Agents. The reports allow you to track various metrics, understand call handling efficiency, and monitor agent productivity.
To understand the data it is important to see in what perspective the data is created. In this database we have multiple perspectives
- Caller perspective (also known as the customer or external)
- Queue perspective (internal company)
- Agent perspective (internal employee of the company)
We try to explain the difference between the perspectives with an example of a case, and what the perspective of the different parties are.
A customer calls in and after 5 minutes and 10 seconds the call is picked up by an agent. The callflow the customers follows the following path
- Incoming call is first being offered to queue 1 with 3 agents configured in the queue
- Queue 1 has a timeout of 5 minutes. The call is then offered to an overflow queue with 20 agents.
For the customer the time to pick up is 5 minutes and 10 seconds, so for the customer this is the wait time and is annoyed that it takes long to talk to an agent.
The agent in queue 2 picks up in 10 second and has a good feeling as he answers very fast.
The agents in queue 1 also have a good feeling, because they were all occupied in a call with another customer.
So with this callflow you see that there is no simple solution for the question, what is the wait time, because it depends on who you ask the question. In our database we tried to have these perspectives available, so you have the insights to see the issue from multiple angles.
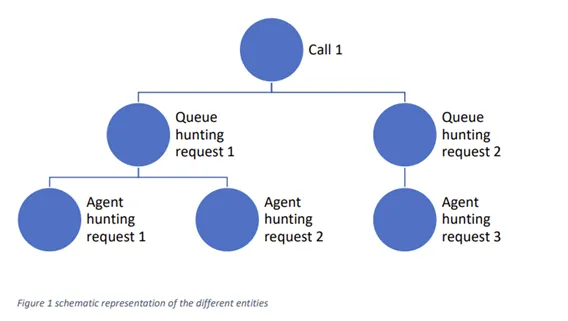
How to navigate
- Navigation Menu: Use the top navigation menu to access different report sections.
- Slicers & Filters: Apply slicers to filter data by specific time periods, call types, or other criteria for detailed analysis.
- Interactivity: Click on any graph element (such as bars or lines) to drill down into the data for more detailed insights.
How to configure
After receving an access to Reporting page at ROGER365 admin portal, download .zip package which contains everything needed to start using this PowerBI Reporting module.
Dashboard
This page offers a comprehensive overview of key performance indicators (KPIs) for the Contact Center. You can view metrics such as total calls, answer rates, average interaction time, and average ring time, helping to monitor the overall performance of the Contact Center.
The page is divided into three horizontal sections based on Call, Queue and Agent perspective.
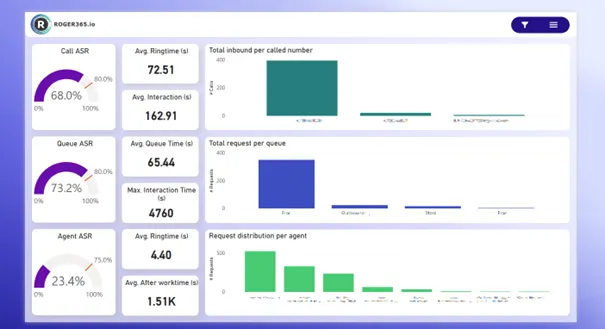
Calls Summary
This page provides an overview of all call-related metrics, including answered calls, average interaction times, and the overall call answer-seizure ratio (ASR). It offers insights into the total number of calls handled, as well as detailed breakdowns of call volumes over specific time periods. This page is essential for tracking call center performance and identifying trends in call handling efficiency.
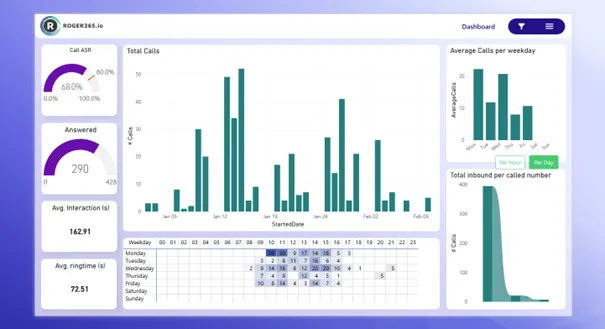
Calls Volume Analysis
This page analyzes call volume patterns by different timeframes. It provides insights into call distribution across weekdays, as well as detailed breakdowns of calls by specific numbers, offering an understanding of peak call times and trends.
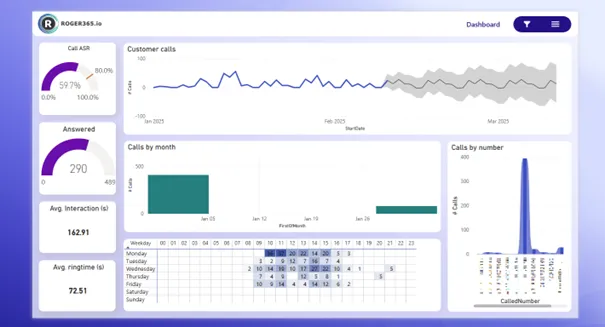
Queue Summary
This page gives a summary of queue performance, displaying metrics such as total requests in the queues, average interaction time, and queue statistics for each weekday. It provides an in-depth view of how well different queues are performing over time.
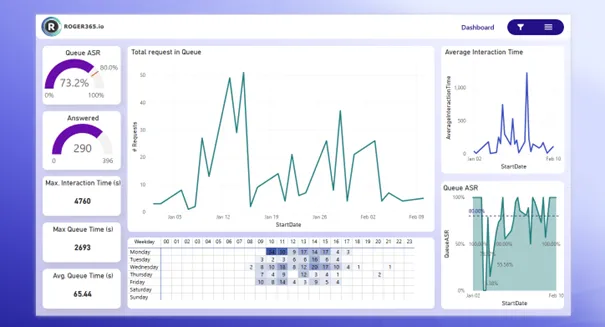
Queue Performance
This page focuses on the performance of individual queues. It displays the number of requests per queue, average queue times, and other performance metrics. It is designed to help analyze queue efficiency and identify areas for improvement.
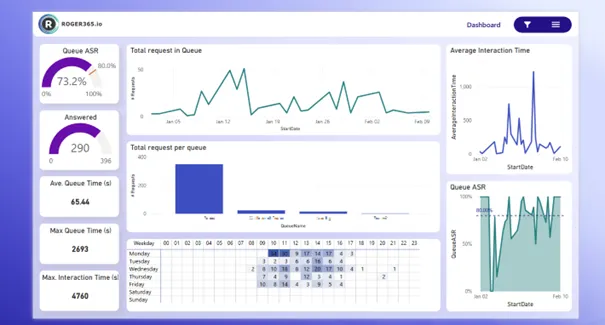
Agent Summary
This page offers a breakdown of agent performance metrics, including request distribution per agent, average ring times, and performance in answering calls. It allows for monitoring of overall agent activity and overall team performance.
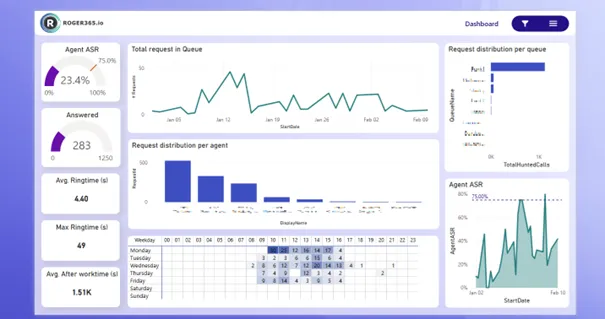
Agent Performance
This page focuses on the performance of agents, analyzing key metrics such as answered/rejected calls, total ring time, and agent answer-seizure ratios. It helps track agent efficiency and identify top performers in your Contact Center.
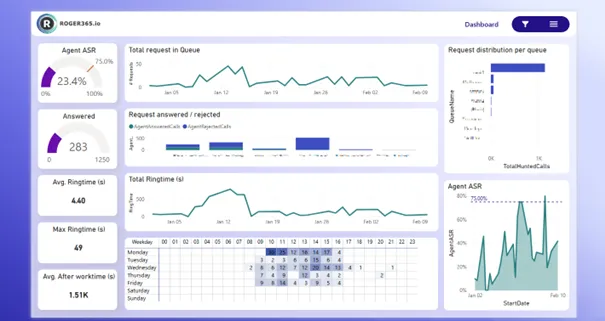
Agent Availability & Utilization
This page provides an overview of agent availability and their utilization, showing how much time agents are spending in different statuses (available, away, busy, etc.). It helps track staffing and identify if there are any gaps in coverage.
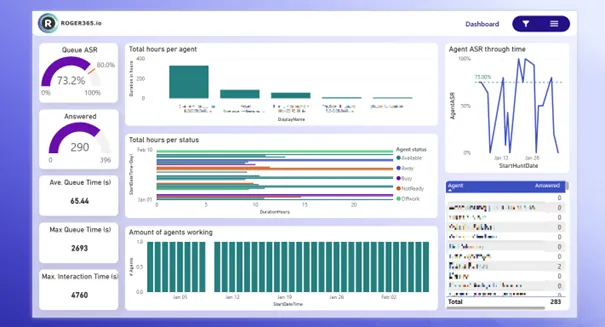
Agent Actions
This page provides an overview of key agent actions during Contact Center calls, including Blind and Consultative Transfers, Callback Requests, Redirects, and Add Participants. It shows how frequently each action is used by agent and queue, highlights trends over time, and offers a clear view of agent activity and performance.
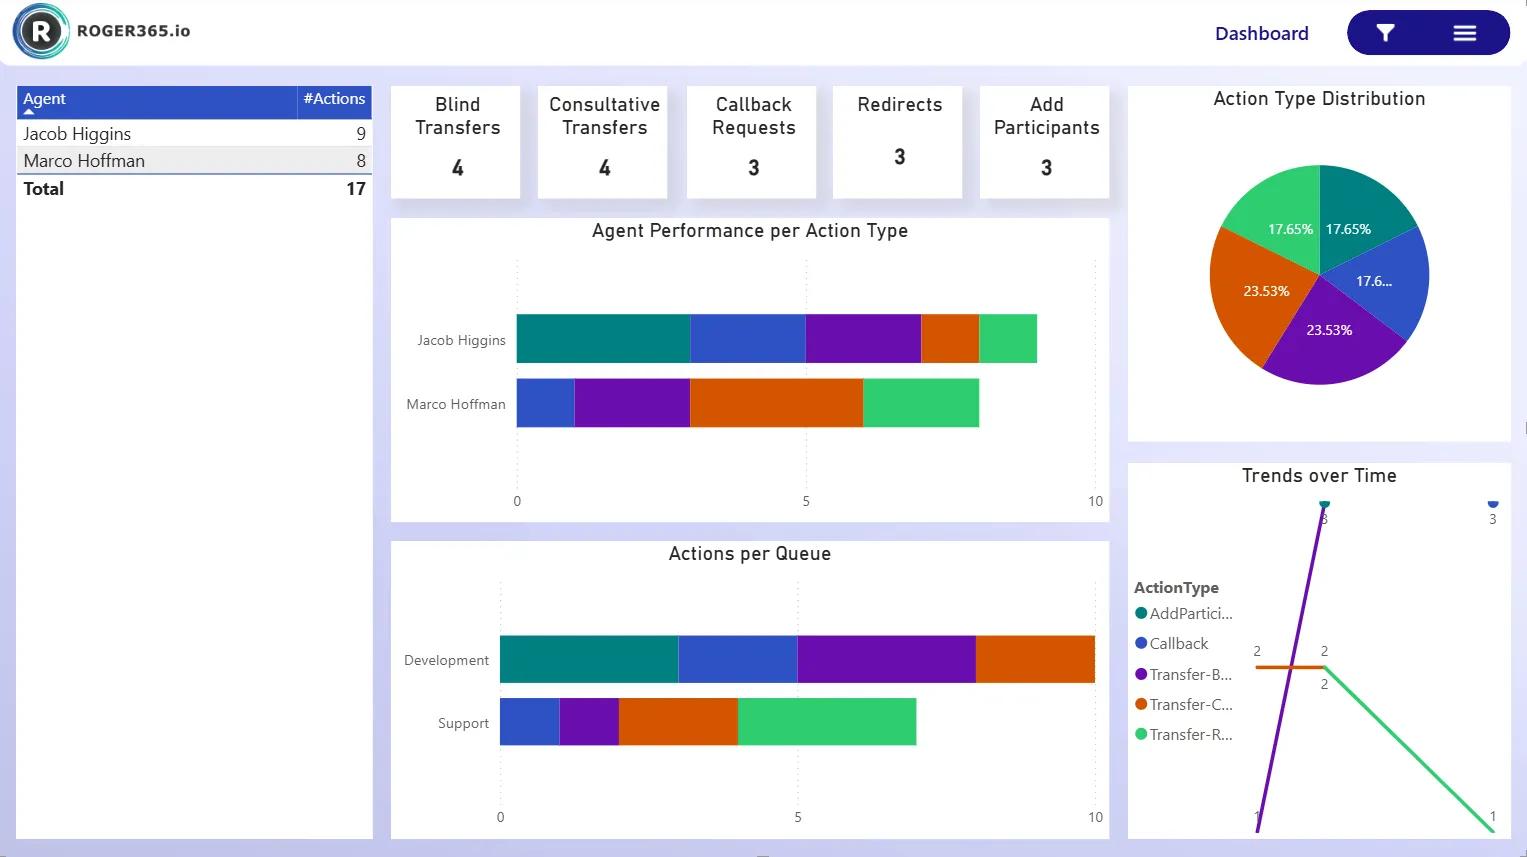
WFM
This page provides an overview of key Workforce Management (WFM) metrics for the agents within Contact Center queues. Using the Erlang C formula, the dashboard estimates the number of agents needed to handle calls, includes adjustments for shrinkage, and measures queue service levels (SLA) and target response times for customers waiting on the line.
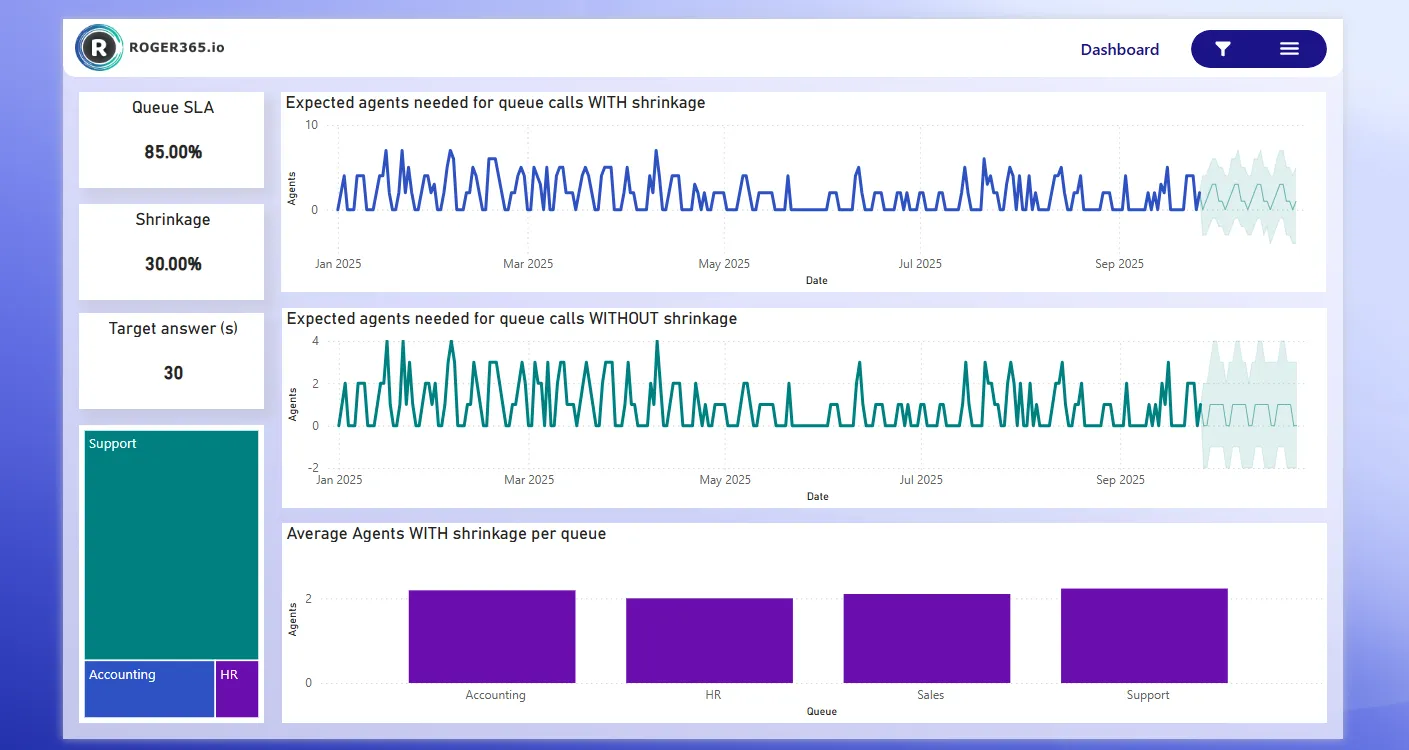
Social
This page provides an overview of social interactions, displaying metrics such as total interactions per type, average interaction time, and statistics over a period of time.
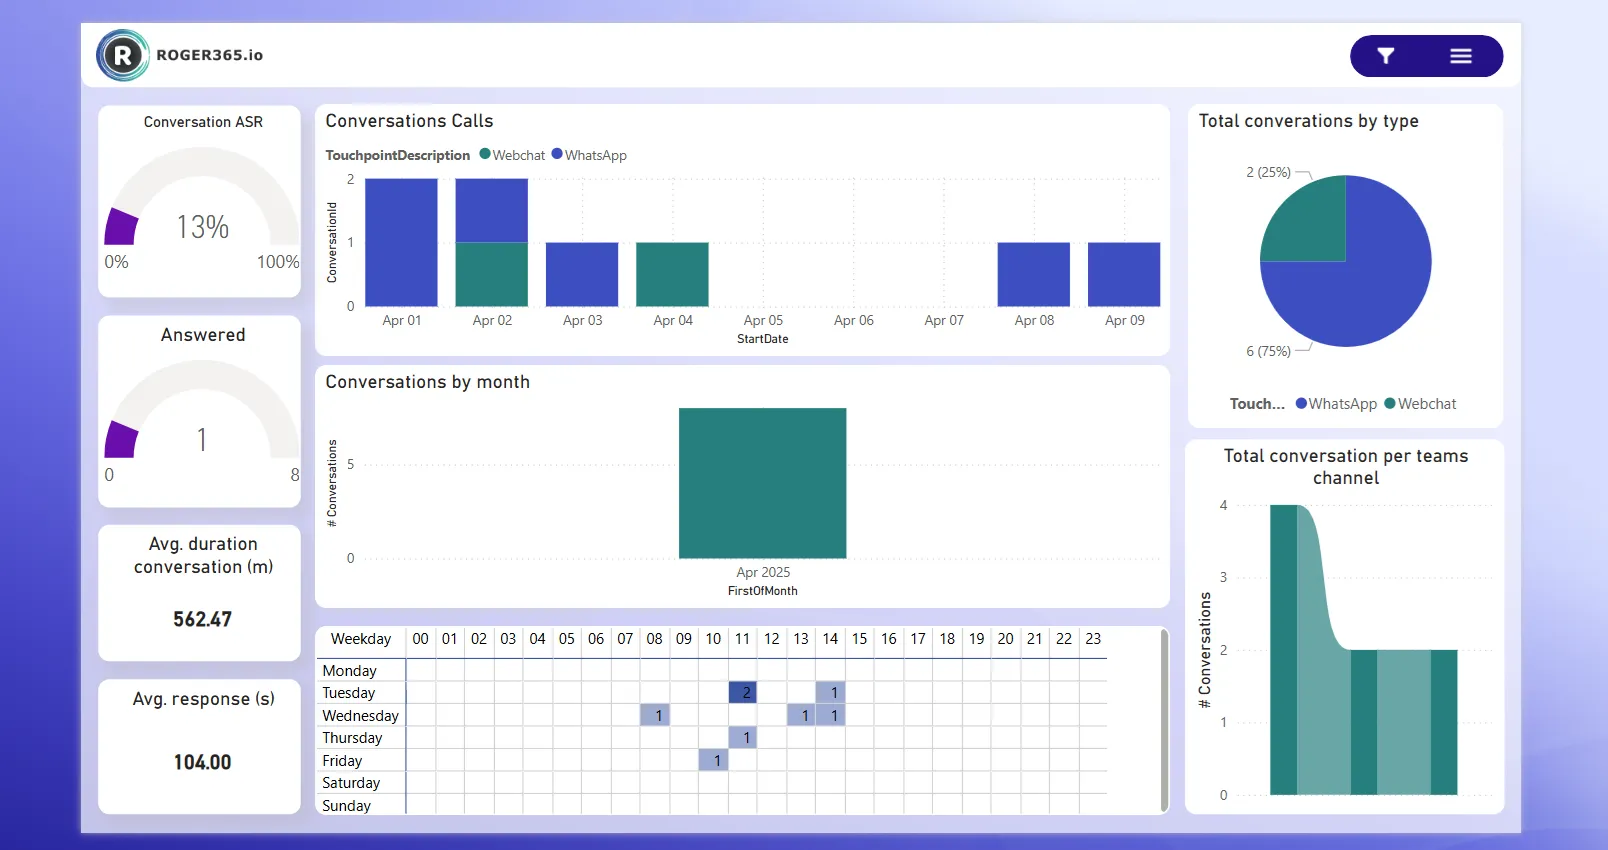
Classification
This page provides an overview of Classifications, displaying metrics such as total classified interactions, average interaction time of classified interactions, and statistics over a period of time.
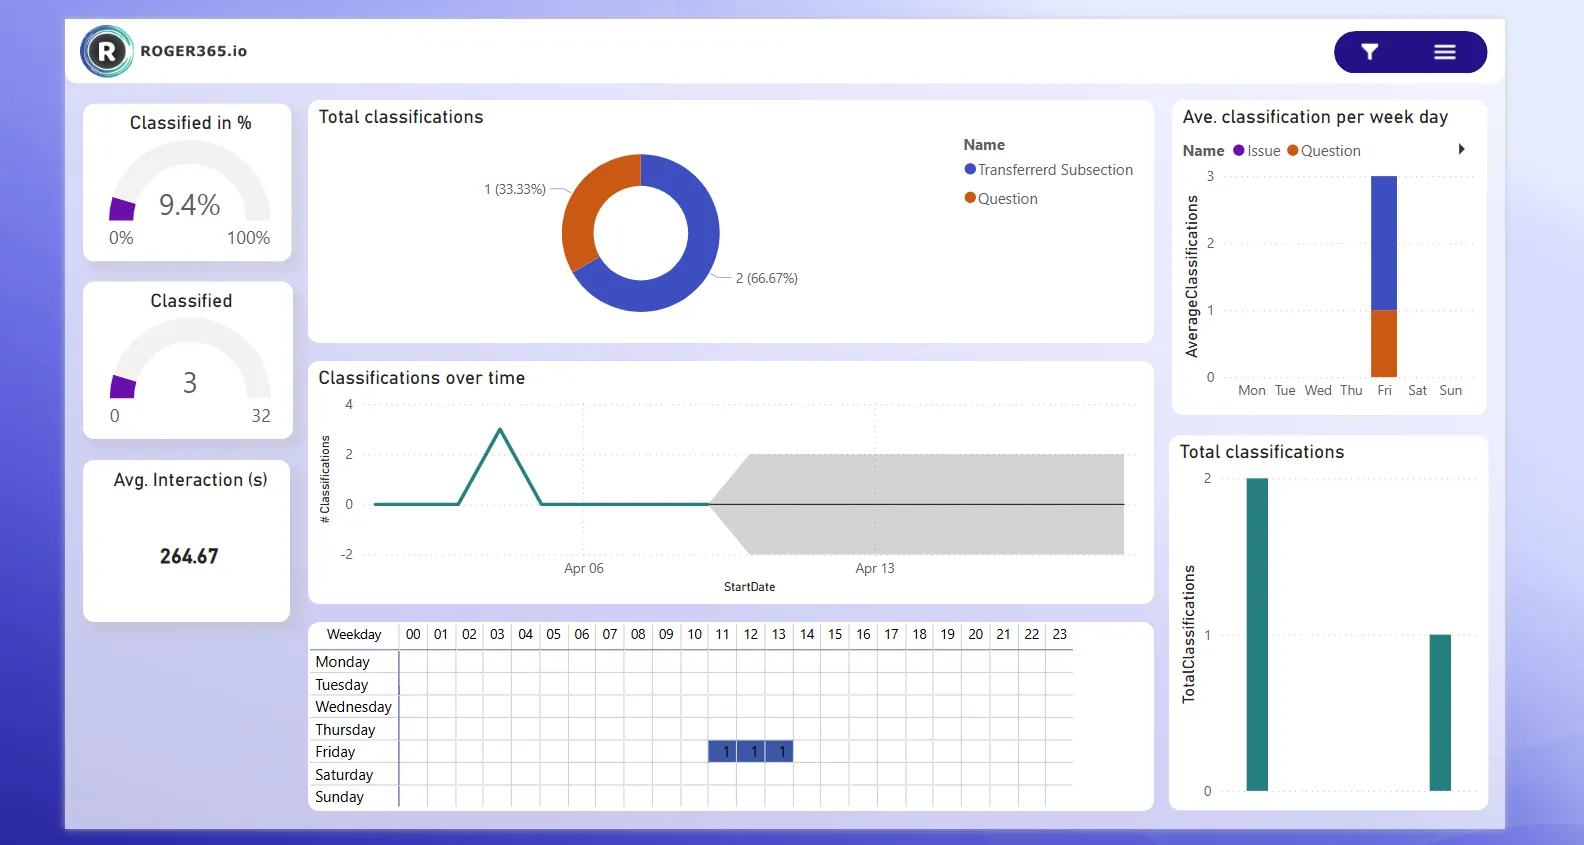
Call rankings Top 30
This page ranks the top 30 callers by volume, offering detailed insights into which numbers or companies are generating the most calls. This is useful for identifying trends in high-call volume sources and monitoring their impact.
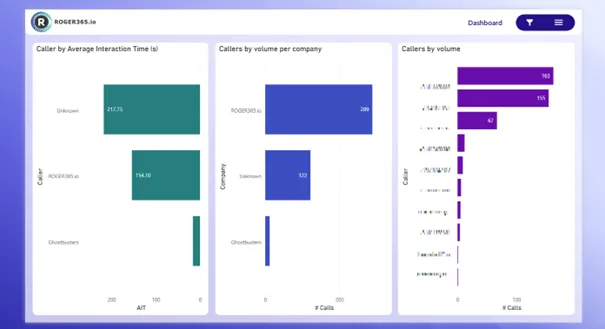
Agent rankings Top 30
This page ranks agents by various performance metrics, such as answer-seizure ratio, average wrap-up time, and the number of answered calls. It helps in recognizing top-performing agents and provides visibility into individual contributions to the overall performance.
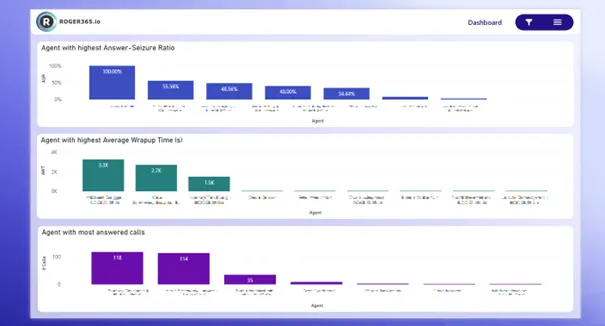
Queue rankings Top 30
This page ranks queues based on their performance metrics like average interaction time and queue time. It provides insights into which queues are performing the best or worst, helping to optimize queue management and agent allocation.
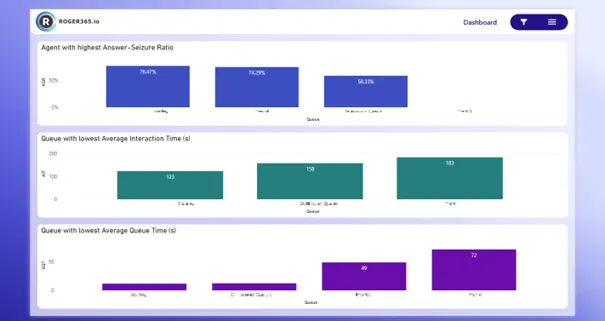
Definition list
Wallboard feature of ROGER365.io allows portal admins or users with proper RBAC permission to create customized Wallboard. Published Wallboard(s) can be used on external monitors or TVs making monitoring of crucial data easier than ever.
Wallboard feature requires license (in order to publish it), Business and Enterprise subscriptions have 1 license included. Each published Wallboard can have 3 active sessions. Additional Wallboard licenses should be arranged with Sales department.
Wallboard page in ROGER365 admin portal allows to import exported earlier Wallboard configurations which enables opportunity of creating various templates.
To create a Wallboard press “+Add”:
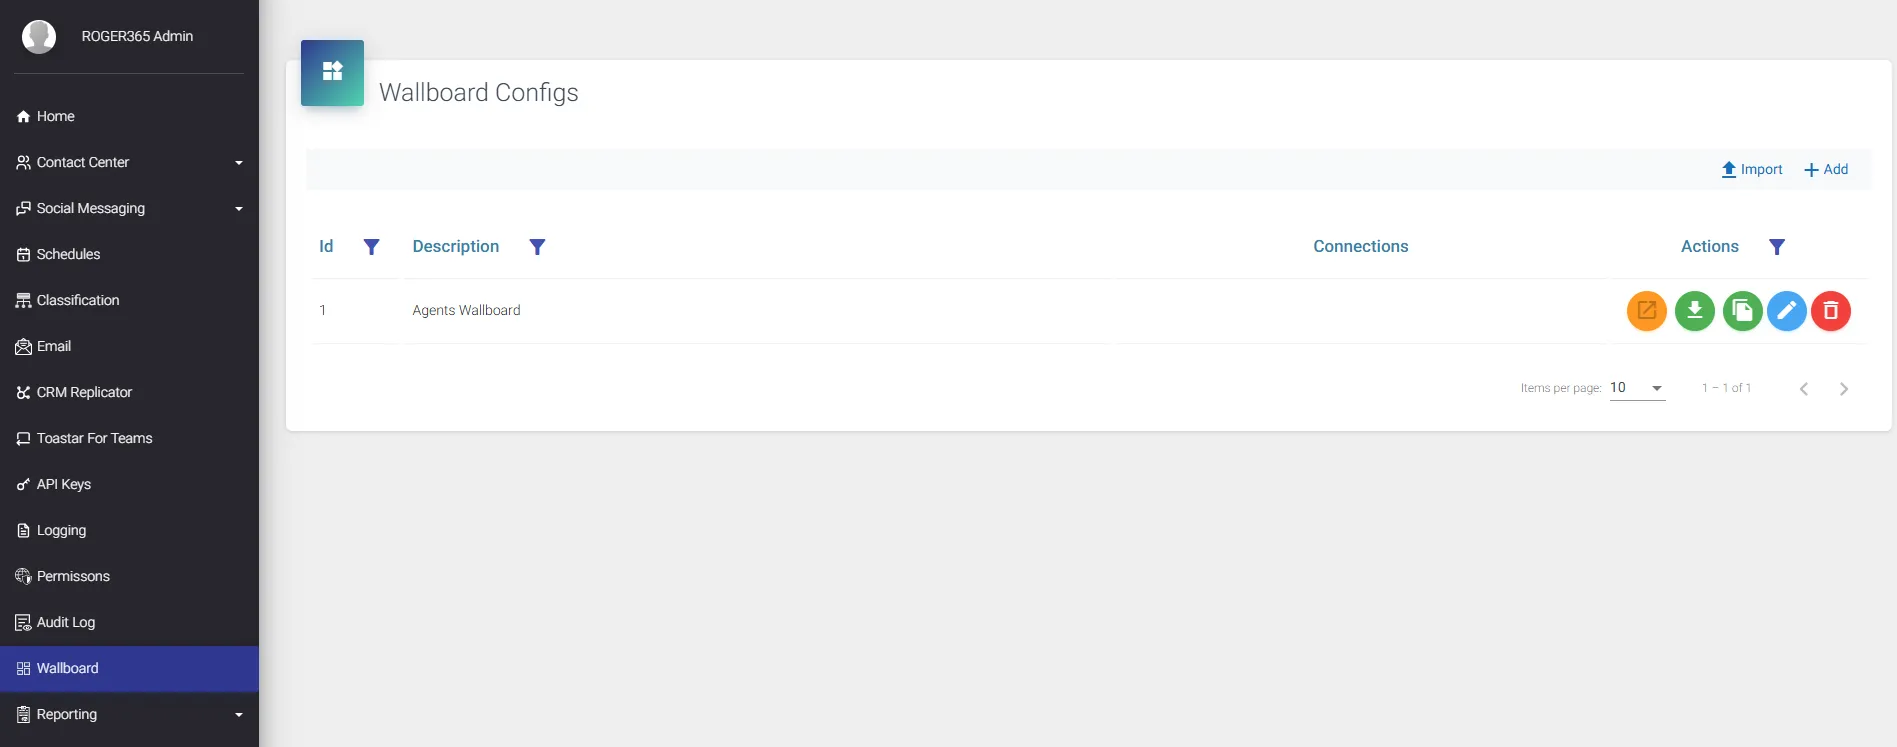
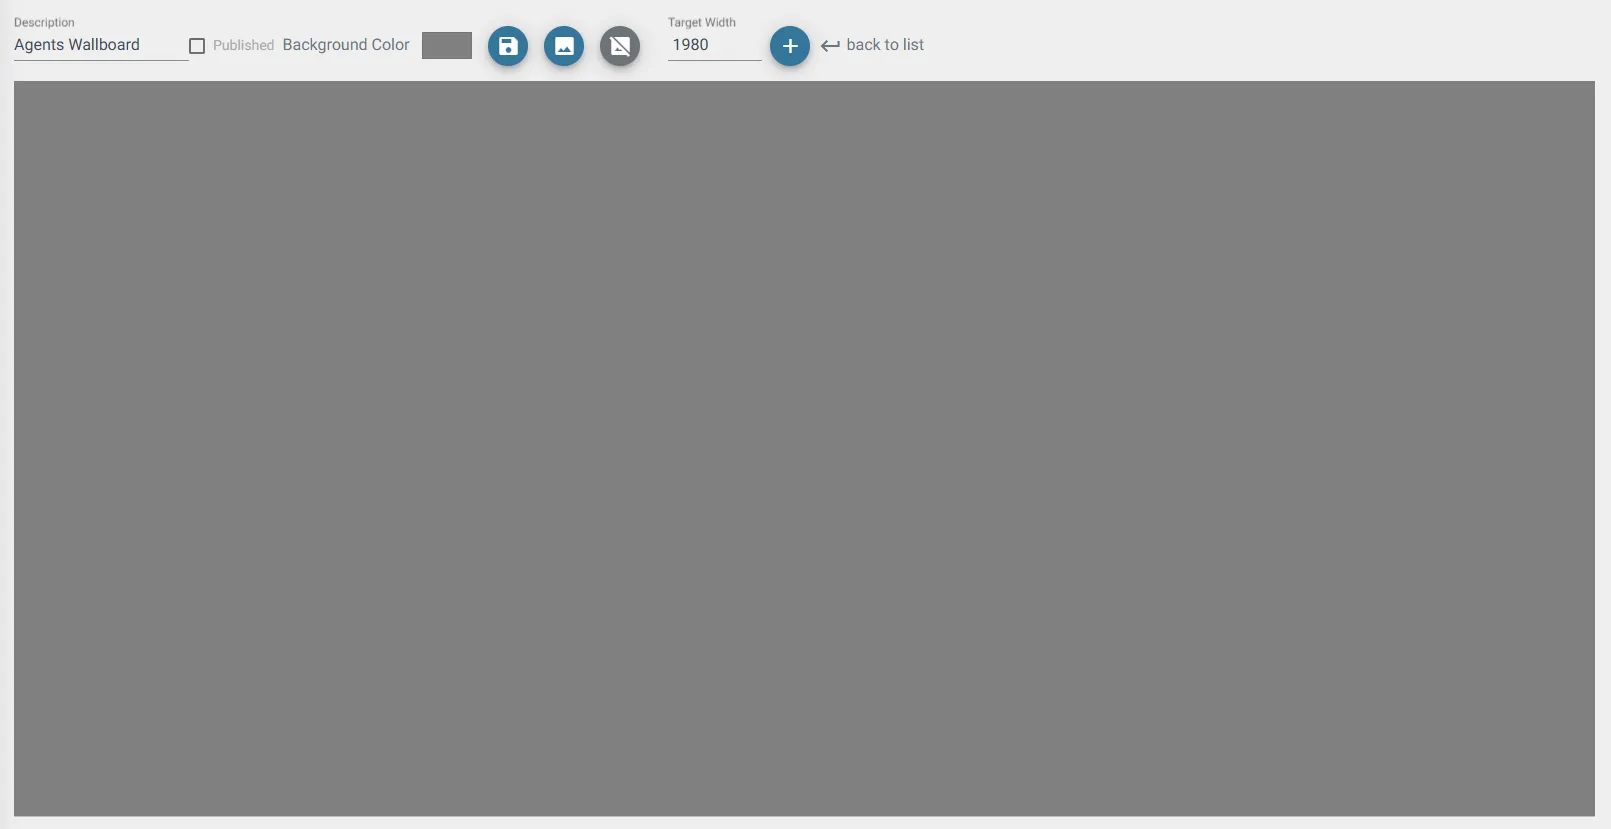
In this configuration window you can start creating your Wallboard which can be customized based on your demands.
Description of the top bar functions is as follows (starting from left to right):
- Name of the Wallboard.
- Checkbox “Published“: if selected, the Wallboard is published, allowing live data monitoring. This action consumes a license.
- “Set Background Color” allows to set background color of your Wallboard.
- “Set Background Image” button allows to upload background picture for your Wallboard.
- A good rule of thumb is to upload a background image with the specified dimensions of the target display.
- “Clear Background Image” button is used for removing uploaded earlier background image.
- “Target Width” property is used for designing Wallboard in specified display width.
- “Add new cell” button is used for adding new cell. Cell is responsible for setting up one of the available Wallboard widgets.
After adding new cell you can choose various widgets from 3 main groups – “General Widgets”, “Voice Queue Widgets” and “Social Queue Widgets”. In the same menu you can Remove specific cell, or Duplicate entire widget’s configuration if recreation takes too much time. These operations are available via ⋮ in the upper right corner of the cell.
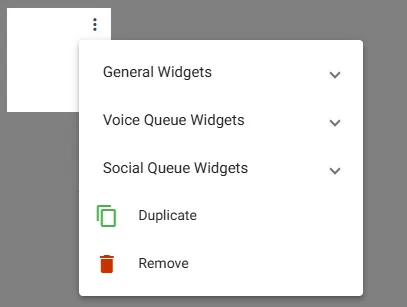
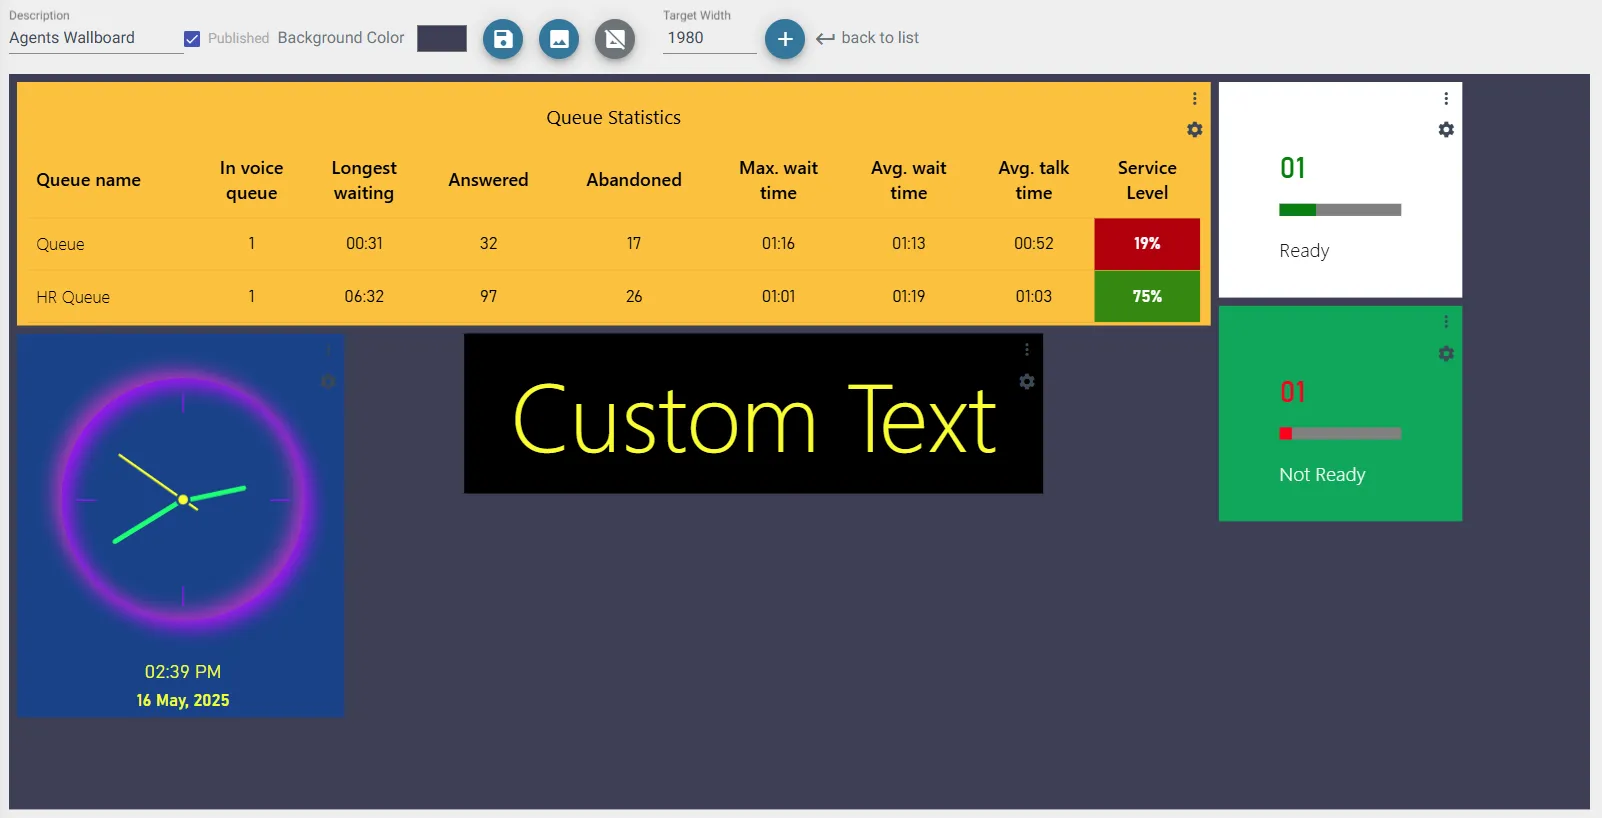
Cells in the configuration window will be showing sample data to make customization of cells easier.
To customize one of the Widgets, press ⛭ icon:
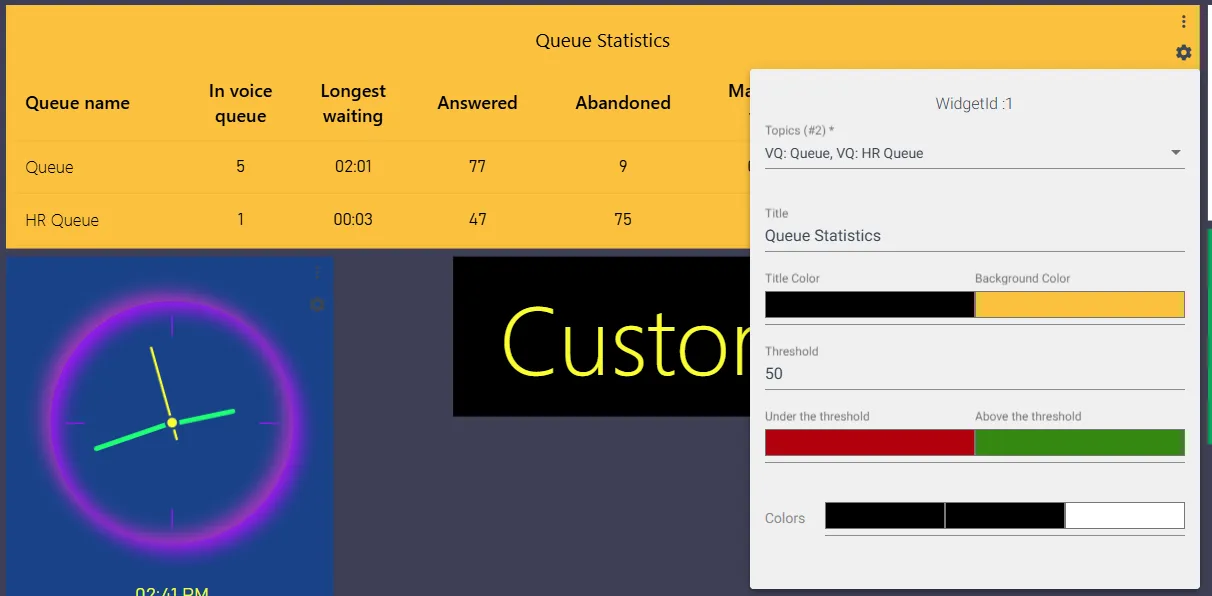
In this window you can change various aspect of this specific Widget. In the example based on “General statistics” Voice Queue widget, you can customize Topics (Voice Queues), the Widget Title, colors, and the Queue Service Level Threshold (as a percentage).
To move widgets, perform press & hold operation and move your mouse in desired direction, you will see a grid which helps with aligning widgets against others. To resize widgets (cells), hover your mouse over any widget edge until seeing ↔ or ↕ mouse icon, then press and hold left mouse button and move your mouse in whathever direction.
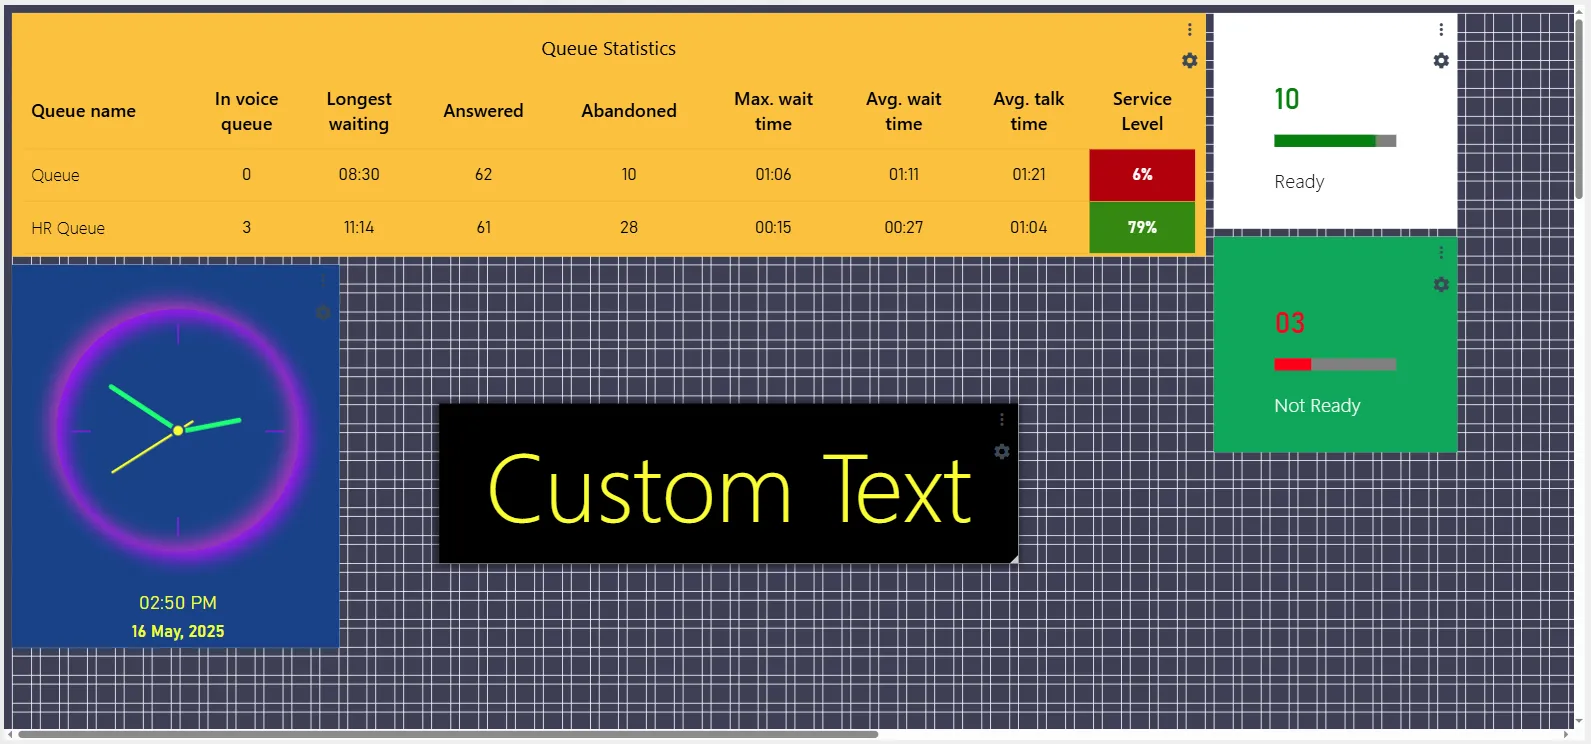
Once your Wallboard configuration is ready to be used at your external displays/TVs, mark Published checkbox and save Wallboard.
To open published Wallboard navigate to a main Wallboard admin page and press yellow icon “Go to published Wallboard”. You will be redirected to a URL of your Wallboard which can be used on devices with Internet access. Live version of the Wallboard will now await for actual data coming from ROGER365.io platform.
Accessing published Wallboard is done via admin portal so it requires authentication in the same way as for portal admins/RBAC users with permissions allowing to set up selected aspects of ROGER365 platform. This approach allows to create Wallboard-only user(s) within your Microsoft Entra ID environment. Wallboard user(s) should have at minimum “TeamsUser” role assigned at Enterprise Application “ROGER365.io” level, it is not possible to access the published Wallboard as a user without any role.
Role reference can be found at this documentation page – Setup Access & Security
Notes:
- Background Image is not saved in cloned/imported Wallboard configurations.
Role-based access control allows for restricting access to only selected parts of ROGER365.io admin portal to groups of users. The configuration must be done by the user with rights to make changes to Microsoft Entra ID tenant, and with an access to ROGER365.io admin portal.
The Logging admin page on the ROGER365.io platform is designed to help you troubleshoot system issues effectively. It provides detailed logs to quickly identify errors and malfunctions, helping you resolve problems faster. You can also track changes made by automated processes, like User Synchronization, for a clearer understanding of the system’s behavior.
If you are unable to resolve the issue yourself, data from the Logging admin page provides crucial information for your dedicated ROGER365 partner.
The Logging admin page classifies all records into three main severities:
- Info
- Warning
- Exception
Each severity is categorized based on the affected component, such as “ContactCenter”, “CRM”, “AI Flow”, “Presence” and more.
To view the details of a specific record, the portal admin should click on it:
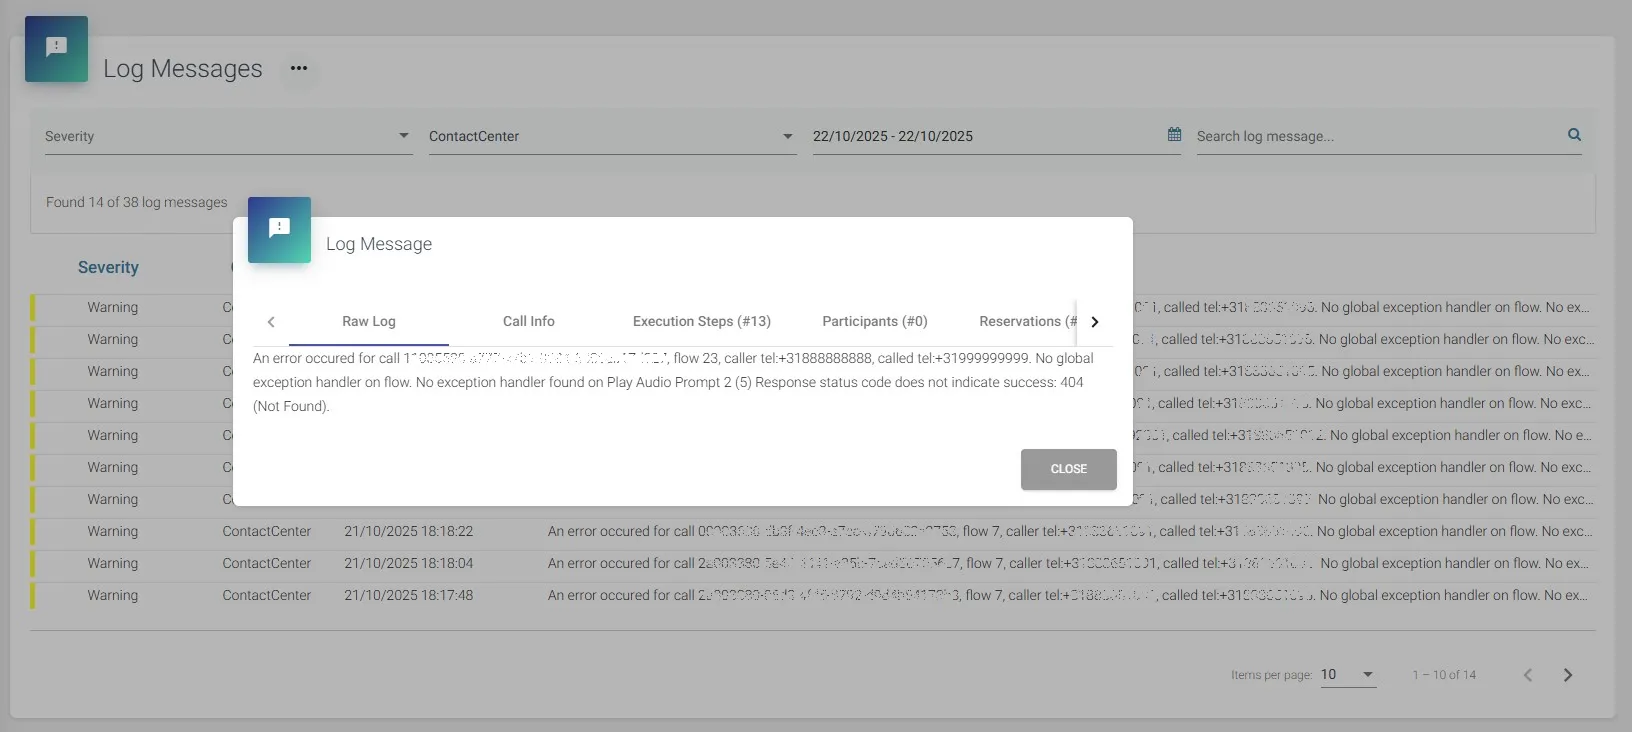
Where:
- Raw Log – This section presents an overview of the message.
- Call Info – This section presents an overview of call’s main details.
- Execution Steps – This section presents the caller’s journey through the actions in the call flow, highlighting the point of failure (marked in red).
- Participants – This section lists the call participants (if any).
- Reservations – This section displays the requests created by the Queue action.
- Stream Changes – This section shows the changes in the audio stream of the calling parties.
Note: The ROGER365.io platform only receives the metadata of a call.
With the CRM Calling Integration (also called Toastar) you can receive customer data from your CRM system when receiving a phonecall. When a new phonecall arrives ROGER365 can search your connected CRM system to match the phonenumber and shows the contactdata of the caller.
There are a few prerequisits:
- Microsoft Teams Calling must be implemented (direct-route or calling plan)
- Currently only external PSTN calls are supported
- A CRM Replicator must be configured, or use Microsoft Power Automate / Logic App to retrieve and show CRM data via the Webhook
- An Azure subscription must be available to register a Bot channel
To enable CRM Calling integration, complete the following steps:
- Register a Bot channel in Azure and create a Teams user
- Create Teams Virtual User
- Add TOASTAR App to Teams
- Enable users in the ROGER365 portal
- Configure Teams client to enable Toastar
- Optional: Create Webhook & Postback
To enable a custom CRM connector, you have to develop your own software. We have an API available to which you can send the data. If you don’t have the expertise, we can get you in contact with one of our partner to help you.
Add Custom CRM Replicator
To create a replicator to which you can send your data, follow these steps:
- Go to the ROGER365 portal
- Select [CRM Replicator] in the left navigation bar
- Click [+ Add Replicator]
- Enter a [Name] and [ Description]
- Select [Custom CRM] as Type
- Choose your Country Code.
- Click [Save]
After saving, the Connection URL and Authorization key are available to you.
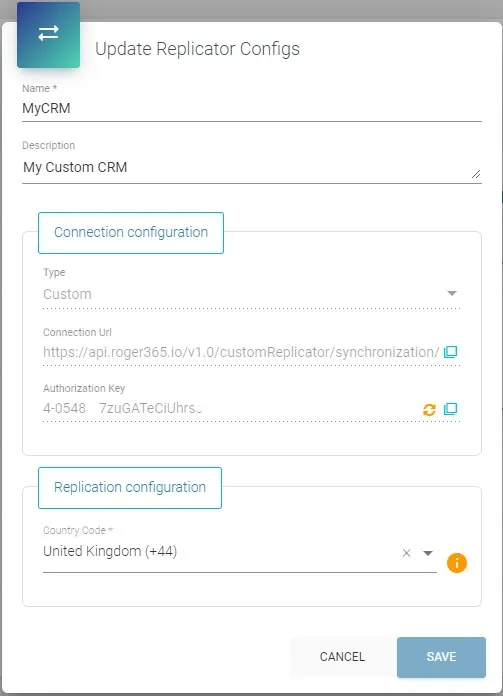
POST JSON
Here’s the definition in which format you can send the data.
The parameter “isPartialUpdate” and “batchIndex” are used to page the import. Start the first POST with “batchIndex=1” and “isPartialUpdate=true”. For each subsequent update, increase the batchindex by 1 and keep “isPartialUpdate=true”, then for the last update set “isPartialUpdate=false”.
The “SourceId” is required and must be unique and stay the same for a contact.
POST /v1.0/customReplicator/synchronization/{id}?isPartialUpdate=true&batchIndex=1 HTTP/1.1
Host: api.roger365.io
Authorization: {authkey}
Content-Type: application/json
HTTP body
[
  {
    "SourceId": " ",
    "FirstName": " ",
    "LastName": " ",
    "DisplayName": " ",
    "Email": " ",
    "SipAddress": " ",
    "Street": " ",
    "Zip": " ",
    "City": " ",
    "Country": " ",
    "Company": " ",
    "PhoneNumber0": " ",
    "PhoneNumber1": " ",
    "PhoneNumber2": " ",
    "PhoneNumber3": " ",
    "PhoneNumber4": " ",
    "PhoneNumber5": " ",
    "Custom0": " ",
    "Custom1": " ",
    "Custom2": " ",
    "MobileData0": " ",
    "MobileData1": " ",
    "MobileData2": " ",
    "Type": " ",
    "ContactUrl": " ",
    "ContactId": " ",
    "CompanyId": " ",
    "ActionLink0": " ",
    "ActionLink1": " ",
    "ActionLink2": " ",
    "ActionLink3": " "
  }
]
E.164 Number formatting
It might be clever to format numbers using the E.164 recommendation. An international E.164 number is designed to include all of the necessary information to successfully route a call or SMS message to an individual subscriber on a nation’s public telephone network.
Here’s how the E.164 numbering plan works:
• A telephone number can have a maximum of 15 digits
• The first part of the telephone number is the country code (one to three digits)
• The second part is the national destination code (NDC)
• The last part is the subscriber number (SN)
• The NDC and SN together are collectively called the national (significant) number
To use the previous example:
Country code: +44
National destination code: 7911
Subscriber number: 123456
In total: +447911123456
Two important things to note: First of all, in the international E.164 notation a leading ‘0’ is removed. The UK mobile phone number ‘07911 123456’ in international format is ‘+44 7911 123456’, so without the first zero. Secondly in the E.164 notation all spaces, dashes [‘-‘] and parentheses [ ‘(‘ and ‘)’] are removed, besides the leading ‘+’ all characters should be numeric.
ROGER365 provides default replicators for CRM software. Underneath you’ll find the list of replicators we have currently available. If you are using another CRM system, you can create your own custom CRM Replicator.
The default CRM Replicators will show basic CRM information and a button to open the contactcard (only Social Messaging). If you want to retrieve extra (realtime) information, you can use our PowerHook to retrieve (eg. via Microsoft Power Automate/Logic App) extra information and paste it to the open conversation.
With the CRM Replicator contact data can be lookup in your CRM system and shown when a new phonecall arrives (CRM Calling Integration), or can be shown with incoming Social conversations. The CRM Replicator connects to your CRM system and replicates on a specific time interval to retrieve the latest data. This replicator only retrieves basic contactdata, like address, email etc.
Data will be stored encrypted in your own ROGER365 database which is not shared with other ROGER365 tenants. The advantage of this is that data can be retrieved very quickly, instead of retrieving in from your CRM system.
In our library we have some default CRM Connectors available, which you can use right out of the box. But if your CRM isn’t available yet, you can create your own Custom CRM Connector.
Each CRM replicator can include up to 4 customizable action buttons. These buttons open external CRM/ERP webpages in new tabs, prefilled with customer-specific data like email, company, or first name. The buttons are shown in the Agent Assist which can be enabled per agent. The action buttons supports usage of default CRM and Contact Center variables.
It is possible to include CRM variables such as “{Email}” or “{PhoneNumber0}” (without quotes) to make your action button using protocol handler dynamic. Additionally, you can use default Contact Center variables.
The CRM’s Action Buttons feature supports protocol handlers in its links, such as:
- tel:
- mailto:
- msteams:
Protocol handlers can enhance your workflow by enabling quick actions, such as calling a supervisor, sending them an email, or even opening a new Microsoft Teams chat window making it faster to seek help in emergency situations or without a need to jump through multiple systems.
Configuration of CRM Action Buttons
- Default CRM Connectors
Navigate to created earlier Default CRM Connector at the ROGER365.io admin portal. Open its settings and scroll down to see “Action Buttons” section:
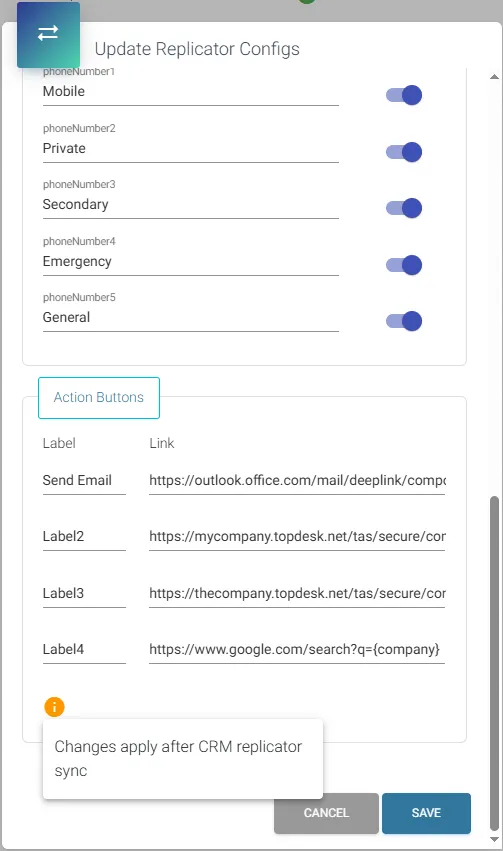
- Labels – visible in the Agent Assist label (name) for the action button.
- Link – URL address which redirects an agent upon pressing on correlating label in Agent Assist.
- Custom CRM Connector
Labels for the action buttons must be defined in ROGER365.io admin portal:
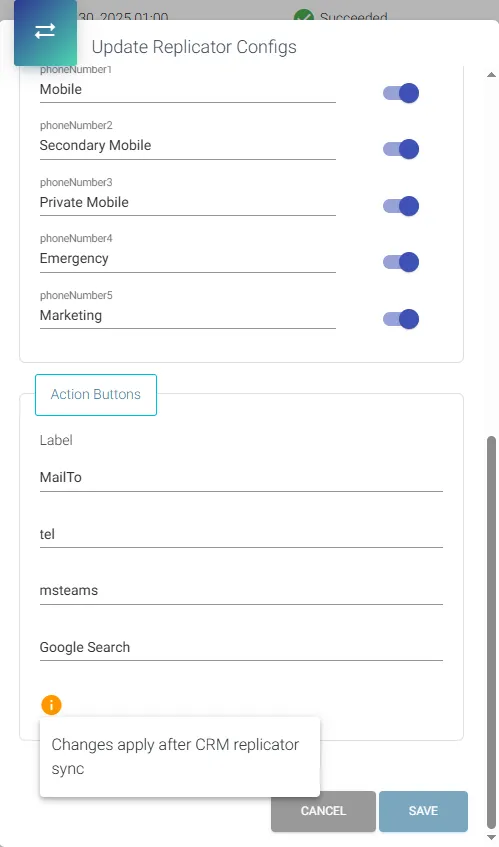
Links in case of Custom CRM Connectors shall be configured in the .csv upload template under ActionLink0 (to 3) columns!
Disclaimer: Before proceeding, please make sure you have good knowledge about your own Microsoft Office 365 and Entra ID situation before continuing.
Email configuration admin page gives possibility to include your own email address (for instance Shared Mailbox) into ROGER365 system. This feature uses App Registration which is able to authenticate and send emails from configured email address. Main benefits of this feature are control over sent emails and their limits, making it default option for sending callback requests (Email type) or include it in Contact Center/Social Messaging actions.
Create Email App Registration
To enable the Email integration, you must first create an App Registration in the Azure Portal: Use Automated method – Download PowerShell Script (preferred way, execute as Global Admin)
General steps (manual method):
- Create an App Registration in Entra ID environment for Email integration (with API permissions: Mail.ReadWrite – Application, Mail.Send – Application, MailboxSettings.ReadWrite – Application, User.Read – Delegated).
- Create a Secret for the App Registration.
- Configure an application access policy and limit the scope of application permissions according to your environment’s situation – Microsoft documentation.
Disregarding point 3 will cause the Email App Registration to have an access to every mailbox within tenant which brings potential security risk.
Create Email Configuration
After successfully creating the App Registration for the Email, you can configure Email configuration, press “+Add” at “Email” admin page:
- Description: Provide a description (name) for your Email configuration.
- MailboxUserId: Enter email address for your Email integration (most of the time email address of shared mailbox).
- ClientId: Provide application (client) ID of Email App Registration from your Azure environment.
- ClientSecret: Provide secret of Email App Registration from your Azure environment.
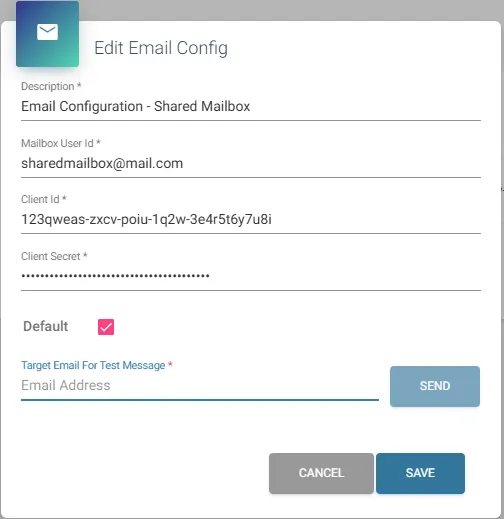
- Default: Setting Email configuration as Default will make every email (including Callback request of Email type) sent via ROGER365 platform to be sent via configured email address (Mailbox UserId).
- Target Email for Test Message: Provide target email address to test whether Email configuration properly sends an email
If Email configuration is not set as Default, Callback request of Email type will not be possible.
With the schedule you can configure your office opening hours and exceptions and optionally assign labels which can be accessed from flowchart allowing fexibility to your flowcharts, for instance play different audio prompt depending on assigned label. The flowchart checks the schedules and based on the result (isOpen or not) different logic of the flow is followed. Define one or more schedules and use this information in your flowcharts. You can review the “Usages” column to see which callflow or messageflow contain a particular Schedule. Click on the buble from “Usages” column to open a box with redirection option to the specific flow.
The schedule can also be used to show different status messages on the Webchat TouchPoint.
Add a schedule
- Go to “Schedules”,
- Choose “+ Add Schedule”, give the schedule a “name” and choose the relevant time-zone,
- Click “Add” to confirm.
Change the schedule
- Now click the “go to Schedule” option behind the just created schedule,
- Update the schedule,
- Click “<- back to list” to close the schedule.
Create long Exceptions & Holidays
- Click “exception” under “One Time” section of “Exceptions & Holidays”,
- Select desired type of exception,
- Select start date and time,
- Select end date and time,
- Click “Save” to confirm.
Changes on the schedule are effective immediately. Start and end time is for first and last day of exception, the rest is marked as all day according to type of exception (open/closed/holiday).
The Agent Assist of ROGER365.io enables agents to see crucial information regarding their customer such as CRM data (if configured), historical interactions with customer, and Classification of current interaction.
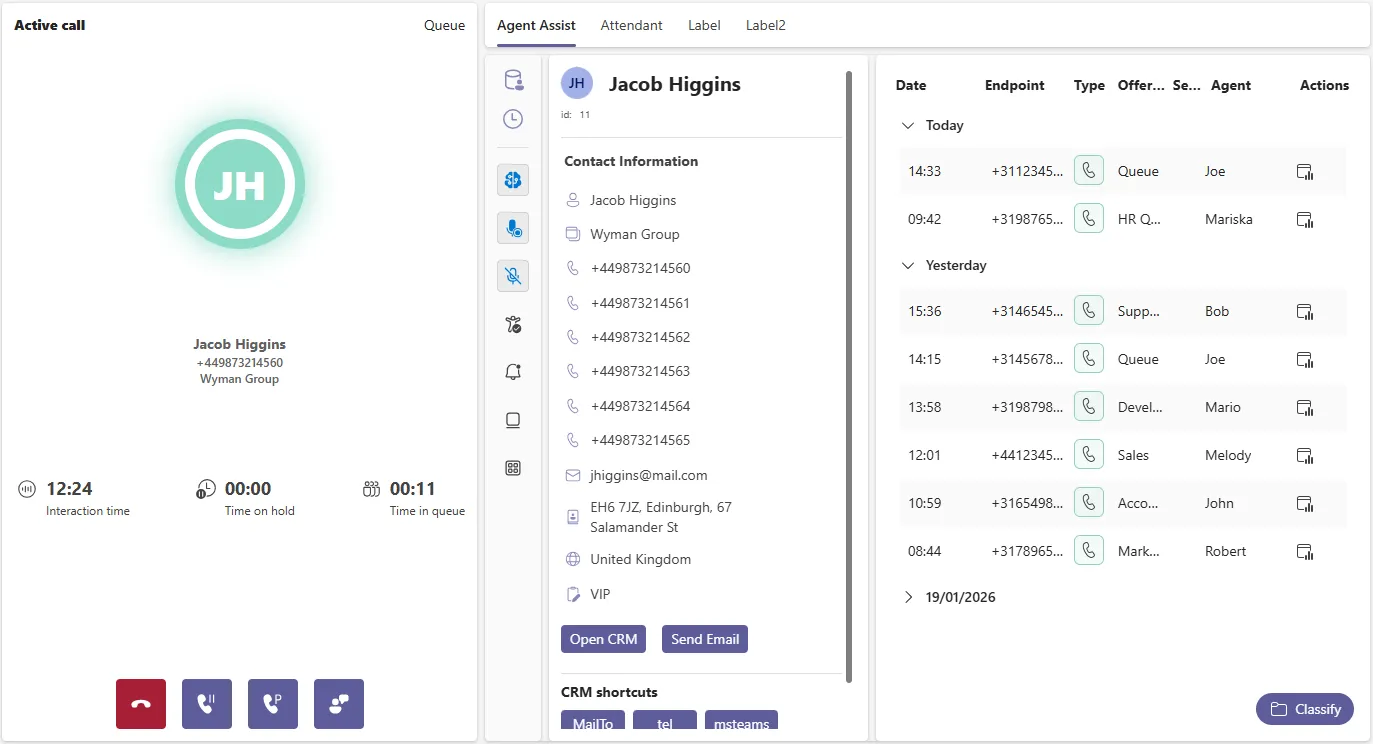
When the call invite is offered to the available in the Queue agent, the Agent Assist tab populates three main sections – “User”, “History” and “Classification” (as a icon). The Agent Assist stays open until the completed Wrap-up item. In case of Social Messaging interactions, Agent Assist will become visible after picking up conversation from the Queue.
You can also open Agent Assist without an active call or conversation. To do this, navigate to the History tab (under the search field), select one of the voice/social records.
Each sections of the Agent Assist can be hidden/shown or maximized using the small icons in the top right corner of specific section:

Or by pressing purple section’s icon on the left side of Agent Assist:
Custom view will be saved during the agent’s session.
The Users section presents most important details of resolved by CRM Replicator contact. Additionally it does have two available buttons:
- “Open CRM” will redirect an agent to the URL configured at “ContactUrl” field of CRM contact.
- “Send Email” will open the “Mailto Link” with the email address of resolved contact which redirects an agent to the Email service of choice.
“CRM shortcuts” section shows configured earlier CRM’s Action Buttons based on assigned CRM Replicator to this Queue – CRM’s Action Buttons reference.
The History section presents the last 10 historical interactions with the present customer. You can see both voice and social interactions.
In case of not being able to read the entire content, an agent can hover their mouse cursor over specific piece of data to see the tooltip with full description. Agent can also maximize the History tab, which will hide the other 2 sections to ensure a clear overview of interactions with the customer.
Sentiment score will be shown for Social conversation when the messageflow does contain Sentiment action.
Seniment score will be shown for Voice calls based on Sentiment Action result of AI Flow.
There’re 3 levels for Sentiment’s confidence score:
- Negative

- Neutral

- Positive
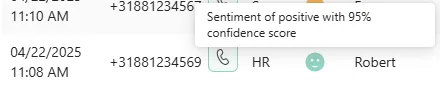
If the agent has the appropriate permissions, a Customer Timeline button is displayed. Clicking this button opens a popup with a detailed timeline for the selected interaction. Agents can also view the interaction classification, which is assigned either manually by a previous agent or automatically by the Classification action (which is part of powerful AI Flow feature). The popup also includes an AI-generated summary that consolidates the key details of the interaction, allowing agents to review and/or edit it if any information is inaccurate. The feature of AI-generated summary of social conversations is available to configure in the End node.
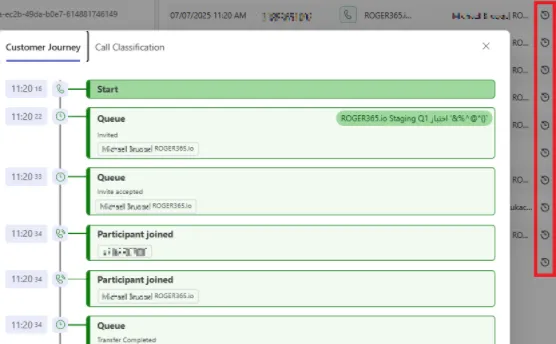
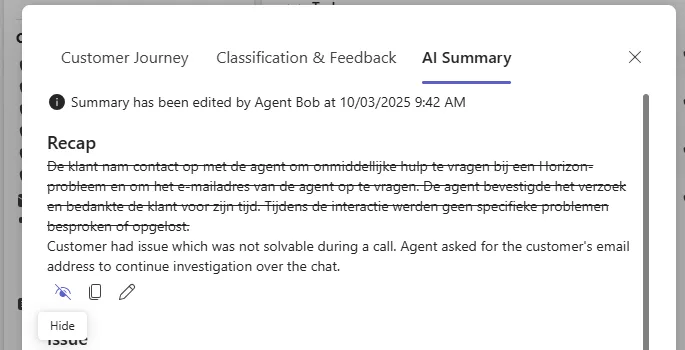
If the caller gave his feedback thanks to configured earlier “Store feedback” action, the “Classification & Feedback” tab allows to check this information:
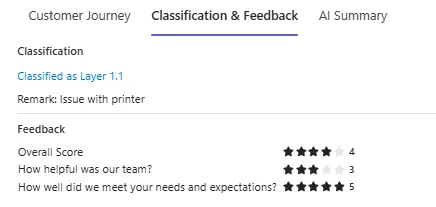
The Classification section (icon) by default won’t contain any of the Classification. This must be first configured, check Classification documentation.
The created Classification will be available during the next interaction with the customer (refresh the application if it’s not visible). When assigning a Classification for the interaction, there is an option to add an optional Remark. This is a useful feature for leaving internal notes for specific customer interactions, either for yourself or other agents.
Reference to Classification documentation in order to retrieve configuration of created Classification, as well as the Classification assigned during the conversation.
Note: Remarks have a hard limit of 2048 characters.
Show Agent Assist for Selected Contact
As an agent, you can open Agent Assist as a separate tab for a selected CRM contact. This allows you to view all relevant contact details without needing to answer a conversation or locate the corresponding history record, saving significant time and effort.
Open the More Actions menu next to the selected contact record and click the “Show agent assist for contact” button:
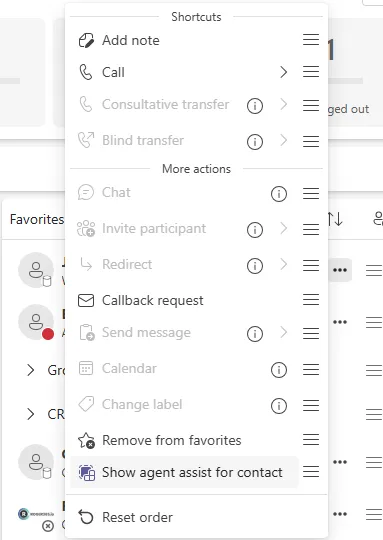
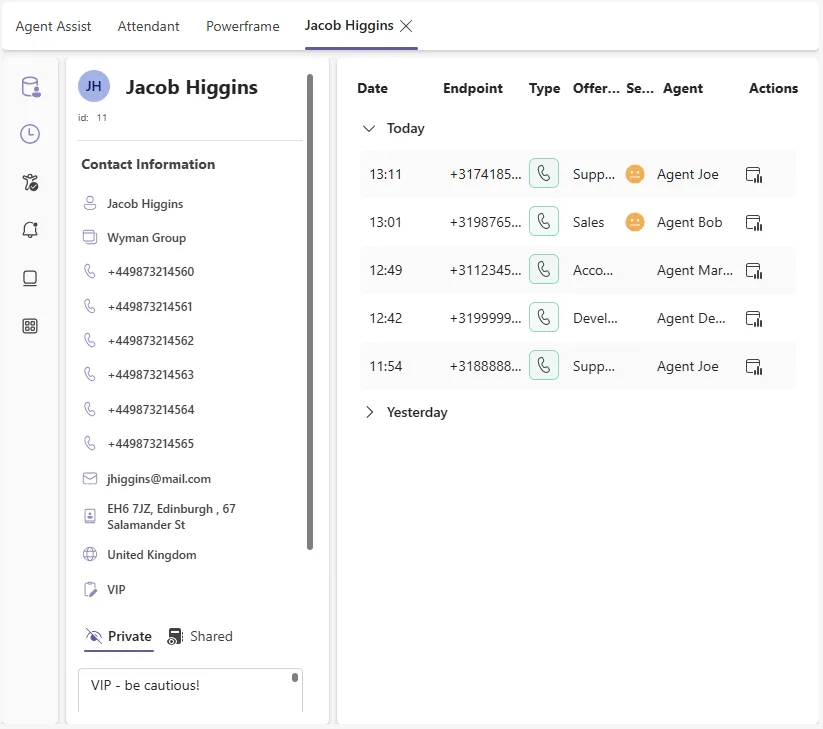
Note: Accepting a new call or social conversation does not automatically close this tab or shift focus away from it. This tab must be closed or switched to manually. Classification and call/conversation-related variables are not supported, as there is no corresponding call or conversation record associated with this action.
Beyond the default sections, ROGER365.io portal admins can create custom Action Buttons for Agent Assist.
This feature allows admins to assign specific URLs, labels, and icons to each button, which will appear as shortcut buttons for agents. The main benefit of this functionality is that it enables agents to quickly navigate to pre-configured pages with a single click, eliminating the need to switch between multiple pages during customer conversations.
To enable Agent Assist for an agents, the Agent Assist Profile needs to be created.
Navigate to “Agent Assist Profile” admin page, and press “+Add Agent Assist Profile”. Enter the name and description for Agent Assist Profile.
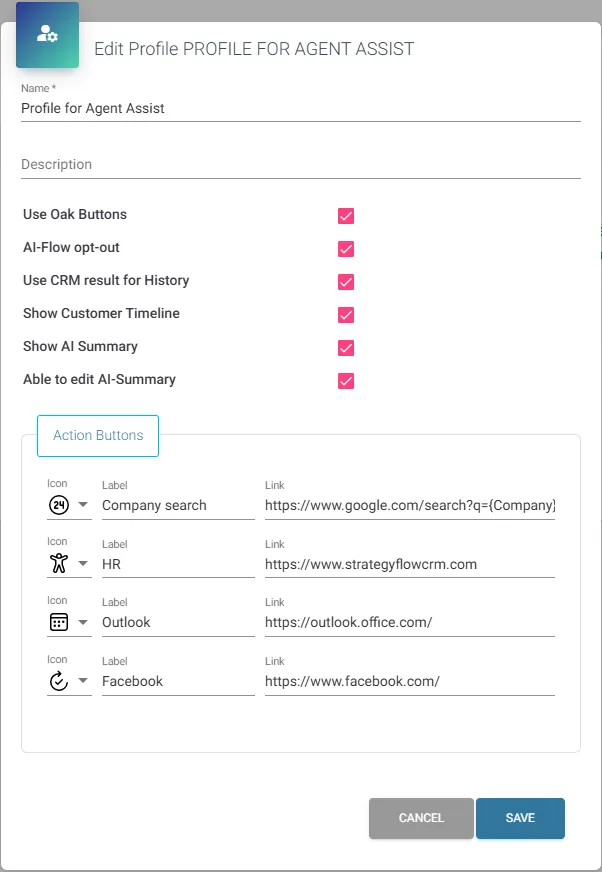
In case of using OAK Clarify Voice Recording Integraion, you can make use of option “Use Oak Buttons” (blue microphone icons underneath section’s purple icons). This feature allows the agents to either Pause or Resume recording of the current call, useful option for various cases.
Notes: In order to use Pasue/Resume recording feature, at the ClarifyGo Automation rules you have to configure a rule set with certain values, for instance:
- PauseRecording action with DTMF Value
*#0 - ResumeRecording action with DTMF Value
*#1
See the ClarifyGo documentation pages for instructions.
Depending on mobile provider, a caller may hear DTMF tone upon pressing Pause/Resume buttons.
- “AI-Flow opt-out” – will show the button in Agent Assist which allow agents to opt-out AI Flow from the current call. This option may be useful when certain conversation (often private) should not be processed by various AI actions. This setting is presented as a blue button (first blue icon underneath section’s purple icons) labeled as “Opt out of AI assistance”.
- Optional “Use CRM result for History” setting will make Webchat conversation visible in Last interaction section (only when user has been resolved in CRM Replicator by the phone number). This option is useful in case of the same user deciding to call a Queue.
- “Show Customer Timeline” – will show the button in the Agent assist so that an agent is able to see the customer timeline.
- “Show AI Summary” – will show the AI summary tab
- For calls – if AI Flow was enabled on the agent who was present in the call.
- For social conversations – if summarization of the conversation transcript succeeded.
- “Able to edit AI Summary” – will allow agents to edit the AI Summary
Action Buttons
- Icon – select icon which will be presented in Agent Assist to an agent (under purple section’s icons)
- Label – tooltip label after hovering mouse cursor over configured Action Button in Agent Assist
- Link – URL address for the Action Button – Link supports usage of variables
Created Agent Assist Profile needs to be assigned. This can be done in two ways:
- Assign “Agent Assist Profile” to created earlier Agent Profile. This will enable an Agent Assist for every agent of the Agent Profile.
- Assign “Agent Assist Profile” to specific agent via Agents admin page.
The ROGER365.io admin portal is the web based portal that is used by ROGER365.io administrators to manage the subscription, reporting, flowchart, FAQ bot and TouchPoints.
Manage access to the admin portal and Teams Application
ROGER365.io only uses Microsoft industry standard technology. The ROGER365.io is an Enterprise application within the Microsoft Azure Active Directory. Via this Enterprise Application you can allow users to sign-in to ROGER365.io admin portal or not. It is strongly recommended to configure the ROGER365.io Enterprise Application within Azure Active Directory according to your own company policy.
- Login into Microsoft Office 365 and choose the Azure Active Directory Admin Center.
- Select the option [Enterprise applications]. TIP: Click search field and type: enterprise, the search will show the option “Enterprise applications”.
- Choose the application “ROGER365.io” or search in the rights search field for this application. Click the application to see the details.
- Choose [Properties] and make sure the following settings are enabled. Make sure the option “User assignment required?” is set to YES. Click [Save] to confirm these changes.
- Select “Users and groups” and add any user or group you would like to give access to the ROGER365.io admin portal. Also change the default access to the Admin role to avoid having issues.
- Assign the correct role to the user. For example ‘Admin‘ for users who must have access to the ROGER365.io admin portal and ‘Teams User‘ for users which have to be able to access the Wallboard or the Phonebook applications. For access to the Supervisor and Reporting tabs when you are using Contact Center you can assign the role ‘CCSupervisor‘ and/or ‘CCReporting‘
- Click [Save] to confirm the changes.
Roles can also be assigned to an Active Directory group (recommended); however, this requires a Microsoft Azure AD Premium license (minimum Azure Entra ID P1).
Make sure that all of the required Microsoft 365 URLs and IP address ranges for Microsoft Teams are allowed in your network infrastructure.
You can prevent that files with a certain file type are uploaded from any TouchPoint. For example: you can prevent external users from uploading a file via Webchat or WhatsApp to your Teams Agent.
To do this:
- Open ROGER365.io admin portal
- Go to TouchPoints and choose a configured TouchPoint
- Scroll down until section: “Malicious File Blocking”
- Click [Edit] and
- choose one of the available extensions, click [Add]
- and/ or create a new “assigned extension” that is blocked based on an file extension
- Click [Save] to confirm
Add ROGER365.io Wallboard app to Microsoft Teams
There are two options to add the Wallboard app to the Microsoft Teams client: 1) Distribute it globally in your tenant to all users via the Microsoft 365 Admin portal or 2) install it locally in the Microsoft Teams client. In case of the 2nd option this must be allowed by the Microsoft 365 Administrator.
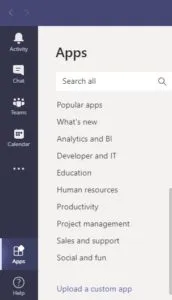
Option 1: Install locally
- Login into https://admin.roger365.io with you Microsoft 365 account
- Go to [Microsoft Teams] and choose [Add Teams TouchPoint]
- Download the WALLBOARD.ZIP manifest file
- In the Microsoft Teams client, click on the [Apps] icon. You can find it at the left bottom of the navigation bar
- Select the option [Upload a custom app] (If you don’t see this option, then this must be allowed by the Microsoft 365 Administrator) and select the WALLBOARD.zip file
- Follow the steps underneath at ‘Activate Wallboard‘
Option 2: Install globally
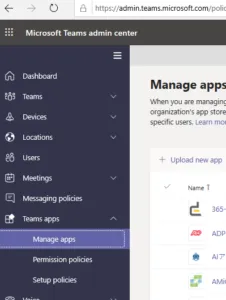
- Login into https://admin.roger365.io with you Microsoft 365 account
- Go to [Microsoft Teams] and choose [Add Teams TouchPoint]
- Download the WALLBOARD.ZIP manifest file
- As a global administrator of teams administrator go to the teams admin center, choose under Teams Apps the option Manage apps
- On the manage apps page choose upload new app and choose select file. In the pop up select the WALLBOARD.ZIP file you downloaded earlier and acknowledge the screen to get the upload started
Activate Wallboard
After a successful upload it could take op to 24 hours before the app is visible in the Teams Apps. You can also logout/login into Teams to have the Wallboard app directly available.
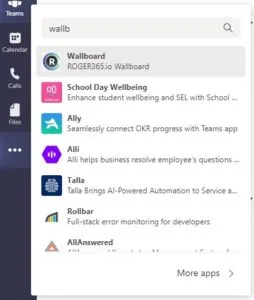
In the Report menu you can run reports about communications from a specific TouchPoint to a specific channel.
- Login via https://admin.roger365.io with you Microsoft 365 account
- Choose [Reporting] and in the left fill in:
- Select from which TouchPoint to which channel
- Selected from and until date
- Click the [Get report] button (magnifying glass icon) on the far right side to generate the report
Reports data should be looked from the Touchpoint perspective.
Reporting data
The following information is by default available. When more information is needed the Microsoft Power BI can be very useful:
- Average response time
- Average time unassigned
- Average messages per conversation
- Conversation per status – number of assigned/ unassigned conversations, agent or customer pending or completed
- Amount inbound vs outbound messages per day
- Conversation totals
- Agent Totals
- SLA Per Agent
What is a conversation?
Every message is part of a “conversation,” which can be thought of as a folder containing related messages.
A conversation is created when the first message from a user or TouchPoint is received. All subsequent messages from the same TouchPoint/user will be grouped into that conversation until it is closed. Once a conversation is closed, any new message from the same TouchPoint/user will trigger the creation of a new conversation.
Message Count
The message count on the Reporting page is based on the total number of messages recorded in the endpoint, which is then divided by the number of conversations associated with that agent. The report also includes all conversations, which may vary depending on message length, as some users may use more words than others.
It’s important to note that the conversations displayed in the report may differ from those in the subscription data. For instance, if you use Campaigns or Toastar for Teams, those conversations are subtracted from the subscription data but are not reflected in the report. Additionally, if TouchPoints are deleted, those conversations are excluded from the report, though they are still counted as part of the overall conversation total.
Looking for more detailed analytics? The Insights & Analytics Power BI report offers deeper insight into your Contact Center’s performance across key metrics and trends.
Messages are standard “predefined” text that can be used within the flowchart. This saves time building the flowchart.
The predefined message can be set in the “Social Messaging” part -> [-Messages] tab (under [Messageflows]).
Messages are used within the flowchart “SendMessageToEndpoint” action with this context: PredefinedMessage[“TestMessage”].
At this moment multiple languages are not supported yet, so only EN will be used
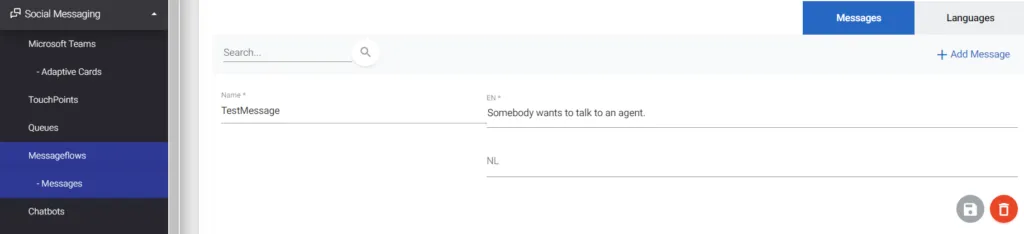
The graphical designer is a workflow design tool. With the graphical designer ROGER365.io is configured how to respond and what to do in certain scenario’s.
Designer
The top “Tool bar” contains general actions like [Save], also the flowchart variables are set here. The left panel has the available actions, the middle “flow area” is the zone were the flow is built and the right “properties” panel is used to fill in data to specify the actions.
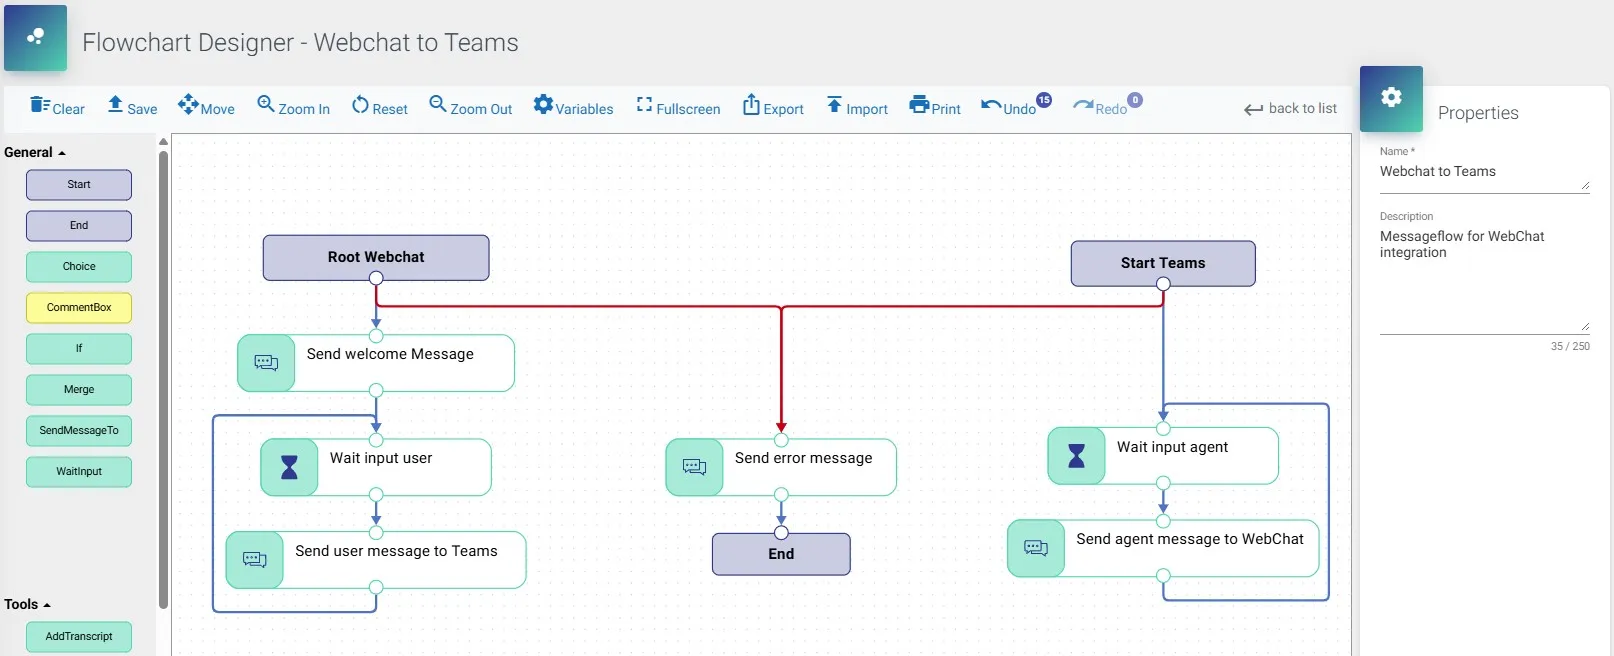
Drag & Drop
To add an action in the flow select it at the left panel and drag & drop into the “flow area”.
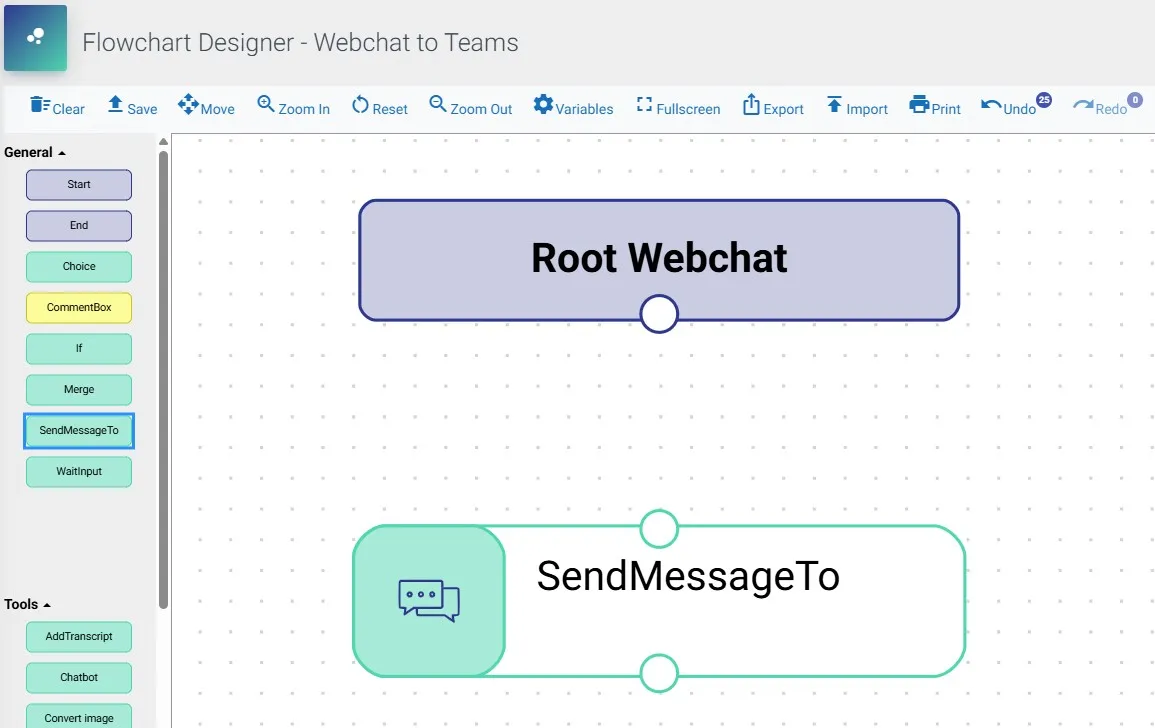
For example, to add the action “SendMessageTo” to your flow select it at the left and drag & drop it in the “Flow area”.
Create a link between actions
To connect two actions, you must select one action, select a “dot” and drag it to the other actions “dot”.
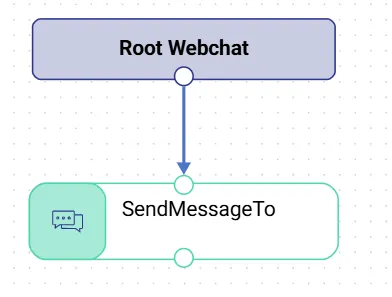
A link or connection can also have different types and values, select the link and see the options in the “Link Properties” right panel.
Graphical Designer offers useful options like:
- Export/Import – This option allows to export/import configuration of the flow. You can decide whether you want to export it with expressions or not. Useful option for making demos, templates and showing them to customers or other engineers.
- Print – This option allows to print configuration of the flow. Upon pressing the button, new page will be open where you can decide how you want to print the flow, or save it as PDF file.
- Copy & Paste – The Graphical Designer offers copy and paste functionality. This allows you to copy highlighted actions and paste them within the same flow (actions cannot be copied and pasted between different flows). Once the actions are highlighted, use the “CTRL + C” shortcut to copy and “CTRL + V” to paste, or hold the “CTRL” key while dragging the highlighted block. Be sure to rename the copied actions, as all details are duplicated.
- Undo & Redo – It is possible to Undo/Redo your changes up to 50 actions. If you edit your flow after undoing couple of changes, you will lose Redo option.
Every dialogue needs a flow which defines what the steps in the communications flow are. You can create the flows manually, or choose predefined flows from the library. When selecting a flow from the library a wizard will guide you trough a few steps. After finalizing them the flow will be created and, if you like, you can make some manual modifications.Currently the following flows are available:
Webchat
Webchat to Microsoft Teams
- A flow which sends the webchat user a welcome message and sends the message to the selected Microsoft Teams Channel.
Webchat to Microsoft Teams + Sentiment Analysis
- A flow which sends the webchat user a welcome message and sends the message to the selected Microsoft Teams Channel including sentiment analysis of the webchat user.
Webchat to Teams + Pageviews
- A flow which sends the webchat user a welcome message and sends the message to the selected Microsoft Teams Channel including which webpages the user visited.
Webchat to Teams + Sentiment + Pageviews
- A flow which sends the webchat user a welcome message and sends the message to the selected Microsoft Teams Channel including sentiment analysis and webpages visited of the webchat user.
Webchat with Chatbot
Webchat to Chatbot (FAQ)
- A flow which connects the webchat user to a chatbot
Webchat to Chatbot (FAQ) escalate to Teams + pageviews + transcript
- A flow which connects the webchat user to a chatbot, and shows which webpages the user visited and the questions asked to the chatbot.
Webchat to Chatbot (FAQ) escalate to Teams + pageviews + transcript + sentiment
- A flow which connects the webchat user to a chatbot, and shows which webpages the user visited and the questions asked to the chatbot including sentiment analysis of the webchat user.
Webchat with Copilot
Webchat to Copilot
- A flow which enables a conversation between the webchat user and a Copilot agent without the option to escalate to a human agent. Requires a Closure Message configured in the ‘End of Conversation’ system topic in Copilot Studio portal.
Webchat to Copilot ➝ Teams Escalation
- A flow which enables a conversation between the webchat user and a Copilot agent, with the option to hand off the conversation to a human agent. Requires an Escalation Message configured in the ‘Escalate’ system topic in Copilot Studio portal.
- For more details regarding Copilot integration, refer to the Copilot TouchPoint documentation.
WhatsApp to Teams
- A flow which sends the messages from a WhatsApp user to the selected Microsoft Teams Channel.
WhatsApp to Teams + Sentiment
- A flow which sends the messages from a WhatsApp user to the selected Microsoft Teams Channel including sentiment analysis of the messages
WhatsApp to Teams + Powerhook
- A flow which sends the messages from a WhatsApp user to the selected Microsoft Teams Channel and sends a Webhook ant the start and end of a conversation
WhatsApp with Copilot
WhatsApp to Copilot
- A flow which enables a conversation between the WhatsApp user and a Copilot agent without the option to escalate to a human agent. Requires a Closure Message configured in the ‘End of Conversation’ system topic in Copilot Studio portal.
WhatsApp to Copilot ➝ Teams Escalation
- A flow which enables a conversation between the WhatsApp user and a Copilot agent, with the option to hand off the conversation to a human agent. Requires an Escalation Message configured in the ‘Escalate’ system topic in Copilot Studio portal.
- For more details regarding Copilot integration, refer to the Copilot TouchPoint documentation.
Facebook to Teams
- A flow which sends the messages from a Facebook user to the selected Microsoft Teams Channel.
Facebook to Teams + Sentiment
- A flow which sends the messages from a Facebook user to the selected Microsoft Teams Channel including sentiment analysis of the messages
Facebook to Teams + Powerhook
- A flow which sends the messages from a Facebook user to the selected Microsoft Teams Channel and sends a Webhook ant the start and end of a conversation
Facebook with Chatbot
Facebook to Chatbot
- A flow which connects the facebook user to a chatbot
Facebook to Chatbot ➝ Teams
- A flow which connects the facebook user to a chatbot and is able to route te user to a Teams Channel
Facebook to Chatbot ➝ Teams + Sentiment
- A flow which connects the facebook user to a chatbot and is able to route te user to a Teams Channel and shows the sentiment of the conversation
SMS
Sms to Teams
- A flow which sends the messages from an sms user to the selected Microsoft Teams Channel.
Sms to Teams + Sentiment
- A flow which sends the messages from an sms user user to the selected Microsoft Teams Channel including sentiment analysis of the messages
Sms to Teams + Powerhook
- A flow which sends the messages from an sms user user to the selected Microsoft Teams Channel and sends a Webhook ant the start and end of a conversation
Email to Teams
- A flow which sends the messages from specified mailbox to the selected Microsoft Teams Channel.
Disclaimer: Before you create Email TouchPoint in the ROGER365.io platform, you need to create App Registration for the Email integration.
The Email Touchpoint is only available in the Enterprise subscription.
Our Email Integration feature seamlessly connects the web version of Outlook with Microsoft Teams, streamlining your communication process. When an email is sent to a mailbox integrated with Email TouchPoint, it automatically initiates a new conversation thread. To respond, agents can easily access the conversation via a direct deep link, redirecting them to Outlook’s web interface.
Please note that replies to these emails cannot be managed directly through the Microsoft Teams channel or Social Queues within the Contact Center. This ensures that all email correspondence is handled efficiently through Outlook, maintaining clear and organized communication.
Create an Email TouchPoint
In the portal select [Social Messaging], [TouchPoints] and then click [+ Add TouchPoint] and select Email.
- Name: Provide a name for your Email TouchPoint.
- Select timezone: Select your timezone.
- ClientId: Provide application (client) ID of Email App Registration from your Azure environment.
- ClientSecret: Provide secret of Email App Registration from your Azure environment.
- MailboxUserId: Enter email address for your Email integration (most of the time email address of shared mailbox).
We advise to enable option “Always show From” at mailbox used for integration.
After creation of the Email TouchPoint, create a predefined flow from the library “Email to Teams” and attach to the TouchPoint.
To create your own TouchPoint integration, you can use the API TouchPoint feature. With this API you can connect your own conversational system with the ROGER365.io platform.
Note: Currently only plain text messages are supported.
Create a TouchPoint API
In the portal select [Social Messaging], [TouchPoints] and then click [+ Add TouchPoint] and select API.
- Name: Here you can fill in a name for the TouchPoint
- Select timezone: Select your timezone
- Postback URL: Enter the URL of your application, so ROGER365.io knows where to send the messages to
- Select Identifier Type: Select, if you want to do CRM recognition, the type of identifier of the participant (email addresss, phonenumber or custom)
- Prefix (in case of custom: Enter the column from the CRM Replicator containing the identifier
After saving the TouchPoint the key is created and can be found in the properties of the API TouchPoint.
A description of the API can be found here.
After you have created a Facebook page, you can add it as a TouchPoint to ROGER365io. Currently only Facebook Messaging is supported, so posts to the Facebook page are ignored.
Connect Facebook Page
- Open web browser and go to: https://admin.roger365.io
- Login with Microsoft 365 credentials
- Go to [Social Messaging], [TouchPoints]
- Click [+Add TouchPoint] and select [Facebook]
- Click the ‘Login with Facebook’ button
- Login to Facebook
- Select the Facebook page you would like to connect
- Enter a friendly name at ‘Name’
- Select the Timezone
- click Save
Set correct app permissions
Browse to: https://www.facebook.com/settings/?tab=business_tools and click ‘View and edit’ next to the ROGER365.io Business Integration. Check the correct pages on which you would like to enable the ROGER365.io integration and click Save.
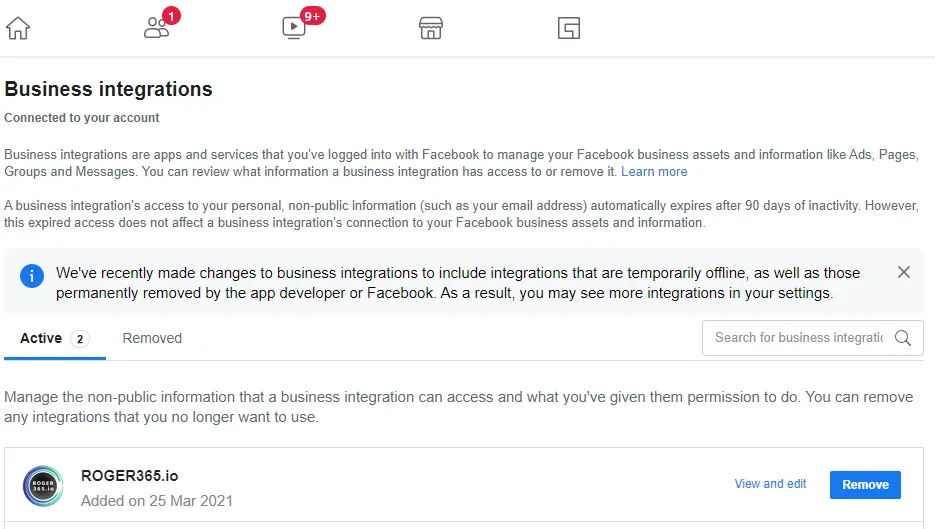
Create a flow
After adding the Facebook page as a TouchPoint, you have to create a flow and if you haven’t create it yet: add a Microsoft Teams channel where the messages should be routed to. Check this page how to create a flow from the library.
Adaptive Card
Finally you can assign a Facebook adaptive card to the Teams channel, check this page how to create one.
Before you can use SMS in the ROGER365.io platform, you need to obtain a verified SMS number.
Adding SMS as TouchPoint
- Go to [Social Messaging], [TouchPoints],
- On the right top click [+ Add Touchpoint] and choose [SMS],
- Add a name and select a Timezone,
- Choose your Service Provider,
- Your Service Provider will provide you the correct API Key and SMS identifier.
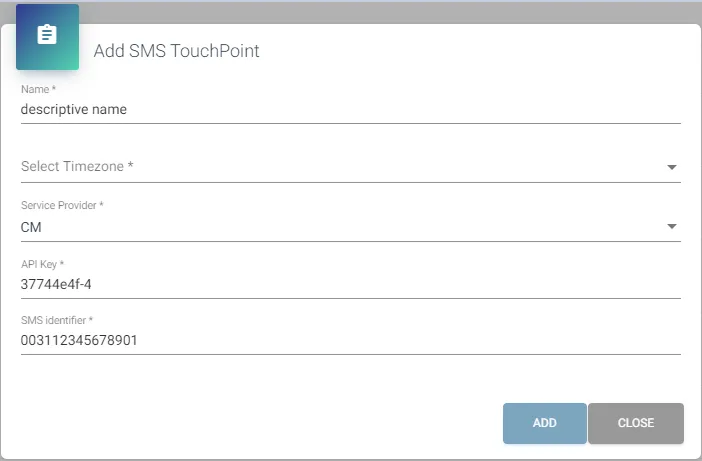
Note: SMS identifier of CM service provider is your obtained SMS phone number. Keep in mind that you have to replace “+” with “00”.
Example: +3112345678901 -> 003112345678901
To send SMS messages out enable the “SMS Out” option at the TouchPoint settings, and select proper Country Code, you can as well connect your CRM replicator data source.
Obtaining a WhatsApp for Business number
Before you can use WhatsApp in the ROGER365.io platform, you need to obtain a verified WhatsApp for Business number. You can get this from an official provider WhatsApp for Business Providers like Messagebird, cm.com or Zenvia. Check here for a more detailed explanation. Once you have obtained this number, it can be connected to the ROGER365.io platform.
Adding WhatsApp as TouchPoint
- Go to [Social Messaging], [TouchPoints]
- On the right top click [+ Add Touchpoint] and choose [WhatsApp]
- Add a name and select a Timezone
- Choose your Service Provider
- Your Service Provider will provide you the correct API Key and Whatsapp for Business identifier
By default you have 1 webchat touchpoint available, which you can add to one or multiple websites. If you need more touchpoints you can add them via the admin portal. Based on the URL configured and attached the correct will be used.
If you would like to quickly create a webchat test website, use this manual
You can watch the steps described underneath in this tutorial video
Configure website tracking
You must register the URL’s on which websites your Webchat TouchPoint will be active. You can use a wildcard to make it available on all pages. For example: https://www.roger365.io/*
- Open web browser and go to: https://admin.roger365.io
- Login with Microsoft 365 credentials
- Go to [Social Messaging], [TouchPoints] on the right top click [+Webchat Urls]
- Add websites URL you want to host the ROGER365.io webchat
Add website to Webchat TouchPoint
- Go to [Social Messaging], [TouchPoints]
- Click the edit icon right to website touchpoint (by default you have 1 Webchat TouchPoint available, but you can add more if you like)
- Scroll down to section “Page urls where webchat is active”,
- Press [+] and choose each website URL you want to run the webchat
- Click [SAVE]
- Click Close
WordPress plugin
If you are using WordPress as your CMS, you can make use of our WordPress Plugin. It adds the ROGER365.io to your website and you are able to customize the layout.
NOTE: Do not change the name of folders!
Manually add webchat to your website
The webchat layout requires the following code to be included in your webpages. These lines must appear in the order shown below.
Add jQuery library in your website (between the <HEAD> and </HEAD>
<script src="https://ajax.googleapis.com/ajax/libs/jquery/3.5.1/jquery.min.js"></script>
CSS:
<link rel="stylesheet" type="text/css" href="https://api.roger365.io/v1.0/webchat/files/startup.v1.css">
<link rel="stylesheet" type="text/css" href="https://api.roger365.io/v1.0/webchat/files/webchat.v1.css">
<link rel="stylesheet" type="text/css" href="https://api.roger365.io/v1.0/webchat/files/spinner.v1.css">
JS:
Jquery library (normal version, not SLIM)
<script src="https://api.roger365.io/v1.0/webchat/files/defaultWebchatOptions.js"></script>
<script src="https://api.roger365.io/v1.0/webchat/files/webchat.js"></script>
ROGER365 is fully integrated with Microsoft Teams. To start using alle the functionalities, a connection has to be configured between the ROGER365 platform and your Microsoft Teams tenant. For various functionalities we have created apps which can be installed into Microsoft Teams.
To get started three steps have to be made:
- Install the ROGER365 App in Microsoft Teams
- Create a channel in Teams and connect it to ROGER365
- Create and connect an Adaptive Card
Next to delivering incoming chat messages into a Microsoft Teams channel, you can also route them into a queue. The chat then will be placed into a visual queue in the native ROGER365.io app for Teams.
- This functionality is only available in the Enterprise subscription.
- Before configuring a queue, make sure you have configured the basic integration. In other words: messages must already be delivered into a Microsoft Teams channel.
- Make sure you have enabled the option ‘Save transcripts’ on the inbound TouchPoint (Webchat, Whatsapp etc.)
Each Voice or Social Queue consumes one license from the Queue license pool. Creating a Social Queue also counts toward the total license limit.
Configuration
- Add a queue by clicking [+ Add Social Queue] on the right top of the screen
- Enter a name for the queue, for example ‘SalesSupport’
- Click Save
Then reopen the queue by clicking the blue edit icon, next to the new created queue:
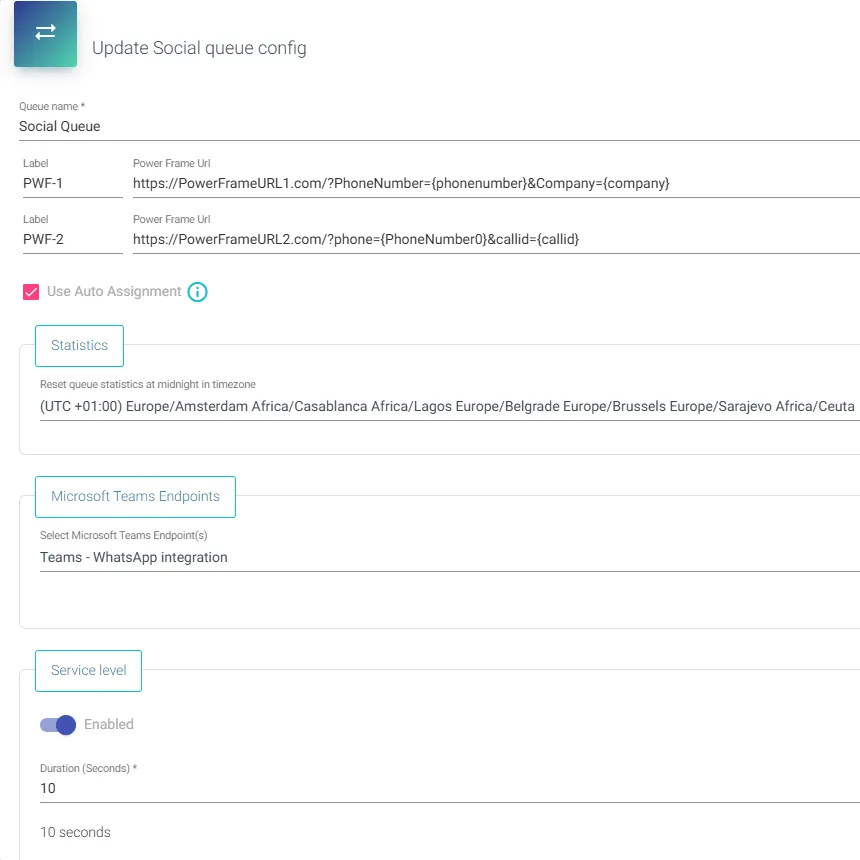
- PowerFrame URLs: You can configure a Power Frame URLs. These URLs are triggered on the Agent App when a new chat is offered to an agent, according to set Label you will be able to distinguish which Powerframe is currently used. You can include variables from the CRM Connector. For example: https://app.yourapp.com/index.html?contactid={SourceId} or https://app.yourapp.com/index.html?contactid={PhoneNumber0}
- Note: If you are using Microsoft PowerApps, then embedding an application is not supported by Microsoft (https://docs.microsoft.com/en-us/powerapps/maker/canvas-apps/limits-and-config#embedding-limits-for-canvas-apps). The workaround would be to open the ROGER365.io application in Teams in your browser via this url: https://teams.microsoft.com/
- Use Auto Assignment: When enabled, the system automatically assigns incoming messages based on agent order to agents signed into the Social Queue with a status other than Off Work. This feature assigns social conversations to agents using a round-robin routing method.
- Note: For the better experience, it is advised to enable “Notify assignment changes” option on the Teams TouchPoint level. This option will notify about social conversation assigned to the agent.
- Statistics: Select the timezone to determine midnight to reset the statistics on top of the Agent App.
- Microsoft Teams Endpoints: These are the EndPoints (channels) from where incoming chat conversations are shown in the queue. You can select multiple Teams Endpoints for example if you have configured a separate channel for WhatsApp and Webchat. By selecting both Endpoints all conversations will visually be placed in 1 queue.
- The Shift Sync feature integrates the Microsoft Teams Shifts application with Formal Agents of a Social Queue. For more information, see the Shift Synchronization documentation.
- Turn on the “Enabled” switch.
- Select the Team you own in Microsoft Teams.
- Select the previously created Scheduling Group in the Microsoft Teams Shifts application
- Save the queue configuration and click "Sync Now" to apply the changes.
- You can enable the Service Level feature for your queue, which measures the efficiency and responsiveness to incoming conversations within a specified service level threshold.
- Set the maximum number of seconds within which a service should be provided to a conversation in the Social Queue.
- Set the Threshold Percentage, which is a performance indicator showing the ratio of conversations handled within the specified time frame to the total number of conversations processed during that period.
- If the Threshold Percentage score exceeds the set value, it will be displayed as a green icon on the Supervisor page. If it falls below the set value, it will appear as a red icon.
- Configuration of a Teams Endpoints: You can configure the priority per endpoint. For example you can assign a Webchat channel with priotity 1 and WhatsApp with priority 2. Then webchat conversation will be placed above WhatsApp conversations. Per Endpoint you can also assign an icon which will become visible in the Agent UI.
- Agents: The agents who a added as a member in Microsoft Teams to the channel are shown here. If “Use Auto Assignment” feature is enabled, you can rearrange agent order by dragging agents within the list when the cursor changes to ✥.
- Check the box if you want this agent to be a formal agent:
- Formal: an agent is able to login and logout of a queue
- Informal: an agent is always logged in this queue, and is not able to logout
- Note: Signing out from the queue will hide every conversation from ROGER365.io app for Teams.
- Check the box if you want this agent to be a formal agent:
- Supervisors: Click + Add Supervisor to insert supervisors for this queue (remind that if you have enabled role-based access, a supervisor also must have the correct Azure role. Find the documentation for this here).
- The option ‘AgentUpdate Allowed’ give the right to change the status of an agent and Log them in or out a queue.
This feature is only available in the Enterprise subscription.
The AI Flow feature for Contact Center application of ROGER365.io enables powerful AI actions such as Transcript, Summary, Quality Assurance or Classification into your daily work. Recorded calls will be later processed by various AI action in the configured by portal admins manner.
The Audio Provider and Transcript Actions are mandatory to use AI Flow feature.
Disclaimers:
- ROGER365 platform does not use its own bots in this feature, you can only use AI bots created by Microsoft (OpenAI and other AI services)!
- All Microsoft AI services do have a cost aspect (including transcription).
- ROGER365 does not have an influence on the quality of used model. Results may vary
There might be situations where your AI model will be blocked by Microsoft if the conversation contains violent content or other factors that violate the Microsoft Terms of Service.
To use AI Flow feature, portal administrators must first:
- Create Audio Provider Action – Audio Providers
- Create Speech to Text Endpoint for Transcript Action – AI Endpoints
- Optionally you can create endpoints for Summary, Sentiment, Quality Assurance and Classification Actions – AI Endpoints
- (optional) Create Quality Assurance Form – Quality Assurance Forms
- (optional) Create Classfication Action Config – Classification Action Configurations
- Create AI Flow – Flows
Note: Processing of each AI Flow action is starting up around 1 minute after call has ended.
AI Flow errors are logged on the Logging admin page. If an AI Flow instance fails, it can be rerun on the Flows admin page. After three unsuccessful attempts the record is marked as Abandoned and won’t be rerun again.
You can retrieve results of AI Flow and/or each Action, using AI Flow API documentation.
Note: Results of Summary action can be seen (and/or edited) in Customer Jounery tab inside of Agent Assist’s Last Interaction section.
This feature (part of Agent Assist) allows agents to categorize the outcome of every call, providing a quick summary of the interaction. With customizable names and labels, agents can efficiently classify calls based on their nature, streamlining both customer service and sales processes. Classification can be created with single class or multilayered one.
Classification can be manually assigned during voice or social conversation in the Agent Assist. Voice interactions can be automatically classified using AI Flow’s Classification action.
To create new Classification, press “+Add Classification” button.
Provide a Name and Description for your Classification which will be visible for the Agent during the interaction with customer. It is possible to select specific Contact Center or Social Messaging Queue for which the created Classification will be available. If defined, you can provide name and description of the Classification for configured Languages.
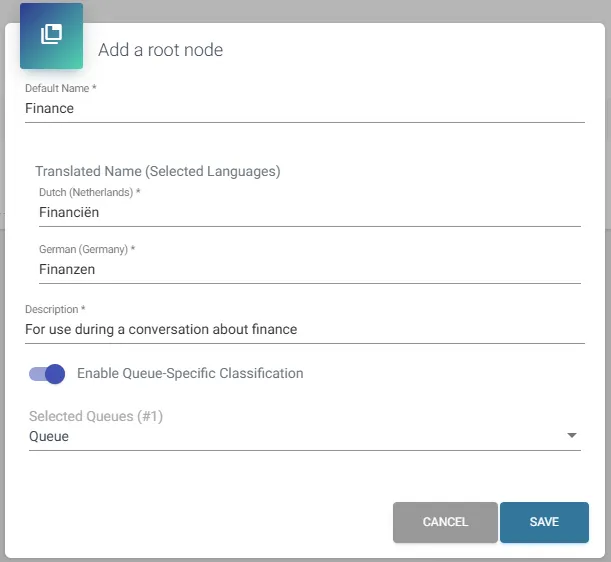
You can define labels based on the language used by the agents. Navigate to “Languages” section and press “+Add Languages”:
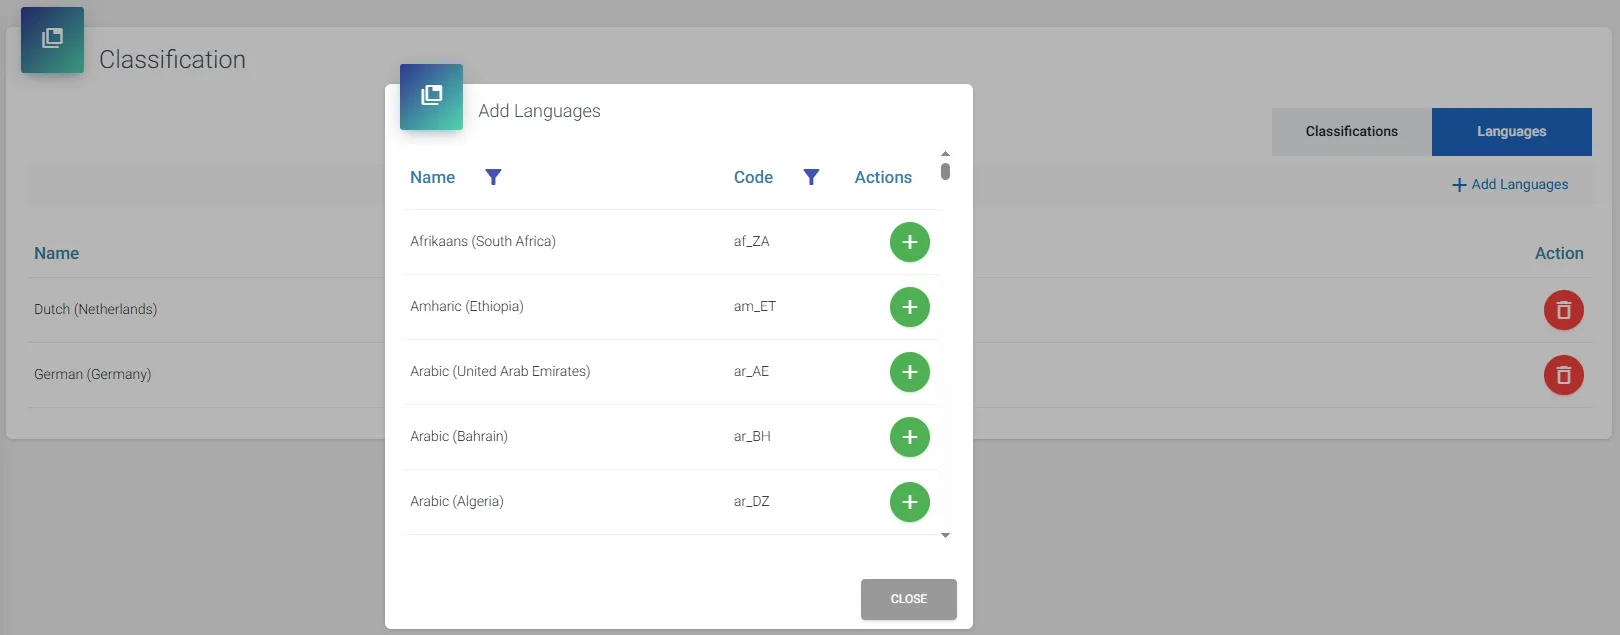
Recognition of the language is done based on Teams Client’s language settings of the user. In case of using Teams Client’s language which is not included in configuration of Classification, the default language (English) will be used.
Use Classification API to retrieve the configuration of the Classification, as well as the Classification assigned (either manually or automatically) during conversation.
To route incoming calls to an agent with the highest skill on a certain subject, you can use the Skill Based Routing Method. The following steps are required:
- Create the skills (see underneath)
- At the Agents configuration, add the skills and the agents’ skill level to the agent
- Enable Skill Based Routing at the queue configuration and select the skills required for the queue
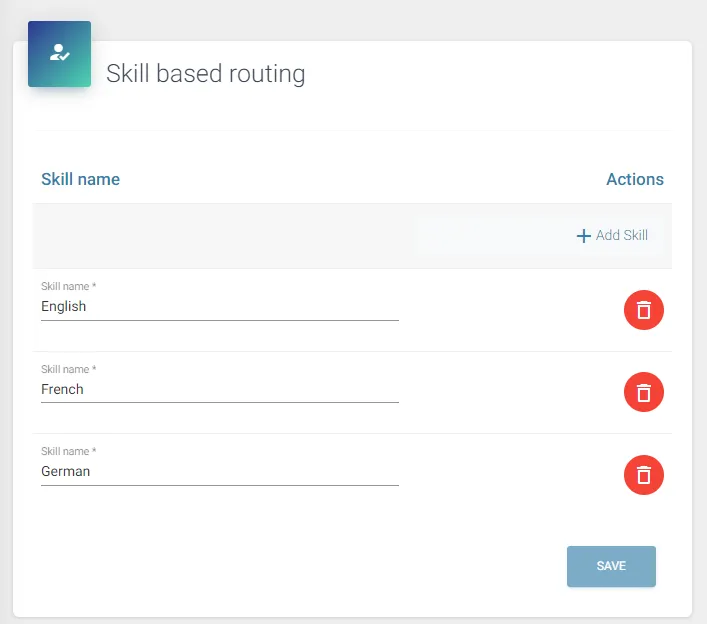
Example Algorithm: Skill-Based Routing
Consider a queue configured with serial and skill-based routing, containing a skill named 'A':
- Agent 1: Skill 'A', Value: 100
- Agent 2: Skill 'A', Value: 100
- Agent 3: Skill 'A', Value: 50
The routing process proceeds as follows:
- A call comes in. The system selects from agents not yet called (called: none) with the highest available skill level for A (100), resulting in Agent 1 and Agent 2. Due to serial routing, Agent 1 receives the call.
- Agent 1 does not answer.
- The system selects from agents not yet called (called: 1) with the highest available skill level for A (100), resulting in Agent 2. Due to serial routing, Agent 2 receives the call.
- Agent 2 does not answer.
- The system selects from agents not yet called (called: 1, 2) with the highest available skill level for A (50), resulting in Agent 3. Due to serial routing, Agent 3 receives the call.
- Agent 3 does not answer.
- The system selects from agents not yet called (called: 1, 2, 3) — none remain, so the list resets — with the highest available skill level for A (100), resulting in Agent 1 and Agent 2. Due to serial routing, Agent 1 receives the call.
- This process repeats as needed.
When a queue is configured with multiple skills, skill levels are not summed but treated as equal. For example, in a queue requiring skills A and B, an agent with Skill A at value 100 is considered equivalent to an agent with Skill B at value 100
An agent can select from multiple availability statuses, including an 'Away' status. The 'Away' status can include a sub-status to provide additional context, such as 'Away – Lunch' or 'Away – Break.' To create these reason codes, follow the steps below:
- Click 'Add Away Status'
- Enter a description
- Click 'Save'
The new statuses will be available in the Teams Agent Tab immediately after refreshing the app.
Audio prompts are messages which you can play to users while they are in the queue. You have the option to generate audio prompt with our Text-To-Speech option, or upload yo wav files manually. Be aware that the WAV files must be in the correct format: riff-16khz-16bit-mono-pcm and the maximum size is 5mb. At the bottom of this page, you see how you can convert your files into the correct format.
- To check if you file is in the correct format, you can use this tool: https://mediaarea.net/nl/MediaInfo/Download
- On this website, you can find some royalty free music, don’t forget to convert them into the correct format: https://www.bensound.com/royalty-free-music/
- For Music-on-hold you could upload your own file, or use this file which generates a waiting-tone so you callers will know they are still connected and in the queue.
Add languages
First, in the Languages tab, add the correct languages which you would like to support. To add a language:
- Click ‘+ Add Language’
- Click ‘Select Languages’
- Enable the languages which you would like to use
- Click Add
Set default Text-to-Speech settings (optional)
You can set default Text-to-Speech settings per added language. Every new TTS prompt in that language will then use them automatically, removing the need to configure each prompt individually.
- In the Languages tab, click the gear icon next to the language
- Choose the default Voice and Speech style (including speed and pitch)
- Optionally type sample text and click Preview to test
- Click Save
New Text-to-Speech prompts will now inherit these defaults. For existing prompts, you can enable the ‘Use preset values of speech language’ option to apply the defaults to them as well.
Add audio prompts
After you have added the correct languages you can add the audio prompts:
- Click ‘+ Add Audio Prompt’
- Enter a name and (optional) description
- Then click the save icon on the right
- Next to the languages, click the ‘+’ button
- Choose the option for Text-To-Speech or Upload a wav file
Text to Speech
- Enter the text in the correct language you would like to pronounce.
- Select the language to use to pronounce the text
- Select the voice which you would like to use
- For some languages it’s possible to select a certain type, if not available select ‘General’
- You can adjust the Speech Speed or Pitch
- Click preview to hear the final result
- Click Save
If default Text to Speech settings have been configured for the selected language, only the Text field needs to be filled in. The remaining values will be applied automatically from the preset, and can still be adjusted per prompt if needed.
You can use SSML to customize the Text-To-Speech file. In the TAB on the top of the screen you can add your own SSML code. For more info about SSML check this page.
Upload audio file
- Optional: If the WAV file is hosted on a server, you can insert a URL
- Click the ‘Select audio file button’
- Find the correct wav file from the file explorer
- Click the SAVE button
To quickly replay the file, click the three-dots icon left of the language and select ‘Play’. To stop the replay, click the three dots again and select ‘Stop’.
You can review the “Usages” column to see which callflow(s) contain a particular audio prompt. Click on the callflow name(s) to open a box with redirection option to the specific callflow.
Converting the file in correct format
The best way to convert your audio files to the correct format is to use the free audio tool Audacity: https://www.audacityteam.org/download/windows/.
After you have opened the file, and you see two tracks (stereo), click “Select” button at the bottom of the audio file to highlight whole file, then right click on Track Control Panel, and select “Split Stereo to Mono” option.
Your audio file now should be separated into two exactly the same independent mono tracks – delete one of them.
Change the format of audio. Right-click on the Track Control Panel again, but this time, select “Format” -> “16-bit PCM“:
Adjust the sample rate by changing value of “Rate” -> “16000 Hz“:
Finally, export your prepared audio file.
Select “File” -> “Export”, save the file as “WAV (Microsoft)“, and set the encoding to “Signed 16-bit PCM“:
Agent Profiles page allows portal admins to create Profiles (presets) with specified agent configuration. Useful option for huge enterprises where manual creation of each agent is simply too time consuming. Agent Profile can be assigned for existing agents (using this admin page) or for non-agent who will be added to the solution (at Agents page).
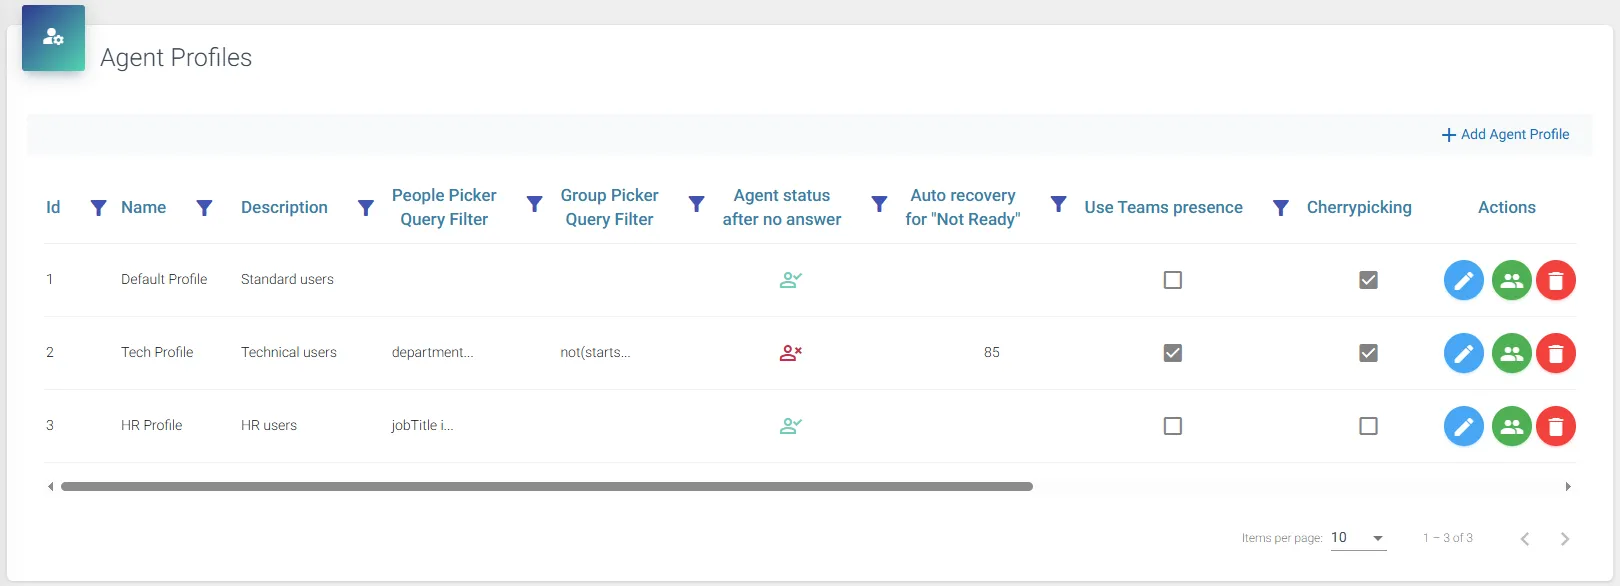
To create Agent Profile, press “+ Add Agent Profile” to open configuration window where you can define basic Agent settings.
To assign existing agents to created Profile, press green button “Assign Agent Profile” which will open a list of configured in the platform agents. Bigger organizations should benefit from “By Security Group” list which shows only configured in the platform agents within specific group.
Note: At the end of list you may see “Load More…” button to load remaining users. There might be situation where this button needs to be clicked couple of times!
Optionally, you can set up People Picker and/or Group Picker query filters to filter the returned users and/or groups from your search results.
The Microsoft Graph API supports various OData query operators like eq (equals), ne (not equals), startswith, endswith, and, and or, enabling complex filtering. Additionally, portal admins may enable Advanced Graph search feature by checking boxes “DisplayName”, “Department”, “JobTitle” etc. This feature allows for more accurate searching for desired contact – example usage of Advanced search feature can be found at Agents page.
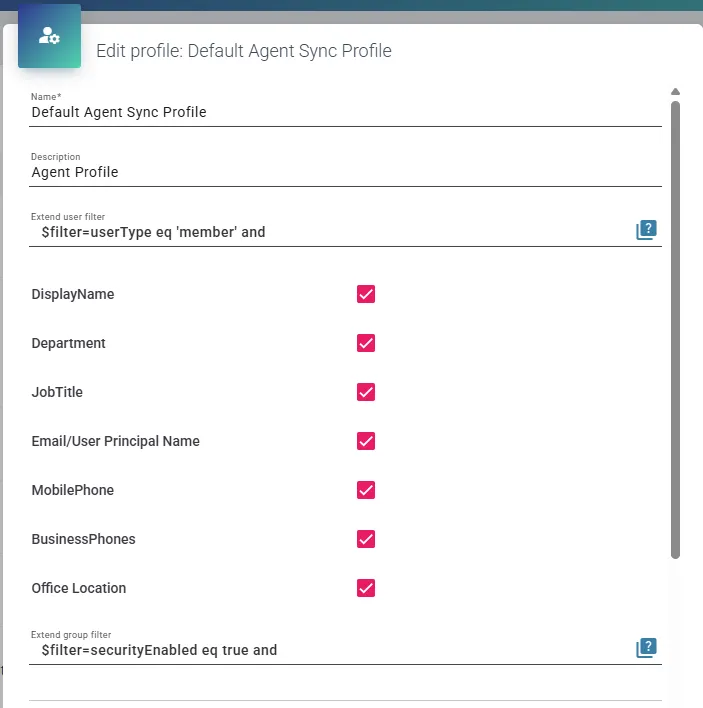
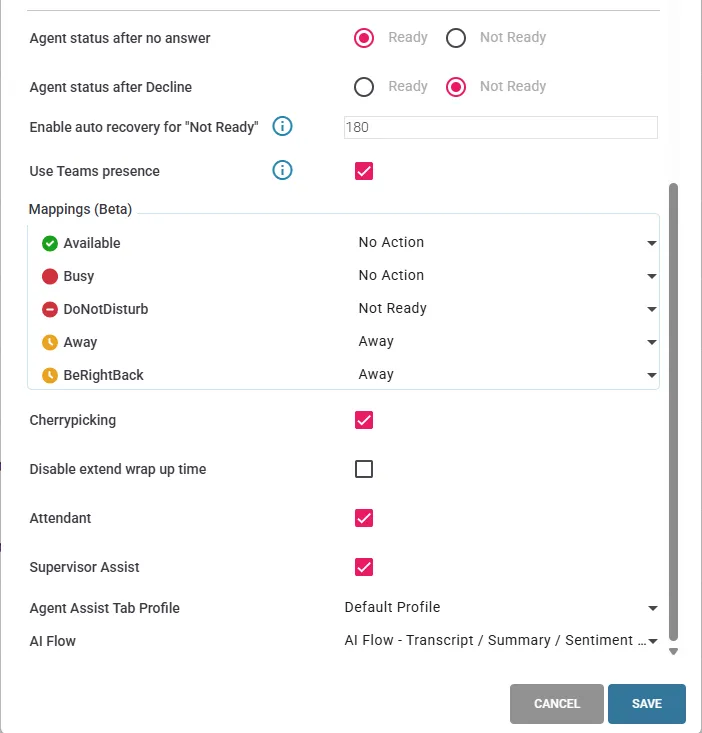
Extend graph user/group filter
For more details on supported operators and use cases, refer to the Microsoft Graph filter documentation.
You can use the Validator feature (the icon on the far right side of the Extend filter field) to check that the provided filter is valid and won’t cause any issues. In order to use it, you need to update your Attendant Console App Registration using Automated PowerShell script (check documentation page).
Microsoft Graph API has limit of its URL length at around 2k characters.
Here you can select persons who can be assigned as an agent and then can be added to a queue.
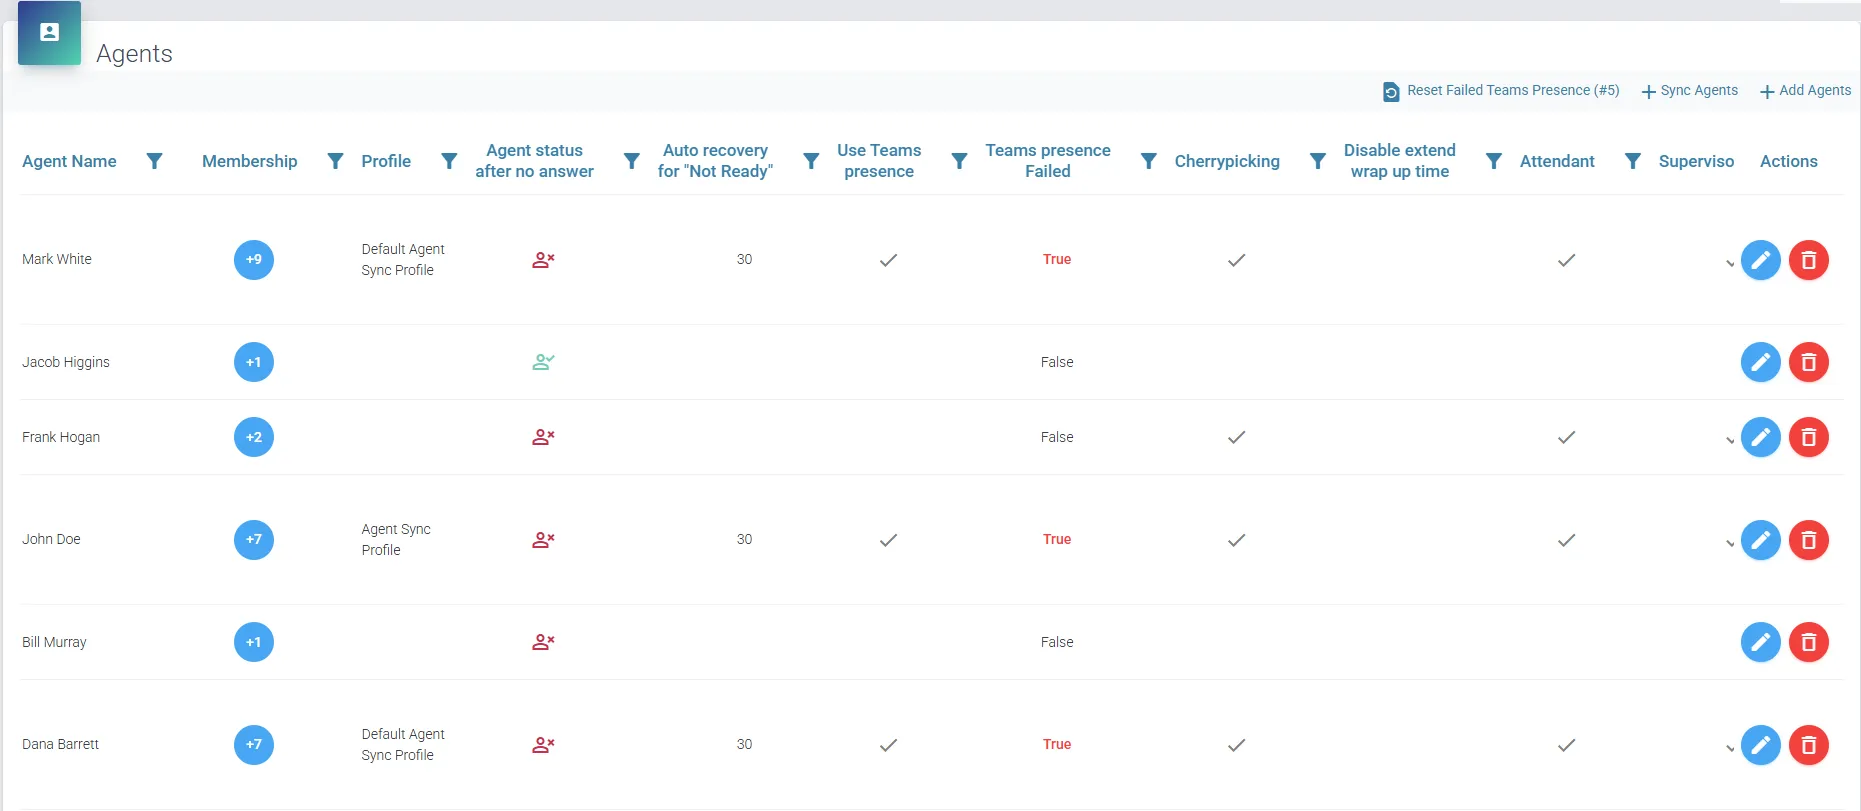
Click '+ Add Agents' to open the pop-up window for adding new agents to the solution. The 'Users' tab displays all users within the organization, including existing agents. For organizations with Security Groups defined in their tenant, the 'By Security Group' tab is recommended, particularly for larger organizations, as it displays the members of the selected group. Note that the first time you search for groups, a pop-up may appear requesting access permissions.
It is possible to assign an Agent Profile to non-agent users, converting them into ROGER agents. This can also be done later via the Agent Profiles admin page.
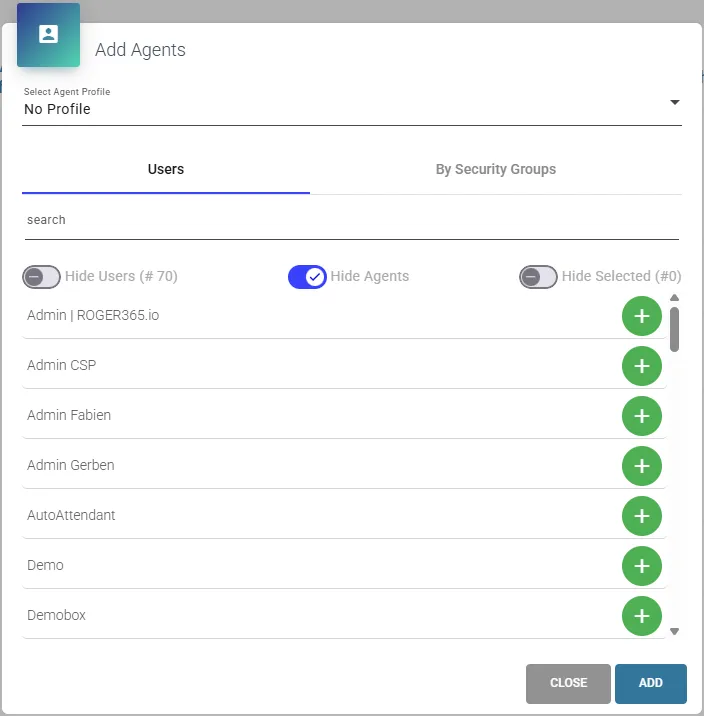
Once agents have been added to the solution, they will appear in the list. Use the 'Edit' button next to the corresponding Agent record to configure Agent Settings and Skills:
Membership
- Blue count badge which upon pressing displays list of the Queues that the specific agent is assigned to.
Profile
- Assigned Agent Profile to the specific Agent, an empty field indicates that no Agent Profile has been assigned.
- Agent status after no answer
- Enable this setting if you want to change the state of the agent to “Not Ready” if the incoming phone call returns to the queue according Queue’s Ring Timeout setting.
- When the setting is set to “Not Ready”, you can configure the Auto Recovery option. This allows you to set a number of seconds (30 seconds minimum) that must elapse before the agent’s status automatically changes from “Not Ready” to “Ready”. This option ensures that even if an agent misses a call and forgets to manually update their status, the call will still be properly handled.
- Enable this setting if you want to change the state of the agent to “Not Ready” if the incoming phone call returns to the queue according Queue’s Ring Timeout setting.
Agent status after Decline
- Enable this setting if you want the agent’s state to automatically change to either “Ready” or “Not Ready” when the agent rejects an incoming phone call from a queue.
- Note: This option does not apply when an agent has cherrypicked an incoming call from a queue.
- When the setting is set to “Not Ready”, you can configure the Auto Recovery option. This allows you to set a number of seconds (30 seconds minimum) that must elapse before the agent’s status automatically changes from “Not Ready” to “Ready”. This option ensures that even if an agent misses a call and forgets to manually update their status, the call will still be properly handled.
Use Teams presence
- When you enable this setting, the agents’ status will change to ‘Busy’ when the Teams status is ‘In a Call’ or ‘Presenting’. Also when the Teams presence changes to ‘Offline’ the status of the agent changes to ‘Off-Work’. Mind that you also have to (one time) authorize the Presence App and enable the setting on the General page.
- Note: Each time when the agent signs out from Teams Client, don’t forget to manually change “Off work” status to Ready else in CC after logging in.
- Note: Enable Teams Presence only for active agents handling calls, not for all users in Entra ID. Presence changes from inactive users are also stored, which can impact performance. Use this feature selectively to avoid unnecessary load.
Mappings (Beta)
- Mappings feature as part of the Teams Presence integration allows to map specific Microsoft Teams status of the user (such as Do not Disturb) to one of available from the list ROGER365 agent status. This feature is particularly useful to for instance map Busy status (which can come from Microsoft Outlook calendar event) to ‘Not Ready’ in Contact Center application of ROGER365.io.
- Note: The Mappings (Beta) feature is ignored when the agent has an active wrap-up item.
Cherrypicking
- Enabling this setting allows the agent to pick a specific call from the queue
Disable extend wrap up time
- Prevents the agent to request more then the default wrap up time.
Attendant
- Activate Attendant Console interface for this agent. More details can be found at Create App Registration for Attendant Console page.
Supervisor Assist
- Activate Supervisor Assistant feature for this agent.
Agent Assist Tab Profile
- Shows Agent Assist Profile name when assigned. This activates the Agent Assist feature for this agent. More details can be found at Agent Assist page.
AI Flow
- Shows AI Flow name when assigned. This activates the AI Flow feature for this agent. More details can be found at AI Flow page.
Graph Query Filter
- Shows configured custom people picker query filter for specific agent. It is possible enable Advanced search feature by marking checkboxes “DisplayName”, “Department” and so on.
- More details can be found at Agent Profiles page.
Skills
- Here you can assign the created skills to the agent with their experience level. The level can range between 0 and 100, where 0 means no skill and 100 expert.
Languages
- Assign one or more languages to an agent to make them eligible for Language Aware Routing. Use the + Add Language button to select a language and set a fluency score from 0 to 100. Agents without any language configured will not be invited when a Queue has Language Aware Routing enabled.
Since ROGER365.io platform cannot guarantee that the Microsoft’s Presence API will always work, the Agent page includes an option to reset failed Teams Presence integrations for affected agents.
You can use the “Reset Failed Teams Presence” button to reset the Teams Presence integration for all affected agents at once.
To reset the integration for a single agent, open the agent’s settings, enable the “Reset Presence” checkbox, and then save the agent’s configuration. This action will reset the Teams Presence integration for that specific agent.
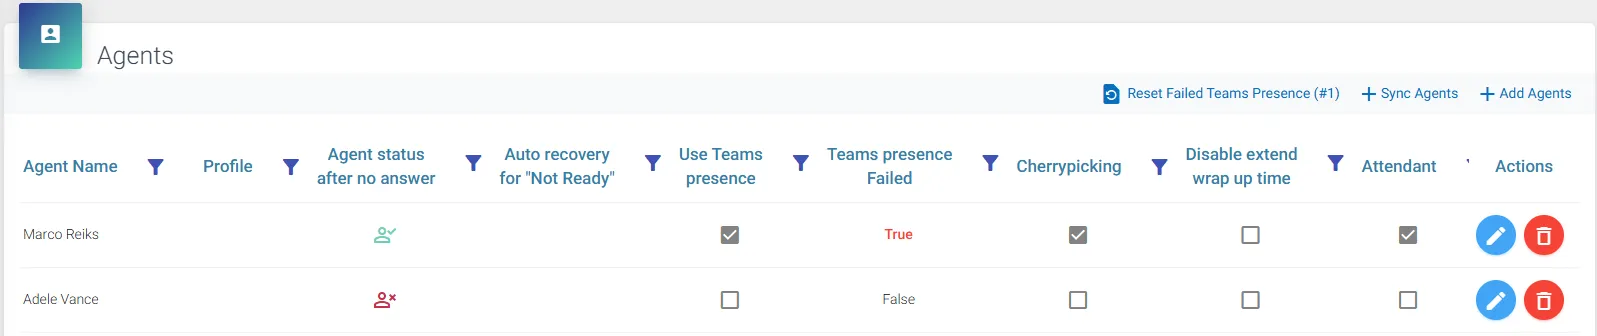
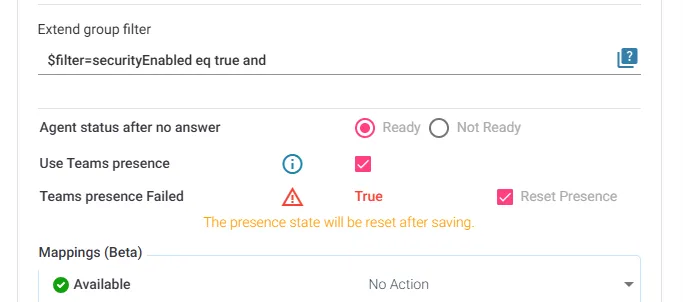
Big organizations should benefit from configured earlier User Synchronization (Beta) feature allowing to add agents to the platform with pre-selected Agent Profile based on selected Entra ID Security Group – more details can be found at the General documentation page.
Press “+ Sync Agents” to open pop-up allowing to select Security Group(s) for synchronization.
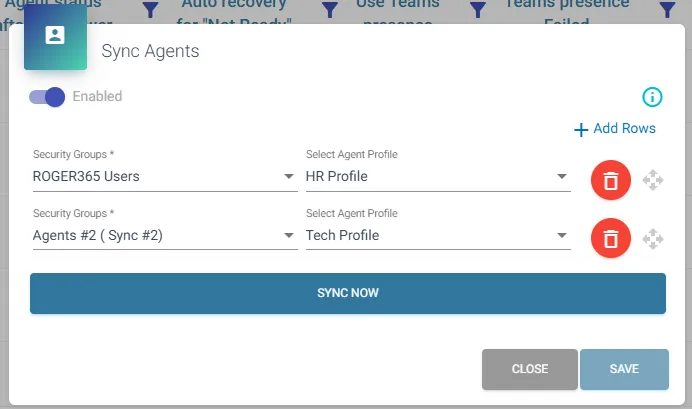
- Turn on the “Enabled” switch
- Select Entra ID Security Group(s) which will be used for synchronization with ROGER365.io platform
- Note: Selected Security Group must be part of Enterprise Application “ROGER365.io” with correct role assigned!
- Select created earlier Agent Profile to add agents with predefined settings,
- Press “Save” button to save Sync Agents form,
- Click [+ Sync Agents] button again,
- Click on “Sync Now” button to start synchronization of the users into ROGER365.io platform.
Call Park function allows you to park (“hold”) current active call for yourself or another agent configured in Call Park’s group. Here you can create your call park group into which you can assign an agents who should have enabled this functionality. Description how to use this feature is described in this documentation page about The Basics.
Click '+Add Call Park' to create a new group, provide a name for the Call Park group, and assign the desired agents.
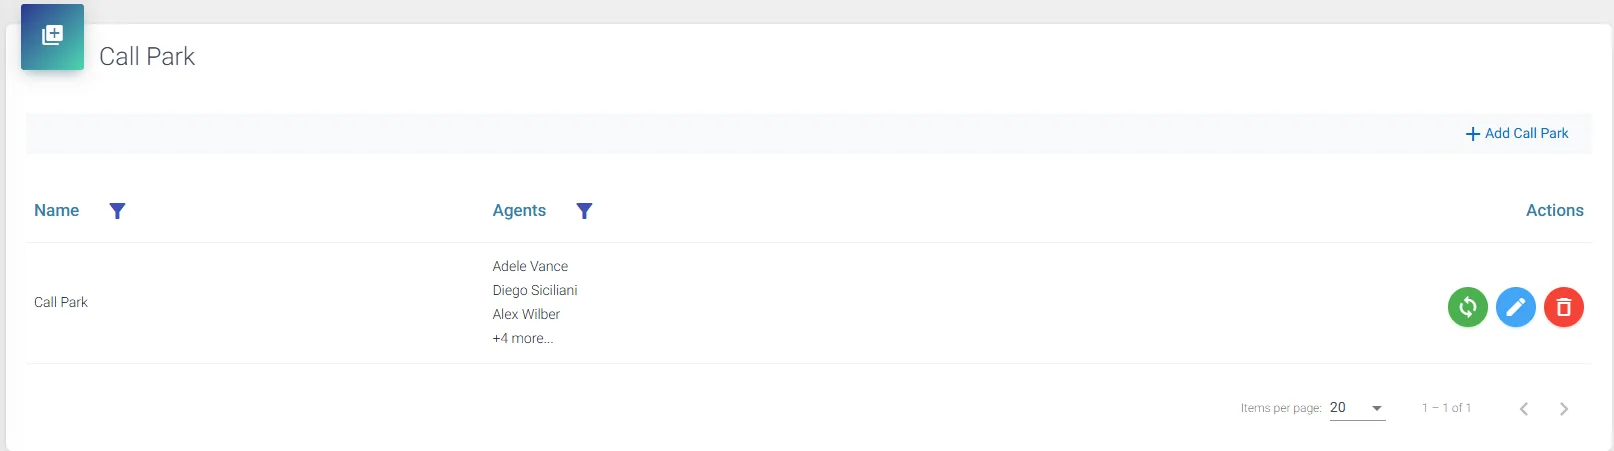
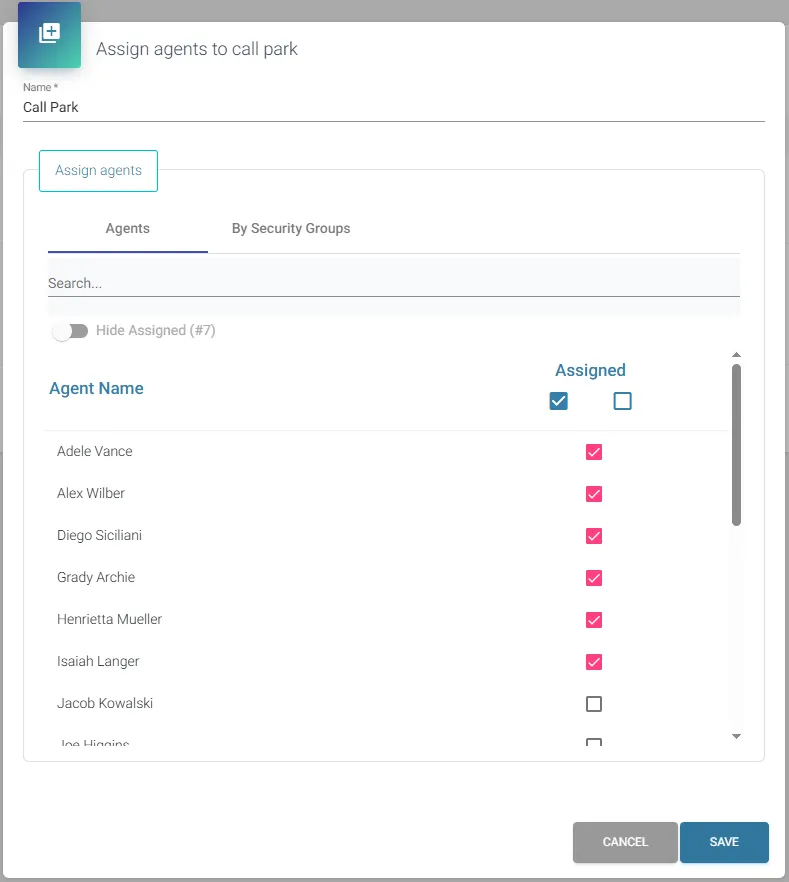
Click 'Save' to apply the Call Park configuration.
Automatic synchronization of agents into the Call Park group can be configured using Azure Entra ID Security Groups. Before proceeding, ensure that the 'Enable User Synchronization' feature is activated on the General admin page.
Click the green 'Sync Configuration' icon:
Next, enable the sync form by selecting the 'Enabled' switch, save the form, and proceed to select the Security Group containing the relevant agent users.
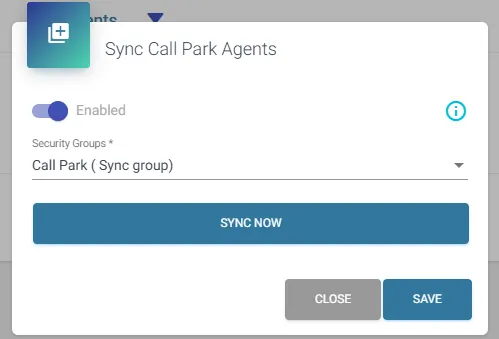
Based on the membership of the selected Security Group, the ROGER365.io platform will automatically add or remove agents from the Call Park group accordingly. Synchronization runs nightly at midnight.
Before un-parking a call, ensure your Teams status is NOT set to 'Do Not Disturb' or any status that automatically rejects incoming calls. Do not set your ROGER status to 'Available' while on an active call (doing so may cause the agent to receive an additional call before the current one has ended).
Before proceeding make sure that your account has Global Administrator role in Microsoft 365 tenant. Make sure that your SBC setup allows forwarding from Teams to Teams (only Direct Routing).
In Microsoft Teams, a resource account is required for each call queue. Resource accounts may also be assigned service telephone numbers. This is how you create a resource account and assign a phone number allowing callers from outside Teams to reach the ROGER365.io queue.
If you haven’t installed the Teams PowerShell module on you PC, you can find the relevant information here: https://docs.microsoft.com/en-us/microsoftteams/teams-powershell-install
We advise to use Teams PowerShell module – version 5.9.0, or above.
1. Create new Resource Account in Teams PowerShell module
- Start a PowerShell session from your pc
- Log in the MicrosoftTeams powershell module with this command
Connect-MicrosoftTeams
- Using the Microsoft Teams PowerShell module, create a new resource account. Update the UserPrincipalName and DisplayName values to align with your environment's naming conventions
New-CsOnlineApplicationInstance -UserPrincipalName "user@domain.com" -ApplicationId 'c8db29b6-8184-44fa-a6a1-086b8ae0435e' -DisplayName "DisplayNameOfAccount"
2. Assign “Microsoft Teams Phone Resource Account” license
- Navigate to Office365 Admin portal via: https://admin.microsoft.com
- Select [Users] / [Active users] and select your created resource account from the previous step
- Assign the resource account a “Microsoft Teams Phone Resource Account”. If this license is unavailable, go to [Billing] / [Purchase Services] where you can add this (free) license
3. Assign a number to the Resource Account
If the Set-CsPhoneNumberAssignment command returns the error 'The application endpoint was not found in Active Directory,' this generally means Azure AD has not yet fully synced. Wait a few minutes and try again.
Direct routing
- If not yet connected start a PowerShell session from your PC like done in step 1
- Configure the resource account with a phone number, phone type, and reverse number lookup using the following command. Insert the username of the previously created resource account, along with the correct phone number, into the command.
Set-CsPhoneNumberAssignment -Identity "user@domain.com" -PhoneNumber +1222333444 -PhoneNumberType DirectRouting -ReverseNumberLookup 'SkipInternalVoip'Update Contact Information of Resource Account identity in Entra ID (only for Direct Routing)
- Navigate to your Entra ID tenant and locate Resource Account’s DisplayName provided in step 1.
- On the Contact Information tab, enter the phone number used in the PowerShell command in the 'Business phone' field.
Operator Connect
- If not yet connected start a PowerShell session from your PC like done in step 1
- Configure the resource account with a phone number and phone type, using the following command. Insert the username of the previously created resource account, along with the correct phone number, into the command.
Set-CsPhoneNumberAssignment -Identity "user@domain.com" -PhoneNumber +1222333444 -PhoneNumberType OperatorConnect
Calling plan
- If not yet connected start a PowerShell session from your PC like done in step 1
- Configure the resource account with a phone number and phone type, using the following command. Insert the username of the previously created resource account, along with the correct phone number, into the command.
Set-CsPhoneNumberAssignment -Identity "user@domain.com" -PhoneNumber +1222333444 -PhoneNumberType CallingPlan
4. Retrieve ObjectID of a Resource Account
- In PowerShell run the following command. Insert the username of the previously created resource account
$Instance = Get-CsOnlineApplicationInstance -Identity "user@domain.com"- Run the command to get the ObjectId of the resource account. Save the ObjectID, it will be used later.
$Instance.ObjectID- To use the disconnect button in the Teams Agent app, you have to run the following command. (Use this exact line, do not change the id)
Set-CsApplicationMeetingConfiguration -AllowRemoveParticipantAppIds @{Add="c8db29b6-8184-44fa-a6a1-086b8ae0435e"}
5. Configure the Resource Account in the ROGER365.io admin portal
- Go to the ROGER365.io admin portal via: https://admin.roger365.io
- Select [Contact Center] / [Resource Accounts]
- Click [+ add Resource Account]
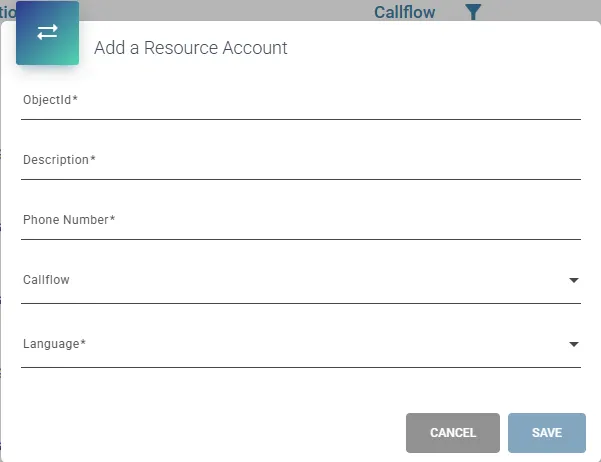
- Enter the ObjectId which you obtained from step 4.
- Enter a description,
- Enter the connected Phone Number,
- If you already configured a callflow, select it here. Else press save and assign the callflow after you’ve created one.
- Select the default language for this Resource Account from the list. The selected language is applied to every call and determines which Audio Prompt file is played. To change the language during a call at runtime, use the Set Language action.
With the Callflow Designer you can graphically design your calling scenario. By adding components you can create several advanced routing flows.
Designer
The top “Tool bar” contains general actions like [Save], also the flowchart variables are set here. The left panel has the available actions, the middle “flow area” is the zone were the flow is built and the right “properties” panel is used to fill in data to specify the actions.
You can drag items from the toolbar on the left and create links between actions. Every actions has it’s own properties, which you can configure on the right.
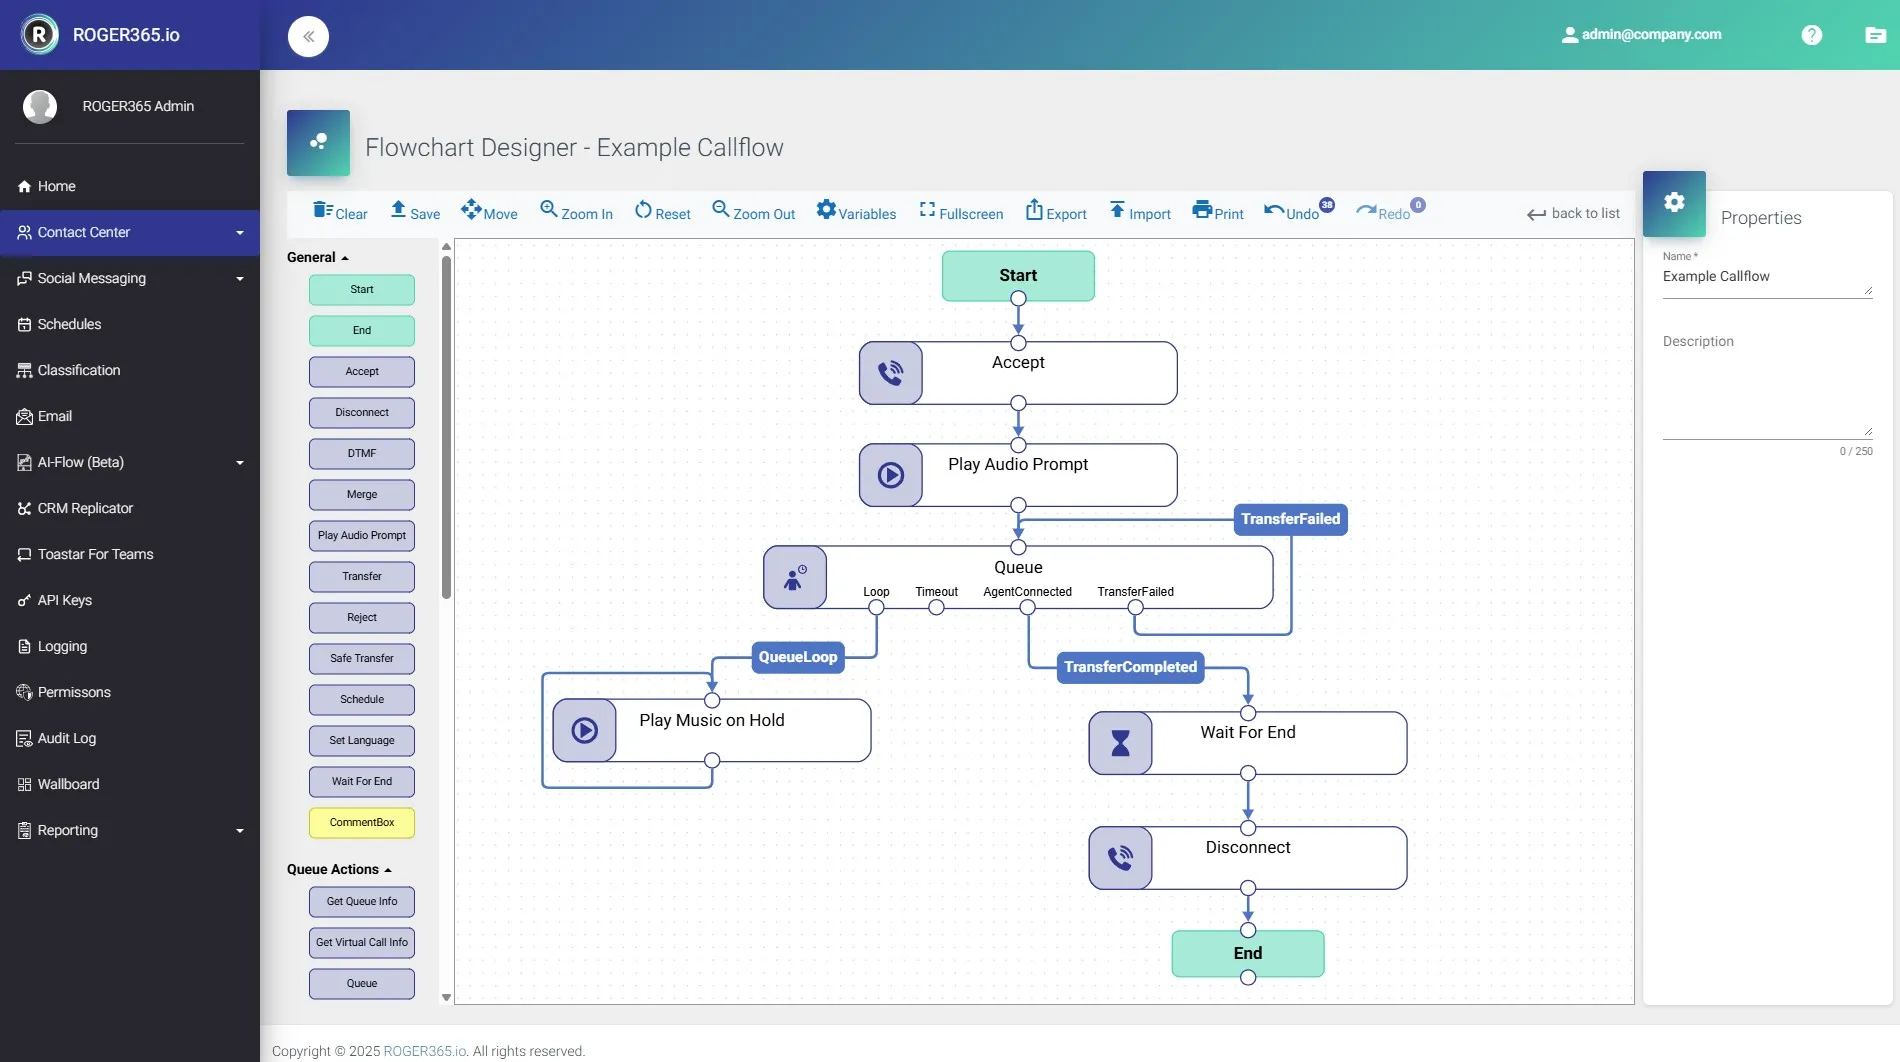
Graphical Designer offers useful options like:
- Export/Import – This option allows to export/import configuration of the flow. You can decide whether you want to export it with expressions or not. Useful option for making templates and showing them to customers, other engineers.
- Print – This option allows to print configuration of the flow. Upon pressing the button, new page will be open where you can decide how you want to print the flow, or save it as PDF file.
- Copy & Paste – The Graphical Designer offers copy and paste functionality. This allows you to copy highlighted actions and paste them within the same flow (actions cannot be copied and pasted between different flows). Once the actions are highlighted, use the “CTRL + C” shortcut to copy and “CTRL + V” to paste, or hold the “CTRL” key while dragging the highlighted block. Be sure to rename the copied actions, as all details are duplicated.
- Undo & Redo – It is possible to Undo/Redo your changes up to 50 actions. If you edit your flow after undoing couple of changes, you will lose Redo option.
A call flow defines how the caller is routed trough the system and what audio prompts will be used. The callflow operated between the configured Resource Account and Queue. To create a callflow, follow these steps:
- Click ‘+ Add Callflow’
- Enter a name and a description for the flow
- Language
- Optional select a language for the queue, so that the correct Audio Prompt will be selected
- Queue
- Select the configured Queue from the list
- Enter the amount of seconds the call must be offered to the agent, before putting in back to the queue or offer the call at another agent (default value [empty field] is 20 seconds, minimum is 10 seconds).
- Schedule
- Select the configured opening-hours schedule from the list
- CRM
- If you have configured a CRM Replicator, you can enable this setting and select the correct source. When found, the displayname and company name will be shown in the Agent App when a caller enters the queue and is offered to the agent.
- Audio Prompts
- Greeting audio file: is played to every caller before entering the queue
- Announcement file: is played directly after the greeting file (eg. can be used to announce a temporay special message)
- Background audio: is played when user is waiting in the queue. You can find an example file on the audio prompt page
- Wait message file: is played every xx seconds (for example: “all our agents are busy, please wait”)
- Call time out handling
- You can configure a queue timeout (minimum value is 10 seconds). When a caller reaches this timer, you can play a Call timeout message followed by an action:
- Disconnect
- Redirect to an external phone number (this can also be an native Teams Auto Attendant with a menu or an instant redirect to a voicemailbox)
- Specific person in the organisation
- You can configure a queue timeout (minimum value is 10 seconds). When a caller reaches this timer, you can play a Call timeout message followed by an action:
Currently, you cannot route a call directly to another resource account (although you can find it in the persons list). Microsoft is currently working on this
- Call closed handling
- If a call is received during closed hours (as defined in you schedule) you can select an audio prompt to play
- and an action to disconnect the call or redirect to another destination
- Schedule closed handling
- When a schedule is configured and at the time of the call the schedule is closed, you can select an audio prompt to play
- and an action to disconnect the call or redirect to another destination
- Schedule holiday handling
- When a schedule is configured and at the time of the call the schedule is set to holiday, you can select an audio prompt to play
- and an action to disconnect the call or redirect to another destination
- No Agents available handling
- If all agents are logged out, or have the ‘Off Work’ status you can select an audio prompt to play
- and an action to disconnect the call or redirect to another destination
- Webhooks
- Here you can configure a webhook which is triggered when the corresponding action occurs.
- For information about the contents of the webhooks, go to this page.
Every call conversation needs a callflow which defines what the steps in the communications flow are. You can create the callflows manually, or choose predefined callflows from the library. When selecting a callflow from the library a wizard will guide you through a few steps. After finalizing them the callflow will be created and, if you like, you can make some manual modifications. Currently the following callflows are available:
Recipe for call queue with queue position
This callflow informs callers about their current position in the queue while they wait. It retrieves the queue position, plays an audio prompt that matches the position, then plays music before repeating.
Recipe for simple Callflow
This call flow connects the caller directly to a queue and plays background music while they wait.
Recipe for creating IVR menu
This callflow shows how to build a simple IVR with three menu options using DTMF input.
Recipe for routing based on logged in agents
This callflow routes callers dynamically based on agent availability in different queues.
Recipe for Schedule routing
This callflow routes calls based on business hours and holidays using the Schedule action.
Recipe for redirecting to other queue
This flow demonstrates how to automatically redirect a call to another queue when the first queue times out.
Recipe for conditional routing based on caller phone number
This callflow demonstrates conditional routing of incoming calls based on provided country code.
Recipe for getting expected wait time of the queue
This callflow informs callers about their estimated wait time based on live data of selected Queue.
Recipe for storing customer feedback
This callflow demonstrates how to store customer feedback which later can be checked using the Agent Assist or API.
Recipe for playing a personal greeting based on CRM
This callflow shows how to create personal greeting based using Text to Speech action for recognized in CRM Replicator caller.
Recipe for continuing the conversation on WhatsApp
This callflow presents how to continue conversation on WhatsApp using created earlier WhatsApp template.
General queue settings
For every group or department you can configure a queue. Based on the settings of the queue incoming calls will be routed to the assigned agents.
- Add a queue by clicking [+ Add Call Queue] on the right top of the screen
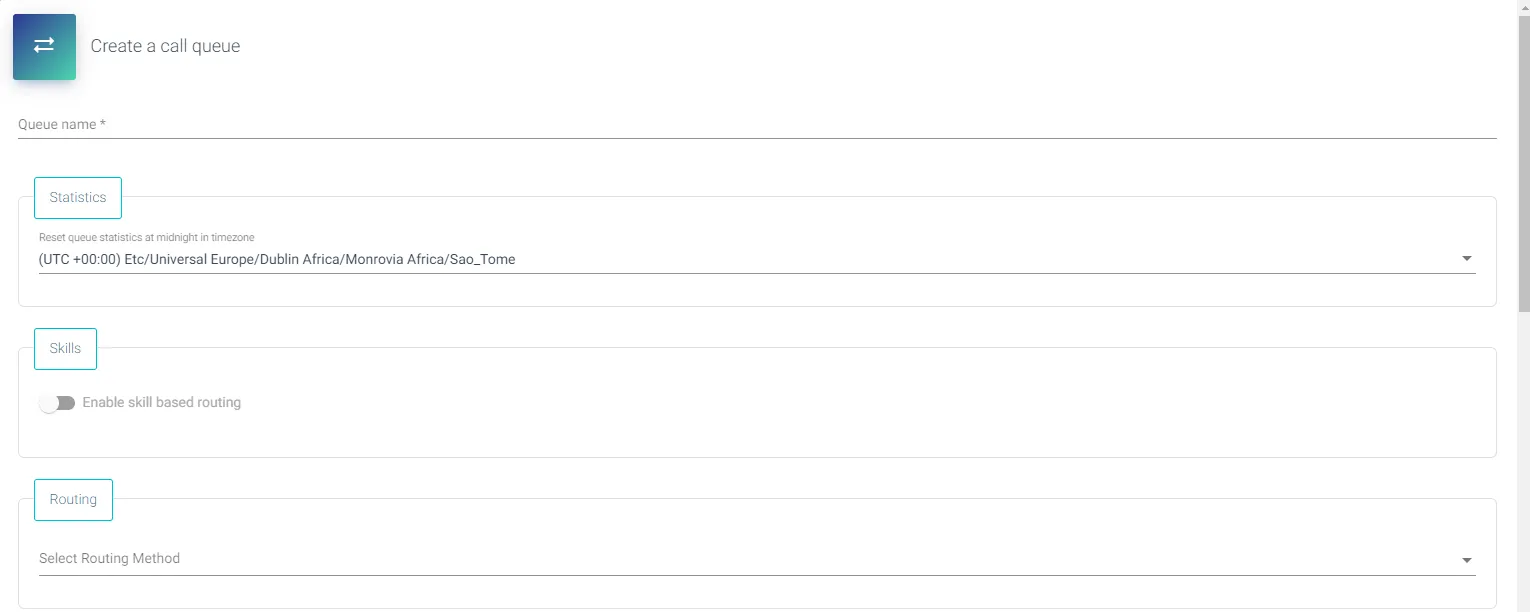
- Enter a name for the queue, for example ‘SalesSupport’
- Statistics: Select the timezone to determine midnight to reset the statistics on top of the Agent App.
- If you would like to use skill based routing you can enable this here, and select the required skills for calls in this queue
- Select the routing method:
- Longest Idle: routes each call to the agent who has been idle the longest time. The agent idle time starts counting from 0 after every status change in the ROGER365.io agent app (not the Teams presence)
- Serial: rings all call agents one by one in the order specified in the Agents list. If an agent dismisses or does not pick up a call, the call will ring the next agent and will try all agents until it is picked up.
- Round Robin: balances the routing of incoming calls so that each call agent gets the same number of calls from the queue.
- Parallel: rings all agents in the queue at the same time. The first call agent to pick up the call gets the call. Invites to a call happens in batches of 10 agents at the time.
- Starting from the Business subscription you can configure a Power Frame URLs. These URLs are triggered on the Agent App when a new call is offered to an agent, according to set Label you will be able to distinguish which Powerframe is currently used.
You can include variables from the CRM Connector. For example: https://app.yourapp.com/index.html?contactid={SourceId}.- You also also include the incoming phonenumber (and without CRM Replicator) by inserting the variable in this format: https://app.yourapp.com/index.html?phone={phonenumber}
- Or you can add the callid using this format: https://app.yourapp.com/index.html?callid={callId}
- Note: If you are using Microsoft PowerApps, then embedding an application is not supported by Microsoft (https://docs.microsoft.com/en-us/powerapps/maker/canvas-apps/limits-and-config#embedding-limits-for-canvas-apps). The alternative would be to open Microsoft Teams application directly in your browser via this url: https://teams.microsoft.com
- if you want to provide agents a wrap-up timer after ending a call you can enable this setting and enter the amount of seconds before the next call will be offered
- You can enable Queue Service Level feature for your Queue, which measures the efficiency and responsiveness to incoming customer requests within a specific service level threshold. It is possible to enable Queue Service Level option for every type of calls, or to exclude Virtual Calls (Virtual Wait action and Outbound Call Campaign).
- Set maximum number of seconds within which a service should be granted to a request in the Queue.
- Set Threshold Percentage, which is a performance indicator that reflects the ratio of requests handled within the specified time frame to the total number of requests processed during that period (formula for calcuating Service Level % can be found at Reporting page).
- Intelligent Formal Activation feature is responsible for automatically activating additional formal agents based on the rules. It is a powerful feature in cases of overloaded Queues with not enough available agents.
- Set “Threshold (Queue position)” which determines when the Intelligent Formal Activation should be activated.
- When the Threshold is met according to a logic (callsQueued > 2 & agentsReady == 0), a currently logged out from the Queue agent will be signed in again, helping to reduce the pressure on the Queue.
- The Shift Sync feature integrates the Microsoft Teams Shifts application with Contact Center Formal Agents. For more information, see the Shift Synchronization documentation.
- Turn on the “Enabled” switch.
- Select the Team you own in Microsoft Teams.
- Select the previously created Scheduling Group in the Microsoft Teams Shifts application.
- Save the queue configuration and click “Sync Now” to apply the changes.
- You can set Priority value for your Queue, it allows to priotize calls between different Queues.
- 0 is the highest priority you can setup.
- Click [+ Add Agents] to inserts agents to participate in this queue
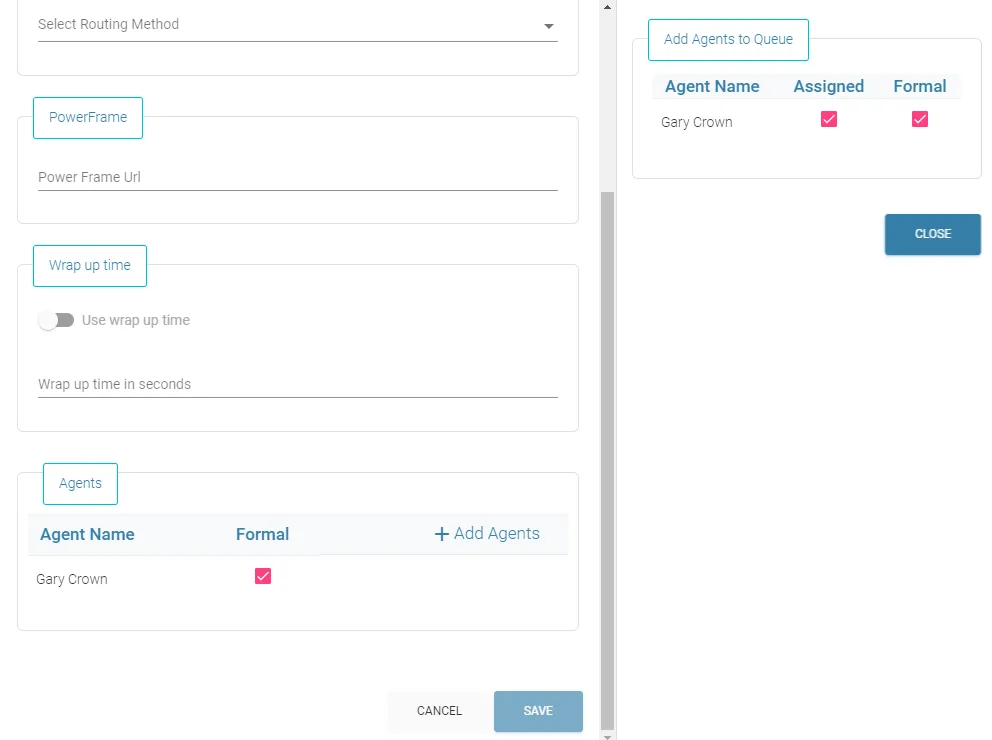
- If you don’t see any agents on the right pane, you first have to enable agents. How you can do this is shown here.
- To add agents to this queue, check the ‘assigned’ box
- Check the box if you want this agent to be a formal agent:
- Formal: an agent is able to login and logout of a queue
- Informal: an agent is always logged in this queue, and is not able to logout
- Click Save
A queue supports a maximum of 50 assigned agents by default. Should additional capacity be required, this limit can be extended through supplementary add-ons.
Alternatively, a portal administrator may configure Agents, Supervisors or Report Viewers to the Queue via enabled earlier User Synchronization feature – more details at this documentation page. Described below method works only with the Entra ID users which are added to ROGER365.io platform (meaning they’re visible at Agents admin page).
- Click [+ Sync Agents] to automatically configure existing agents to this Queue
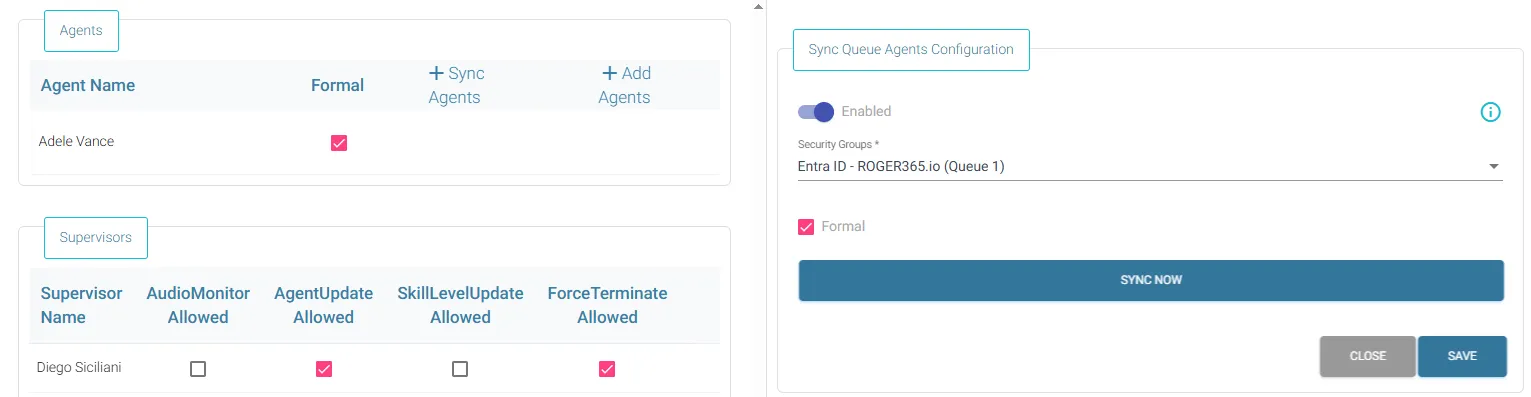
- Turn on the “Enabled” switch
- Select Entra ID Security Group containing users which are agents of ROGER365.io platform
- Note: Selected Security Group must be part of Enterprise Application “ROGER365.io” with correct role assigned!
- Check the “Formal” box if you want agents to be a formal agents:
- Formal: an agent is able to login and logout of a queue
- Informal: an agent is always logged in this queue, and is not able to logout
- Press “Save” button to save Sync Queue Agents form,
- Click [+ Sync Agents] button again,
- Click on “Sync Now” button to automatically add agents to this Queue.
- Do not forget to save Queue settings at the end of configuration process!
Supervisors
Click + Add Supervisor to insert supervisors for this queue (remind that if you have enabled role-based access, a supervisor also must have the correct Azure role. Find the documentation for this here)
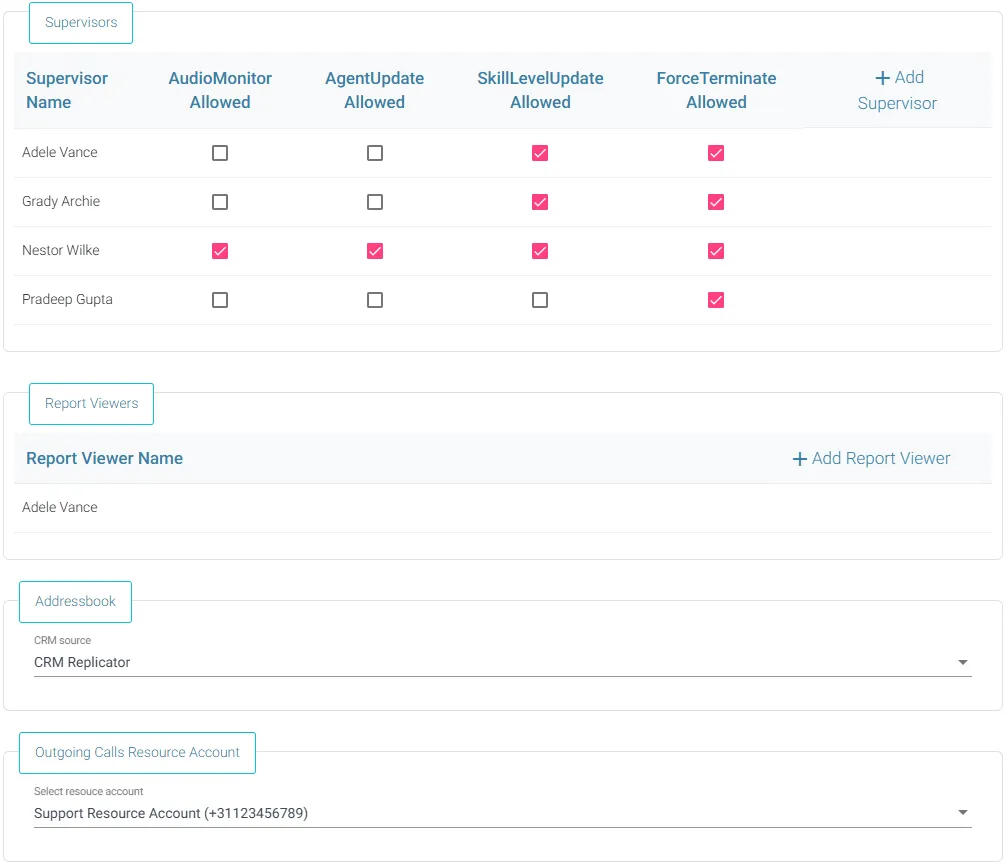
After you’ve added the supervisor you can enable ‘AudioMonitor Allowed’ which gives the supervisor the right to Monitor, Join or Whisper a live call. The option ‘AgentUpdate Allowed’ give the right to change the status of an agent and Log them in or out a queue.
You can enable 'SkillLevelUpdate Allowed' option, which grants the supervisor the ability to change the skill level of agents assigned to this Queue, as well as add or remove skills. In the Supervisor page of the ROGER365.io Contact Center application, supervisors with this permission can update the skill level of an agent by clicking the '…' icon on the far right side of the agent's record in the Agents section.
The option ‘ForceTerminate Allowed’ give the right to force terminate a call at the Supervisor page of the ROGER365.io Contact Center application when necessary. Each force terminating a call by Supervisor is logged into “Logging” page of ROGER365 admin portal. You can find more details regarding usage on The basics documentation page.
- Click [+ Sync Agents] to automatically configure existing agents as Supervisors of this Queue
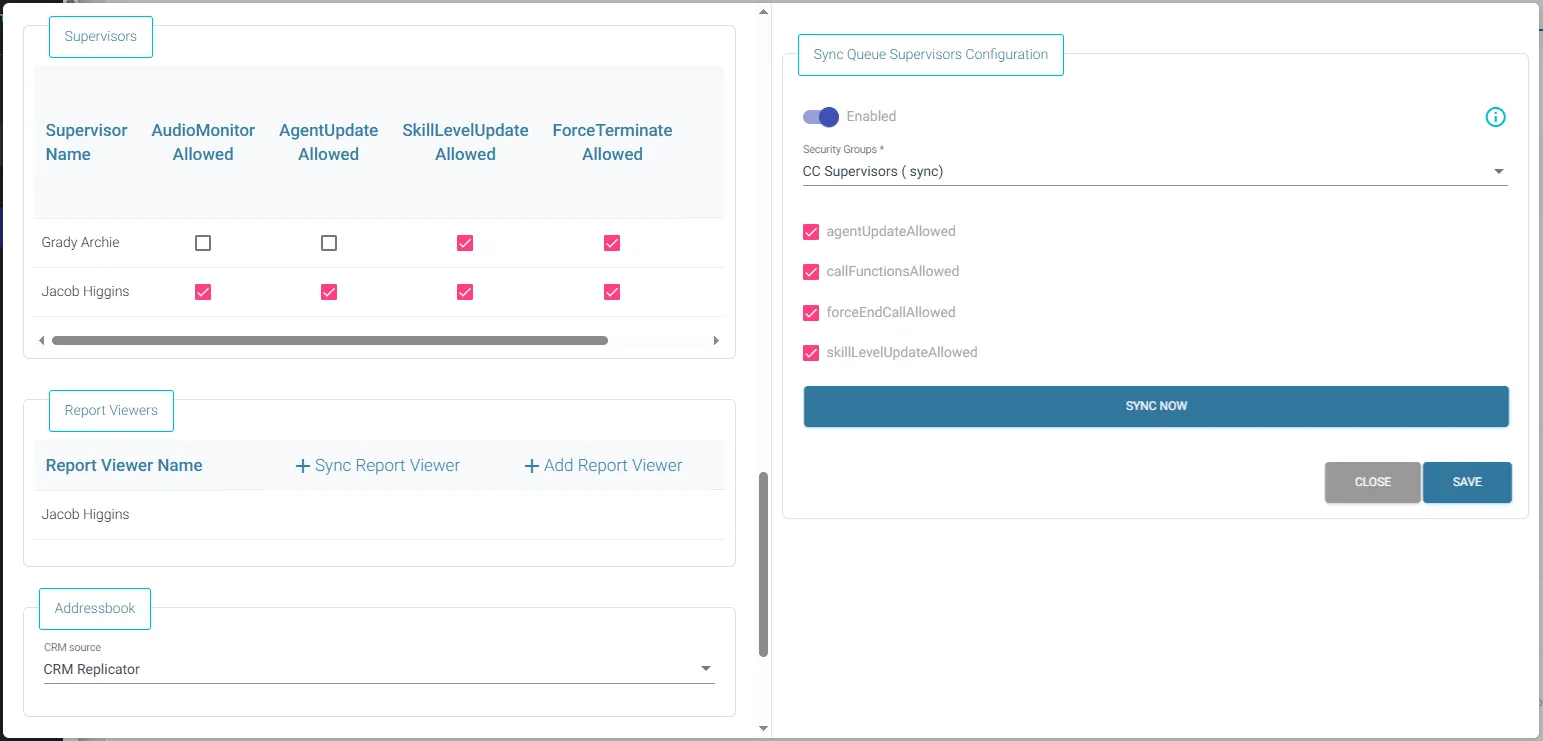
Report Viewers
Click + Add Report Viewer to insert agents who will have an ability to see queue’s reports (reminder that if you have enabled role-based access, a reporting users also must have the correct Azure role. Find the documentation for this here).
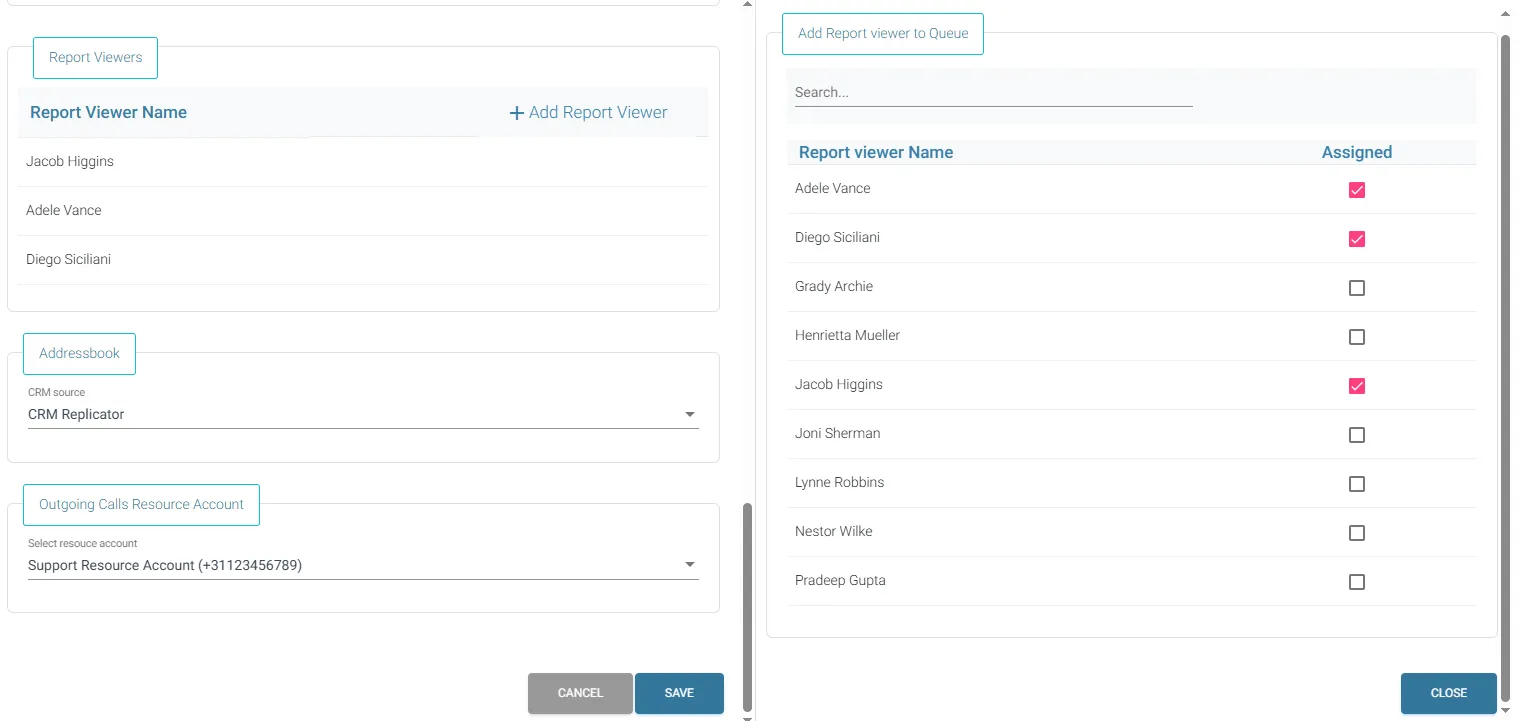
Assigning an agent as a Queue’s Report Viewer gives them access to the Reporting tab in the Contact Center application, scoped to this queue. Queue-based reports (such as Queue Summary, Queue Detail) will only show this queue’s data, while Agent-based and Caller-based reports may also include related activity from other queues, since those reports are organized around the agent or caller rather than a single queue.
- Click [+ Sync Agents] to automatically configure existing agents as Report Viewers of this Queue
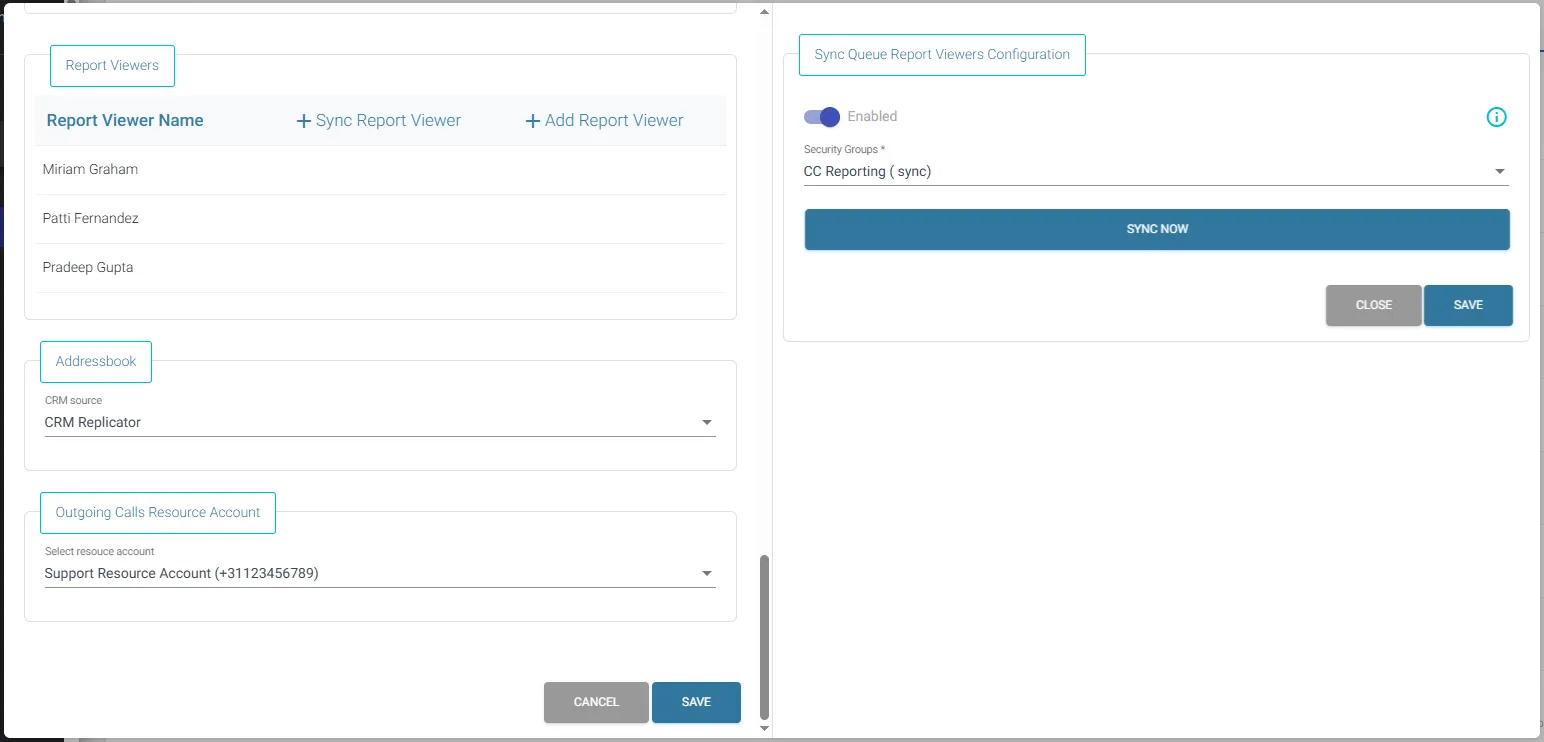
Addressbook
Here you can configure in which CRM Replicator can be searched by the agent
Outgoing Calls Resource Account
Select the resource account phone number which is used as caller identification when placing an outgoing call.
Important: Make sure you have configured and assigned a Teams Voice Policy to the resource account, else it won’t we able to dialout externally.
Note: For getting presence info we rely on the Graph API from Microsoft. Experiences are that the Presence API is not very stable and can cause issues especially with connections to an on-premise Exchange environment, therefor we cannot full support this feature. SLA of presence updates can be checked on this Microsoft Graph documentation site.
The Contact Center solution of ROGER365.io is designed to work on 1920×1080 resolution with a scale of 100%.
The Contact Center solution of ROGER365.io communicates directly with your own Microsoft Teams environment (tenant). In order to work together, you must authorize ROGER365.io.
- Start with login into the ROGER365.io admin portal and select [Contact Center] and then [General] in the left navigation bar.
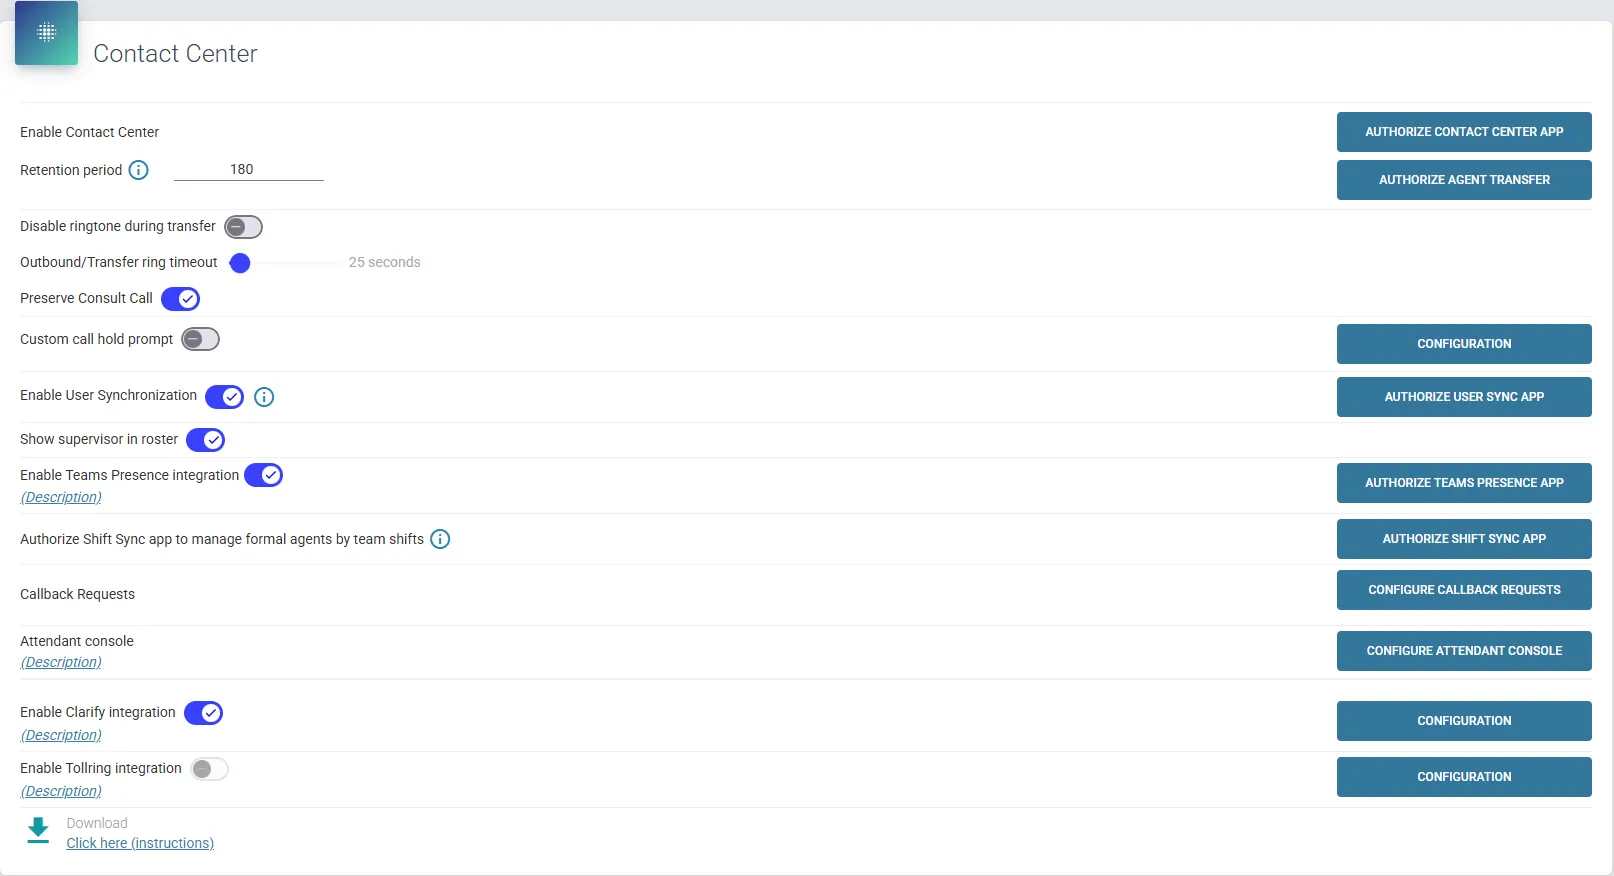
- Click the button named: ‘Authorize Contact Center App’ and Accept the Permission.
- Click the button named: ‘Authorize Agent Transfer’ and Accept the Permission.
- Click the button named: ‘Authorize Teams Presence App’ and Accept the Permission.
You can configure based on situation the Retention period for all Contact Center data. Default Retention period is 180 days, you can set it between 1 and 365 days.
“Outbound/Transfer ring timeout” determines the duration a call will ring at the external (PSTN) recipient before being terminated. It applies only to new outbound calls and transfers to external recipients, depending on the specifics of the call. It also applies to the Make Call Virtual callflow action.
- (Note: This option doesn't apply to transfers while already part of a group call, to internal users, or when adding a participant to an existing call.)
The “Preserve Consult Call” option is responsible for preserving a call when, during a consultation with another contact (via the Consultative Transfer option), the caller decides to hang up.
“Custom call hold prompt” option gives you the opportunity to change the onHold music, it also allows businesses to reinforce branding. Press “Configuration” button to upload custom audio file, then select it from dropdown list.
“Enable User Synchronization (Beta)” allows to automatically synchronize users from Security Group in Microsoft Entra ID to ROGER365.io. This feature can be extremely useful for big organizations where user management is time consuming. Synchronization of the Entra ID security groups to ROGER365.io platform is done every midnight (according to tenant’s region), meaning when the platform will detect change in membership of selected security group it will update Agents list accordingly.
To enable this option, a portal admin (with required permissions in Entra ID environment) must first press “Authorize User Sync App” button and accept permissions request. After this step, an Entra ID Enterprise Application named “ROGER365.io User synchronization” will be created, and admin consent must be granted via the Permissions tab.
- Note: Users which have to be synchronized from Entra ID environment to ROGER365.io platform must be a members of Entra ID Security Group created earlier. The group of users must be added to Enterprise Application “ROGER365.io” with correct role – check this documentation page for the role reference. Each insert, update or removal is written into Logging admin page. Any manually added Agents that arent a member of the selected User Sync Groups will be deleted after you press sync now, make sure that any manual added Agents are also included in the User Sync Entra groups.
“Show supervisor in roster” determines whether Supervisor will become visible participant upon start of supervising specific call (Monitor/Whisper). When enabled, connected to the call Supervisor will appear as record in the Agent app for agent handling the call. Disabled option means default state (Supervisor is not visible as a participant of the call).
- Note: The Supervisor leaving a call will not clear the record from the Agent screen. In case the Supervisor leaves a call and joins again using a different method, the record will be updated with the selected supervising option.
“Authorize Shift Sync app to manage formal agents by team shifts (Beta)” – allows configuration of a feature that connects Microsoft Teams Shifts with Contact Center Voice Queues. This integration is used to set and manage agents’ working times based on their assigned shifts. More information at Shift Synchronization documentation page.
You can also configure how you want CallBack Requests from the Agent App to be handled (Email, Mailto Link or Webhook). Check this documentation page for more details.
When using the Attendant Console, you have to manually configure an App registration in the Microsoft Azure Portal. Then insert the Appid of this created App when clicking the ‘Configure Attendant Console’ button.
Now you have successfully authorized the ROGER365.io Contact Center App
ROGER365.io Contact Center App for Microsoft Teams
From your Teams client, browse to the Teams App store and download our Contact Center | ROGER365.io app. Install the app on every Teams client in your organisation.
OAK Clarify Voice Recording Integration
With this integration, recorded calls can be played back directly from the Reporting tab in the ROGER365.io native Teams App, and used as an Audio Provider in the powerful AI Flow feature. By clicking the configuration button, you can insert the correct information:
- Sub domain: Enter the subdomain in the URL you use to access ClarifyGo. Enter only the domain, without ‘clarifygo.com’
- Client ID: Provided by Oak Innovation
- Client Secret: Provided by Oak Innovation
- username: A user configured within your ClarifyGo tenant with the ability to search and play calls.
- password: the password for the associated user”
Please contact Oak Innovation on +44 1202 607000 / servicedesk@oakinnovate.com to request your Client ID and Client Secret.
Tollring Compliance Recording Integration
With this integration, recorded calls can be played back directly from the Reporting tab in the ROGER365.io native Teams App, and used as an Audio Provider in the powerful AI Flow feature. Click the configuration button to enter the required information:
- Description: Enter a description for the Tollring configuration.
- Api URL: Enter the API URL pointing to the correct cluster.
- For example – https://api.rx.eu.analytics-365.com
- Note: The ‘eu’ part of the URL indicates the cluster where the Tollring environment was created. This may vary depending on your enrollment cluster.
- For example – https://api.rx.eu.analytics-365.com
- App URL: Enter the App URL pointing to the correct cluster.
- For example – https://app.rx.eu.analytics-365.com
- Note: The ‘eu’ part of the URL indicates the cluster where the Tollring environment was created. This may vary depending on your enrollment cluster.
- For example – https://app.rx.eu.analytics-365.com
- Token: Enter the Authentication Token from the Analytics365 portal.
Obtaining Tollring Authentication Token in the Analytics365 Portal
Navigate to Settings → API Access page:
Click on the ‘+New Token’ button and complete the following:
- Enter a name for the token.
- Set an expiry date – the maximum is 1 year.
- Select a Permission Group – Playback Supervisor.
- Allocate the playback network Via People – select Via Organization.
Focus Compliance Recording Integration
With this integration, recorded calls can be played back directly from the Reporting tab in the ROGER365.io native Teams App, and used as an Audio Provider in the powerful AI Flow feature. Click the configuration button to enter the required information:
- Region: Select the region of the Focus environment (assigned during enrollment of Focus)
- Client Id: Provide the Client ID of the Focus REST API user (created earlier in Focus portal)
- Username: Enter the username of the Focus REST API user (created earlier in Focus portal)
- Api key: Enter the password (API Key) of the Focus REST API user (created earlier in Focus portal)
Creating Focus REST API user
Navigate to Account settings -> Integrations page and locate Manage users button:
- Select Super User role and press +Add User button,
- Copy generated username, password (API Key) and Client ID to a safe place.
Known Limitations
This section provides an overview of the known limitations of certain functionalities. ROGER365.io relies heavily on Microsoft Teams and the Microsoft Graph API, which sometimes introduces limitations to required functionalities. Below you'll find a list of the current known limitations:
Transferring calls (Search box & Attendant Console)
- It’s not supported by Microsoft to transfer a call to another resource account. A workaround is to transfer to the external PSTN number and make sure is routed externally.
- It’s not possible to transfer a call to the PSTN number of an internal Teams User which is answered by the Teams Mobile App. Workaround: transfer the call to the ‘Teams’ option in the ROGER365.io app instead of selecting the E.164 phonenumber.
- An outbound call to PSTN cannot be blind transferred to another PSTN number.
- Transfers from a meeting call are not supported by Microsoft.
Other
- There may be scenarios where calls fail to connect properly if the user has call recording enabled.
- It isn’t possible to cancel invite to an outbound call made to the Teams user because Microsoft Teams does not send the event which ROGER365.io can act on it. The only way is either waiting for the timeout of the call invite or for the called Teams user to reject the invite.
- The Microsoft’s Presence API is more unstable for on-premise Exchange environments than regular cloud environments. ROGER365.io does not have influence over the failures coming from Presence API.
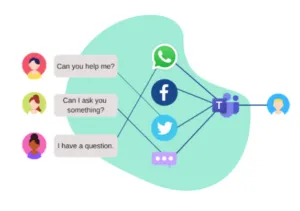
ROGER365.io is sold and supported by our partners. Our solution partners offer you advice, consultancy, training and support in your region. Check our partner page for their contact details.
Up time
ROGER365.io uses 100% Microsoft Azure infrastructure. This means that the data is stored triple during the processing. Additional ROGER365.io does a daily backup. The database uptime is 99.99%. Every is in “code”, the whole system is rebuilt based on Microsoft Azure development best practices. Uptime is based on Microsoft Azure function Apps (up time; 99.95%) and in the worst-case scenario (when complete Azure Data center is down) there is a maximum of 1 hour’s recovery time.
Setup and consultancy
Everybody can start the ROGER365.io evaluation. Look here for how to get started. Assistance with configuration and setup for example the webchat or WhatsApp touchpoint is offered by our local solution partners.
First-line support
The frist-line support is offered by your local ROGER365.io partner. Reach out to them for the support options they offer.
Second-line support
Second-line support is done via ROGER365.io. However your local partner will be your first contact in any case.
Development support
ROGER365.io offers several integration API’s, like with CRM application or Microsoft PowerPlatform. The ROGER365.io development can assist our partners and customers with development questions or even help with building custom integrations.
ROGER365.io is based on the Microsoft Azure serverless architecture principles making it scalable, secure and future proof/flexible by design. ROGER365.io only uses Microsoft industry standard technology and uses Microsoft API’s for seamless integrations.
Microsoft Azure data centers are setting the norm as the industry standard and by having the solution based on the latest technology ROGER365.io benefits by the 90 Microsoft compliance certifications.
User Access
There is one administrator portal to configuration connections and systems. Access to this administrator portal is done via the ROGER365.io Enterprise application within the Microsoft Azure Active Directory. There is no storage of username/ password at all. All token-based access via Azure AD. No client software, seamless integration with Microsoft Teams. Different roles can be assigned to users, such as those accessible through the supervisor or reporting tab in the Contact Center application, utilizing Role-Based Access Control (RBAC) within the administrator portal, where administrators have the flexibility to create and assign roles to other users. ROGER365.io comes equipped with an Audit Log, providing users the ability to easily track any changes made within the system. This feature ensures transparency and accountability, especially during disaster recoveries or post-incident reviews.
Data encryption and separation
Each customer has their own database. The data in the database is “encrypted at rest”. ROGER365.io does not store the communication data. All communications is transferred from touchpoint to Microsoft Teams and back.
Database only contains minimum metadata required to keep the system working. For example, webchat can be anonymous, but mobile phone is used being able to identify and reply WhatsApp messages. This data will be anonymized 24 hours after the communication window closes.
It is optional to store transcript or store conversation date but must switch on by customer. When subscription ends the customers’, database is completely deleted from the ROGER365.io, no data stays within the platform.
The reason to enable this feature can be that you want to push the conversation into another system (log systems) like Microsoft Dynamics or Salesforce when the conversation is closed. The transcript is also used to do sentiment analysis.
ISO 27001 Certified
ROGER365.io B.V. is proud to hold ISO/IEC 27001:2022/AMD1:2024 certification, the latest version of the globally recognized standard for information security management. This independent certification (registration number DGT2717211090) confirms that every aspect of how we develop, deliver, operate, and support the ROGER365 platform meets the highest standards for protecting your data. From risk management and access control to incident response and business continuity, security is embedded into everything we do. Customers and partners can download our certificate and request the Statement of Applicability (SoA) for compliance and due diligence purposes.
Microssoft 365 App Compliance Certified
ROGER365.io is certified under the Microsoft 365 App Compliance Program, Microsoft’s framework for validating the security, privacy, and compliance posture of applications built on the Microsoft 365 platform. This certification gives enterprise customers and IT administrators independent assurance that ROGER365.io meets Microsoft’s standards across two key domains: Operational Security and Data Handling & Privacy. Being part of this program reflects our ongoing commitment to transparency and trust, so your security team can deploy ROGER365.io with confidence through the Microsoft Teams admin center or Microsoft Teams app store.
Connection to Microsoft Teams
ROGER365.io only uses Microsoft industry standard technology. Integration within Microsoft Teams is done via the Microsoft bot framework and the Graph API. ROGER365.io admin portal access is done via a verified Enterprise application within the Microsoft Azure Active Directory.
Connection with TouchPoints and Teams Calling Environment
TouchPoints are connections to external communication networks like Facebook, WhatsApp or SMS providers. All the connections are based on the lasted API’s, authentication and authorization technologies provided by the service providers that offer these communication channels. All communication is encrypted and cannot be seen at any time by any third-party. For Contact Center functionality ROGER365.io uses the official Contact Center Architecture utilizing the Communications API’s.
Questions?
Please reach out to us if you have concerns or questions. We can share with you our company procedures and other required documentation when necessary.
Currently, the API key which you can create in the Admin portal to extract the Social Messaging Center data is named ‘DataExport‘.
All exportable object contain the following properties in order to synchronize correctly to the database and as such will not be explained on every specification:
- “isDeleted”: (bool) true if the item was ‘soft-deleted’ (for synchronization purposes). Items that are soft-deleted, will be permanently deleted after a retention period,
- “lastModified”: (datetime) last time the record was saved. This includes added, updated, deleted (soft delete)
- “batchToken”: (string) token that can be used to retrieve the next batch of records
All datetimes are UTC, unless specifically mentioned otherwise.
Currently, the API key which you can create in the Admin portal to extract the Contact Center data (beside of Outbound Call Campaigns and Swagger tool) is named ‘DataExport‘.
All exportable object contain the following properties in order to synchronize correctly to the database and as such will not be explained on every specification:
- “isDeleted”: (bool) true if the item was ‘soft-deleted’ (for synchronization purposes). Items that are soft-deleted, will be permanently deleted after a retention period,
- “lastModified”: (datetime) last time the record was saved. This includes added, updated, deleted (soft delete)
- “batchToken”: (string) token that can be used to retrieve the next batch of records
Other general properties are:
- “tenantId”: (int) id of tenant registration (R365),
- “agentId”: (int) id of the user (R365),
- “id”: (int) id of the record (R365)
All datetimes are UTC, unless specifically mentioned otherwise
Getting started how to setup your ROGER365.io Xtend environment.
General Prerequisites
General information about ROGER365.io and what environment is needed to get the Software as a Service running.
Signup & Enrollment
How to start with ROGER365.io and what steps to take to finish the enrollment process.
What to do next?
What are the next steps after the enrollment.
API keys are only available from the Business subscription
ROGER365.io API’s use HTTP verbs and a RESTful endpoint structure. An access key is used as the API Authorization. Request and response payloads are formatted as JSON, using UTF-8 encoding.
You can create the required API keys in the ROGER365.io portal. Select API Keys in the left navigation bar, then click on + Add ApiKey, give descriptive name for your key, and select desired scopes:
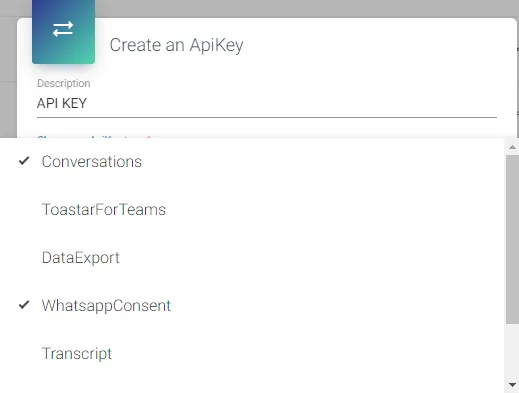
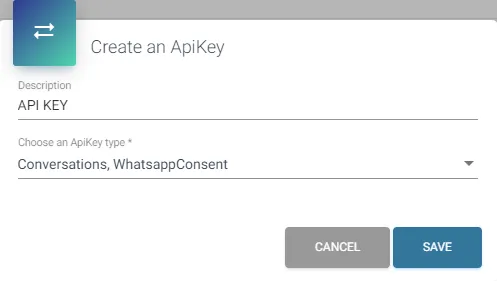
Available scopes are: Conversations, ToastarForTeams, DataExport, WhatsappConsent, Transcript, Teams, Campaign, ContactCenter.
You can remove or add scopes even if the key is already created (change of the key scope is effective after ~60 seconds).
API requests have throttling set to 5 requests per second per tenant.
API EndPoint
https://api.roger365.io/
Authentication
The ROGER365.io API uses API keys to authenticate requests. In the admin portal you can create, change and delete the keys.
Batchsize
Some API’s require the batchSize parameter. This is used to request the output in multiple batches. In each JSON output batch you’ll receive a ‘batchToken’ value. To retrieve the 2nd, 3rd etc. batch include the ‘batchToken’ value from each previous batch. The header to include is named: ‘Batch-Token’.
ROGER365.io
Knowledge Base


ROGER365.io
Knowledge Base

Latest Release Note
What's new
Your ideas shape the future of ROGER365.io!
Got a feature in mind, an improvement, or a use case template that would make your work easier? Share it with us!